
 In this tutorial, we will show you how to install ELK Stack on Debian 9. ELK stack is a collection of three open-source products, Elasticsearch, Logstash, and Kibana, and is a robust solution for searching, analyzing, and visualizing data. Elasticsearch is a distributed, RESTful search and analytics NoSQL engine based on Lucene, Logstash is a light-weight data processing pipeline for managing events and logs from a wide variety of sources and Kibana is a web application for visualizing data that works on top of Elasticsearch. This ELK Stack tutorial should work on other Linux VPS systems as well but be tested and written for a Debian 9 VPS. Installing ELK Stack on Debian 9 is an easy and straightforward task, just follow the steps below, and you should have it installed in less than 10 minutes.
Table of Contents
1. Requirements
To complete this tutorial, you will need:
- A Debian 9 VPS
- A user with sudo privileges
If you have a VPS with us, we’ll install the ELK Stack for you for free.
2. Update the system and install necessary packages
sudo apt-get update && apt-get -y upgrade
sudo apt-get install apt-transport-https software-properties-common wget
You should always keep the software on your Linux VPS up to date and set up automatic security and critical updates.
3. Install Java
Elasticsearch requires at least Java 8 in order to run. It supports both OpenJDK and Oracle Java. In this guide, we will install OpenJDK version 8.
To install OpenJDK run the following command:
sudo apt install openjdk-8-jdk
To check if everything is installed correctly, issue:
java -version
and you should see something like the following:
openjdk version "1.8.0_171"
OpenJDK Runtime Environment (build 1.8.0_171-8u171-b11-1~deb9u1-b11)
OpenJDK 64-Bit Server VM (build 25.171-b11, mixed mode)
4. Install and configure Elasticsearch on Debian 9

We will install Elasticsearch using the apt package manager from the official Elastic repository. First, enable the repository and update the package cache list with the following commands:
wget -qO - https://artifacts.elastic.co/GPG-KEY-elasticsearch | sudo apt-key add -
echo "deb https://artifacts.elastic.co/packages/6.x/apt stable main" | sudo tee -a /etc/apt/sources.list.d/elastic-6.x.list
sudo apt-get update
and install Elasticsearch with apt using the following command:
sudo apt-get install elasticsearch
Once the installation is completed, open the elasticsearch.yml file and restrict the remote access to the Elasticsearch instance:
sudo nano /etc/elasticsearch/elasticsearch.yml
# ---------------------------------- Network -----------------------------------
#
# Set the bind address to a specific IP (IPv4 or IPv6):
#
#network.host: 192.168.0.1
network.host: localhost
Restart the Elasticsearch service and set it to automatically start on boot:
sudo systemctl restart elasticsearch
sudo systemctl enable elasticsearch
To check the status of the elasticsearch server you can use the following command:
curl -X GET http://localhost:9200
The output should look like:
{
  "name" : "UHR2XBB",
  "cluster_name" : "elasticsearch",
  "cluster_uuid" : "Ranc0Jh9QAuuMYhALcZIRA",
  "version" : {
    "number" : "6.2.4",
    "build_hash" : "ccec39f",
    "build_date" : "2018-04-12T20:37:28.497551Z",
    "build_snapshot" : false,
    "lucene_version" : "7.2.1",
    "minimum_wire_compatibility_version" : "5.6.0",
    "minimum_index_compatibility_version" : "5.0.0"
  },
  "tagline" : "You Know, for Search"
}
5. Install and configure Kibana on Debian 9

Same as Elasticsearch, we will install the latest version of Kibana using the apt package manager from the official Elastic repository:
sudo apt-get install kibana
Once the installation is completed, open the kibana.yml file and restrict the remote access to the Kibana instance:
sudo nano /etc/kibana/kibana.yml
# Specifies the address to which the Kibana server will bind. IP addresses and host names are both valid values.
# The default is 'localhost', which usually means remote machines will not be able to connect.
# To allow connections from remote users, set this parameter to a non-loopback address.
server.host: "localhost"
Start the Kibana service and set it to start automatically on boot:
sudo systemctl restart kibana
sudo systemctl enable kibana
Kibana will now run on localhost on port 5601
6. Install and configure Nginx as a reverse proxy
We will use Nginx as a reverse proxy to access Kibana from the public IP address. To install Nginx, run:
sudo apt-get install nginx
Create a basic authentication file with the openssl command:
echo "admin:$(openssl passwd -apr1 YourStrongPassword)" | sudo tee -a /etc/nginx/htpasswd.kibana
Note: always use a strong password.
Delete the default nginx, virtual host:
sudo rm -f /etc/nginx/sites-enabled/default
and create a virtual host configuration file for the Kibana instance:
sudo nano /etc/nginx/sites-available/kibana
server {
    listen 80 default_server;
    server_name _;
    return 301 https://$server_name$request_uri;
}

server {
    listen 443 default_server ssl http2;

    server_name _;

    ssl_certificate /etc/ssl/certs/ssl-cert-snakeoil.pem;
    ssl_certificate_key /etc/ssl/private/ssl-cert-snakeoil.key;
    ssl_session_cache shared:SSL:10m;

    auth_basic "Restricted Access";
    auth_basic_user_file /etc/nginx/htpasswd.kibana;

    location / {
        proxy_pass http://localhost:5601;
        proxy_http_version 1.1;
        proxy_set_header Upgrade $http_upgrade;
        proxy_set_header Connection 'upgrade';
        proxy_set_header Host $host;
        proxy_cache_bypass $http_upgrade;
    }
}
Activate the server block by creating a symbolic link:
sudo ln -s /etc/nginx/sites-available/kibana /etc/nginx/sites-enabled/kibana
Test the Nginx configuration:
sudo nginx -t
Restart the Nginx service and set it to start automatically on boot:
sudo systemctl restart nginx
sudo systemctl enable nginx
7. Install Logstash on Debian 9

The final step is to install Logstash using the apt package manager from the official Elastic repository.
sudo apt-get install logstash
Once the Logstash package is installed start the Logstash service and set it to start automatically on boot:
sudo systemctl restart logstash
sudo systemctl enable logstash
The Logstash configuration depends on your personal preferences and the plugins you will use. Find more information about how to configure Logstash.
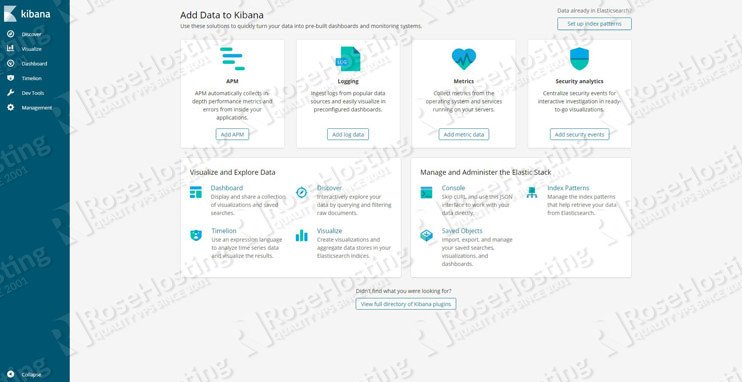
8. Access Kibana
You can now access the kibana interface by opening your browser and typing https://YourServerIpAddress
Follow this guide on how to Install ELK stack on Ubuntu 20.04
 That’s it. You have successfully installed the ELK Stack on your Debian 9 VPS.
Of course, you don’t have to Install and Configure the ELK Stack on Debian 9, if you use one of our Managed Elasticsearch VPS Hosting services, in which case you can simply ask our expert Linux admins to install the ELK stack for you. They are available 24×7 and will take care of your request immediately.
PS. If you liked this post please share it with your friends on the social networks using the buttons below or simply leave a comment in the comments section. Thanks.
Hello, post install all, i need user and pass for login, use the one that generates higher, but nothing. Can you know why?
The username is admin, and you can reset your admin user password using:
echo “admin:$(openssl passwd -apr1 YourStrongPassword)” | sudo tee -a /etc/nginx/htpasswd.kibana
Do not forget to replace YourStrongPassword with an actual strong password.