In this tutorial, we will show you how to install FlintCMS on a CentOS 7 VPS.
 FlintCMS is a free and open-source, super-fast, content-focused, Node.js-based Content Management System (CMS). It provides a flexible and easy-to-use interface for creating and managing websites, blogs, and other types of content. It’s a CMS that is built for those who want to fully design the front-end of their website without wanting to deal with static site generators or older content management systems.
The installation is quite simple. If you follow our instructions carefully, you can finish installing FlintCMS on your CentOS 7 VPS in less than 10 minutes. Let’s get started.
Table of Contents
Prerequisites
- For the purposes of this tutorial, we will be using a CentOS 7 VPS.
- Node.js version 8.x or higher and MongoDB database
- Full SSH root access or a user with sudo privileges is also required.
Step 1: Connect to Your Server
Before we begin, you will need to connect to your server via SSH as the root user or as any other user that has sudo privileges.
To connect to your server as the root user, use the following command:
ssh root@IP_ADDRESS -p PORT_NUMBER
Make sure to replace IP_ADDRESS and PORT_NUMBER with your actual server IP address and SSH port number.
Once logged in, make sure that your server is up-to-date by running the following commands:
sudo yum update
You will also need to add the CentOS 7 EPEL repository:
sudo yum install epel-release
Step 2: Install Node.js and NPM
FlintCMS also requires Node.js. Node.js is an open-source, cross-platform JavaScript run-time environment that will allow you to execute JavaScript code on your server. At the moment of writing this tutorial, the latest LTS version of Node.js is version 10.x.
NPM stands for Node Package Manager and is the default package manager tool for Node.js.
To install Node.js and NPM, first, you will need to add the Node.js official repository to the system.
sudo curl -sL https://rpm.nodesource.com/setup_10.x | sudo bash -
Once the repository is added, run the following command:
sudo yum install nodejs
To verify the version and if Node.js has been successfully installed, run the following command:
node --version
To verify the NPM installation, run the following:
npm --version
To be able compile and install native add-ons from NPM, we also need to install the following build tools:
sudo yum install gcc-c++ makeStep 3: Install MongoDB
The default CentOS 7 repository does not contain a package for MongoDB, so we will need to use the official MongoDB repository to install MongoDB package.
At the time of writing this tutorial, the latest stable version of MongoDB is 4.0. Let’s add the MongoDB repository by creating the following file:
nano /etc/yum.repos.d/mongodb-org-4.0.repo
Then, add the following lines:
[mongodb-org-4.0]
name=MongoDB Repository
baseurl=https://repo.mongodb.org/yum/redhat/$releasever/mongodb-org/4.0/x86_64/
gpgcheck=1
enabled=1
gpgkey=https://www.mongodb.org/static/pgp/server-4.0.asc
You can now install MongoDB using the following command:
sudo yum install -y mongodb-org
Enable the MongoDB service to start automatically on boot:
sudo systemctl enable mongod
Start the MongoDB service:
sudo systemctl start mongod
For security reasons, if you are going to allow remote access to your MongoDB server, it is recommended to enable database authorization.
Open the MongoDB configuration file:
nano /etc/mongod.conf
And add the following:
security:
  authorization: "enabled"
Restart the MongoDB server for the changes to take effect:
sudo systemctl restart mongod
Step 4: Create a MongoDB user and database
Once we have our MongoDB server up and running, we will need to create a new user and database for our FlintCMS installation
First, we need to access and MongoDB shell, by typing the following command:
mongo
You can then create a new database for our FlintCMS by entering the following command in the MongoDB shell:
> use flint_db;
Next, create a new user, with readWrite permissions for this database:
> db.createUser(
  {
    user: "flint_user",
    pwd: "PASSWORD",
    roles: [ { role: "readWrite", db: "flint_db" } ]
  }
)
Do not forget to replace PASSWORD with your own strong password.
After you are done, you can exit the MongoDB shell with:
> quit()
Step 5: Install FlintCMS
We can now proceed with the FlintCMS installation.
Let’s start by creating a new directory for our FlintCMS project. You can place your project at any location on your server:
mkdir /var/www/flintcms
Navigate to this directory with:
cd /var/www/flintcms
To install FlintCMS and this location, simply run the following command:
npm install flintcms
After the installation is complete, you will want to create a new JavaScript called which will serve as an entry point for our JavaScript application:
nano index.js
Place the following content and save the file:
const Flint = require('flintcms');

const flintServer = new Flint({
 siteName: 'My Amazing Flint Site!'
});

flintServer.startServer();
You will also need to create a .env file to store sensitive environment variables, like the database connection details:
nano .env
And add the following settings:
# Secret settings
SESSION_SECRET= Yx#hqPeM`sSfhd7sNX.E84<pR'MG

# Debug settings
DEBUG= ...

# Environment
NODE_ENV=production

# Mongo Credentials
DB_HOST= 127.0.0.1
DB_URL= 127.0.0.1:27017/flint_db
DB_USER= flint_user
DB_PASS= PASSWORD

# Email Credentials
MAIL_HOST= ...
MAIL_USER= ...
MAIL_PASS= ...
NOTE: You need to replace the SESSION_SECRET with your own random string.
You can configure your debug settings and define the environment mode for your application (production or development). If left undefined, the application will be started in development mode by default, and create its own development database.
To connect to your new database (in production mode), use the MongoDB user and database information we have created earlier.
If you have a running mail server, you can also add your email credentials to this file.
With this being completed, you can now run the Node.js server with the following command:
node index.js
The following output should be displayed on your screen, letting you know that the server is up and running:

Step 6: Access FlintCMS
You should now be able to access your application in your browser. However, in order to access your FlintCMS admin panel, you will first need to create a new admin user.
You can do this by opening the following URL in your web browser http://your-server-ip:4000/admin/install

You can now login with your admin account and access the FlintCMS admin panel:
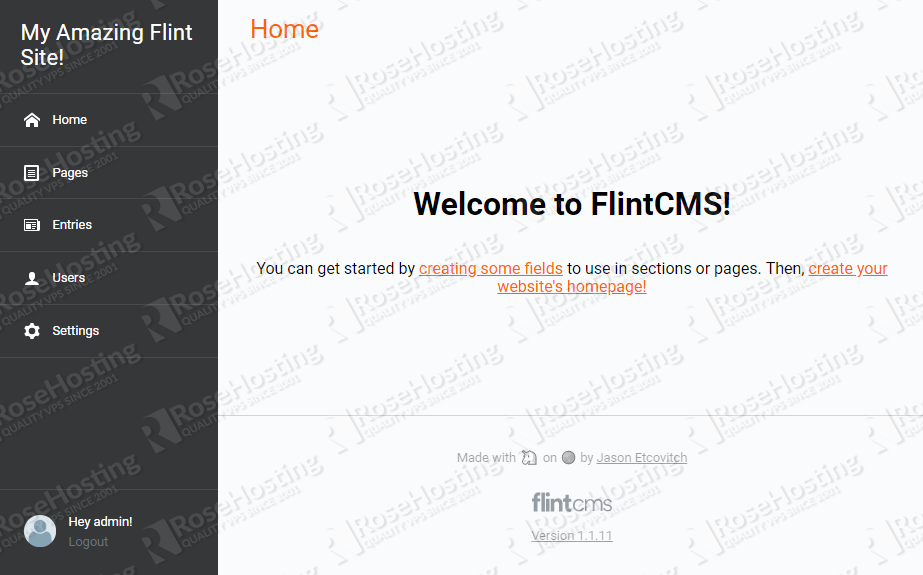
That’s it! FlintCMS has been successfully installed on your CentOS 7 server.
 Of course, you don’t have to install FlintCMS on CentOs 7 if you have Managed CentOS Hosting with us. You can simply ask our support team to install FlintCMS on CentOS 7 for you. They are available 24/7 and will be able to help you with the installation.
PS. If you enjoyed reading this blog post on how to install FlintCMS on CentOS 7, feel free to share it on social networks using the shortcuts below, or simply leave a comment in the comments section. Thanks.