
In this tutorial, we will explain how to install and configure Kanboard on an Ubuntu 18.04 VPS.
 Kanboard is a free and open-source project management software that helps you to manage your projects simply and efficiently. With Kanboard, you can visualize your work, limit and pace yourself with the work in progress, and drag and drop tasks to manage your projects easily. Kanboard also provides support for reports, analytics, and it can be integrated with external services. Kanboard allows you to customize your board according to your business needs, making it a very versatile tool that can boost the productivity of any business.
Prerequisites
- For the purposes of this tutorial, we will use an Ubuntu 18.04 VPS.
- MySQL 5.6 or higher, or MariaDB 10 or higher.
- PHP 5.6 or higher with MySQL, GD, Mbstring, Openssl, Json, XML, SimpleXML, and Dom extension enabled.
- Full SSH root access or a user with sudo privileges is also required.
Step 1: Log in and Update Packages
First, we’re going to need to log into our server using SSH. You can do that by entering this command:

ssh root@IP_Address -p Port_Number
Remember to replace “root” with your username if you are not using the root user. Change “IP_Address” and “Port_Number” according to your server’s IP address and SSH port number.
Once you are logged in, you should update all of your packages to their latest available versions.
apt-get update
apt-get upgrade
Once the updates are completed, we can proceed to the next step.
Step 2: Install LEMP Server
First, we will need to install the Nginx Web Server, MariaDB database server, PHP and all of the required PHP extensions onto your server. You can install all these packages using the following command:
apt-get install nginx mariadb-server php7.2 php7.2-mysql php7.2-gd php7.2-mbstring php7.2-common php7.2-opcache php7.2-cli php7.2-xml php7.2-fpm php7.2-zip git unzip
Once all the packages are installed, start the Nginx and MariaDB services and enable them to start after system reboot:
systemctl start nginx
systemctl start mariadb
systemctl enable nginx
systemctl enable mariadb
Once you have done, you can proceed to the next step.
Step 3: Configure a Database for Kanboard
Kanboard uses MariaDB to store its data. Optionally, you can secure MariaDB installation using mysql_secure_installation script:
Just in case you need to, the default root password is blank, so you can get around password prompts by simply pressing the [Enter] key.
mysql_secure_installation
Once secured, log in to MariaDB shell with the following command:
mysql -u root -p
Provide your root password then create a database and user for Kanboard:
MariaDB [(none)]> CREATE DATABASE kanboarddb;
MariaDB [(none)]> CREATE USER 'kanboard'@'localhost' IDENTIFIED BY 'password';
Make sure to replace “password” with a unique and strong password.
Next, grant all the privileges to Kanboard using the following command:
MariaDB [(none)]> GRANT ALL ON kanboarddb.* TO 'kanboard'@'localhost' WITH GRANT OPTION;
Next, flush the privileges and exit from the shell with the following commands:
MariaDB [(none)]> FLUSH PRIVILEGES;
MariaDB [(none)]> EXIT;
Step 4: Install Kanboard
You will need to download the latest version of Kanboard from the Git repository. You can download it to the Nginx web root directory with the following commands:
cd /var/www/html/
git clone https://github.com/kanboard/kanboard.git
Next, change the directory to kanboard, and rename the sample configuration file:
cd kanboard
mv config.default.php config.php
Next, open the config.php file with the nano editor:
nano config.php
Define the database settings that you have created earlier as shown below:
// Database driver: sqlite, mysql or postgres (sqlite by default)
define('DB_DRIVER', 'mysql');

// Mysql/Postgres username
define('DB_USERNAME', 'kanboard');

// Mysql/Postgres password
define('DB_PASSWORD', 'password');

// Mysql/Postgres hostname
define('DB_HOSTNAME', 'localhost');

// Mysql/Postgres database name
define('DB_NAME', 'kanboarddb');
Save and close the file. Then, change the ownership of kanboard directory to www-data:
chown -R www-data:www-data /var/www/html/kanboard
Step 5: Create an Nginx Virtual Host Configuration file for Kanboard
Kanboard is now ready and configured. Let’s create a new Nginx configuration file inside the /etc/nginx/sites-available/ directory:
nano /etc/nginx/sites-available/kanboard.conf
Add the following contents:
server {
        listen       80;
        server_name  your-domain.com;
        index        index.php;
        root         /var/www/html/kanboard;
        client_max_body_size 32M;

        location / {
            try_files $uri $uri/ /index.php$is_args$args;
        }

        location ~ \.php$ {
            try_files $uri =404;
            fastcgi_split_path_info ^(.+\.php)(/.+)$;
            fastcgi_pass unix:/var/run/php/php7.2-fpm.sock;
            fastcgi_param SCRIPT_FILENAME $document_root$fastcgi_script_name;
            fastcgi_index index.php;
            include fastcgi_params;
        }

        location ~* ^.+\.(log|sqlite)$ {
            return 404;
        }

        location ~ /\.ht {
            return 404;
        }

        location ~* ^.+\.(ico|jpg|gif|png|css|js|svg|eot|ttf|woff|woff2|otf)$ {
            log_not_found off;
            expires 7d;
            etag on;
        }
        gzip on;
        gzip_comp_level 3;
        gzip_disable "msie6";
        gzip_vary on;
        gzip_types
            text/javascript
            application/javascript
            application/json
            text/xml
            application/xml
            application/rss+xml
            text/css
            text/plain;
    }
Make sure to replace “your-domain.com” with an actual registered domain name that is set up to work with your server.
Save and close the file. Then, enable the Nginx virtual host file using the following command:
ln -s /etc/nginx/sites-available/kanboard.conf /etc/nginx/sites-enabled/
Finally, restart the Nginx and PHP-FPM service to apply the configuration:
systemctl restart php7.2-fpm
systemctl restart nginx
Step 6: Access Kanboard
Now, open your web browser and visit the URL your-domain.com. You should see the Kanboard login screen:
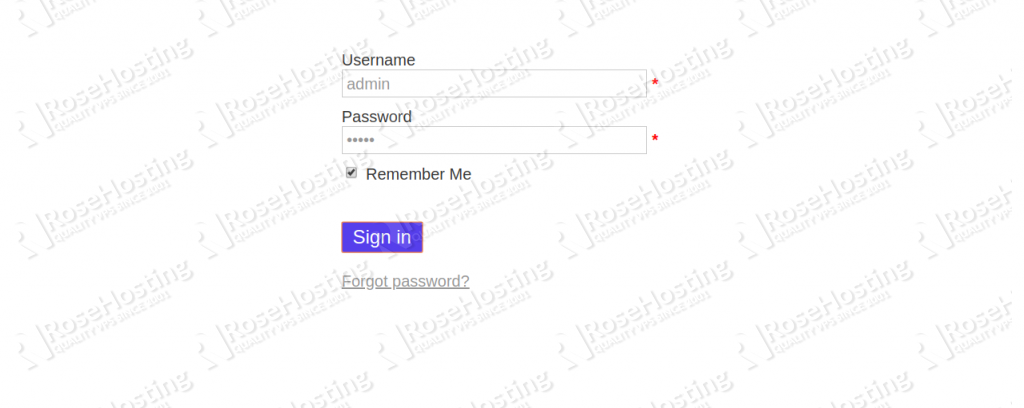
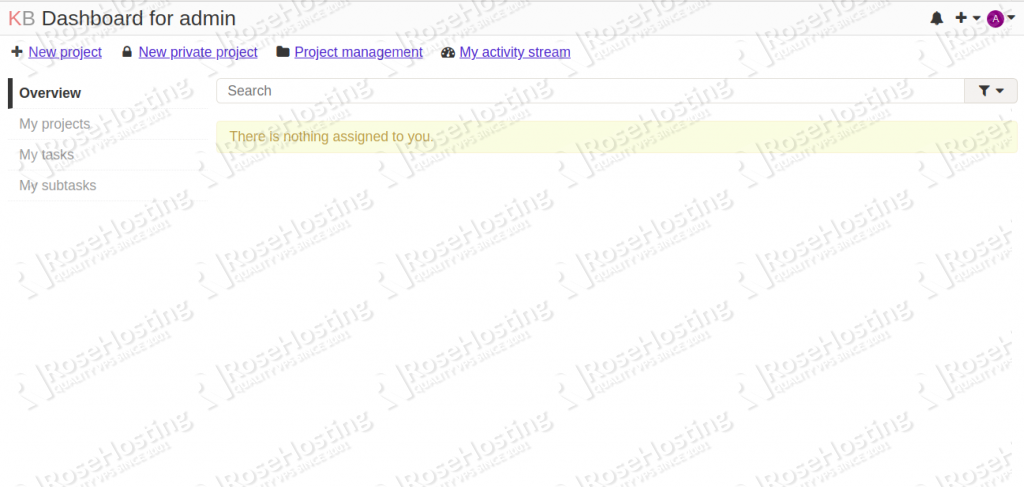
Log in with username admin and the password admin. You should get the following screen:
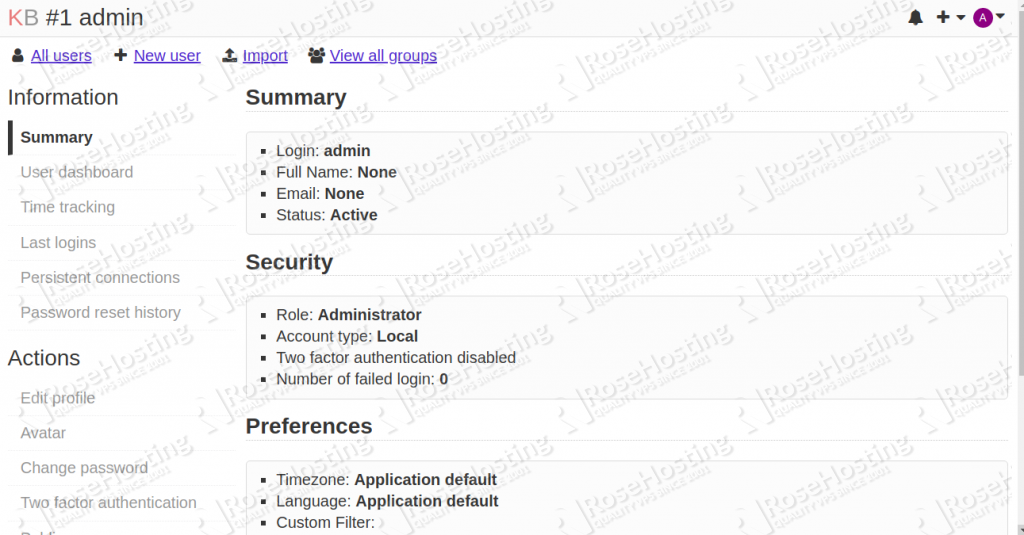
It is highly recommended to reset the default admin password as soon as you can. To do so, click on the Admin > Users Management > admin. You should see the following page:
Now, click on the section labelled “change password”. You should get the following screen:
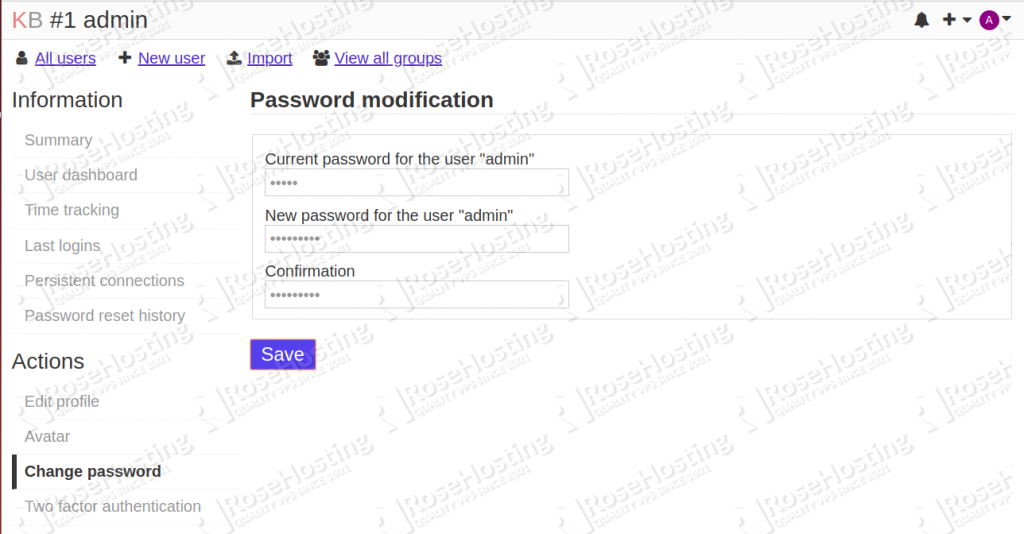
Now, change your admin password and click on the Save button.
Step 7: Set up a Cron Job for Kanboard
In order for Kanboard to work properly, we will need to set up a cron job that runs on a daily basis. The cron job is necessary for reports, analytics, and overdue task notifications features.
To set up a cron job, open the crontab file with the www-data user:
crontab -u www-data -e
Add the following line:
0 10 * * * cd /path/to/kanboard && ./cli cronjob >/dev/null 2>&1
Save and close the file.
This cron job will run and update all of the reports and analytics at 10 AM every day.
Congratulations! you have successfully installed Kanboard on Ubuntu 18.04 VPS.
 Of course, you don’t have to know how to install Kanboard on Ubuntu 18.04 if you have a Managed Ubuntu Hosting plan with us. You can simply ask our support team to install Kanboard on Ubuntu 18.04 for you. They are available 24/7, and will be able to help you with the installation of Kanboard on Ubuntu 18.04.
PS. If you enjoyed reading this blog post on how to install Kanboard on Ubuntu 18.04, feel free to share it on social networks by using the shortcuts below, or simply leave a comment in the comments section. Thank you.