 MODX is an easy-to-use and one of the best free CMS platforms available on the Internet. Also, it is a web application framework which provides the web designers with easy to learn and use set of tools to build the websites they want. In this step-by-step tutorial, we will show you how to easily install MODX on your Linux based virtual server.
At the time of writing this tutorial, the latest stable version is MODX 2.2.11-pl and it requires:
- PHP >= 5.1.2 (the php-fpm package is required for Nginx servers) with the following PHP extensions enabled: cURL, GD Graphics Library version, ImageMagick, JSON (or PECL library), pdo_mysql, SimpleXML, and Zlib. Also, safe mode, register globals and magic quotes settings should be disabled;
- MySQL >= 4.1.20+ installed on your Linux virtual server.
In order to install Nginx and PHP-FPM on your Linux based virtual server , add the following repos:
rpm -Uvh http://mirror.pnl.gov/epel/6/x86_64/epel-release-6-8.noarch.rpm
rpm -Uvh http://rpms.famillecollet.com/enterprise/remi-release-6.rpm

vi /etc/yum.repos.d/nginx.repo

[nginx]
name=nginx repo
baseurl=http://nginx.org/packages/centos/$releasever/$basearch/
gpgcheck=0
enabled=1
Remove Apache and install Nginx and PHP-FPM:
yum remove httpd*
yum --enablerepo=remi,remi-php55 install nginx php-fpm php-common php-pdo php-gd php-mysqlnd php-xml php-mbstring php-mcrypt php-curl
Set Nginx and PHP-FPM services to automatically start when the server boots:
chkconfig --levels 235 php-fpm on
chkconfig --levels 235 nginx on
Edit the ‘/etc/php-fpm.d/www.conf’ php-fpm configuration file and replace ‘apache’ in the user and group with ‘nginx’:
user = nginx
group = nginx
Execute the following command:
chgrp nginx -R /var/lib/php/
Download MODX available at http://modx.com/download/ to the server and extract it using the following commands:
cd /root
wget http://modx.com/download/direct/modx-2.2.11-pl.zip
unzip modx-*.zip -d /var/www/
mv /var/www/modx-2.2.11-pl/ /var/www/modx/
MODX requires a MySQL user and database, so create them by executing the following commands:
mysql -u root -p
CREATE DATABASE modxdb;
CREATE USER 'modxuser'@'localhost' IDENTIFIED BY 'your-password';
GRANT ALL PRIVILEGES ON modxdb.* TO 'modxuser'@'localhost';
FLUSH PRIVILEGES;
quit
Edit the php.ini configuration file using the following command:
vi /etc/php.ini
and add/modify the following lines:
memory_limit = 128M
cgi.fix_pathinfo=0
safe_mode = Off
register_globals = Off
magic_quotes_gpc = Off
date.timezone = "US/Central"
Execute the following command:
/etc/init.d/php-fpm restart
Create a new Nginx configuration file:
vi /etc/nginx/conf.d/your-domain.com.conf
and add the following lines:
server {
listen 80;
server_name www.your-domain.com;
root /var/www/modx;
index index.php index.html;
access_log /var/log/nginx/your-domain.com-access.log;
error_log /var/log/nginx/your-domain.com-error.log;

client_max_body_size 30M;
        location / {
                root /var/www/modx;
                if (!-e $request_filename) {
                        rewrite ^/(.*)$ /index.php?q=$1 last;
                }
        }
        location ~ \.php$ {
                try_files $uri =404;
                fastcgi_split_path_info ^(.+\.php)(.*)$;
                fastcgi_pass  127.0.0.1:9000;
                fastcgi_index  index.php;
                fastcgi_param  SCRIPT_FILENAME  $document_root$fastcgi_script_name;
                include fastcgi_params;
                fastcgi_ignore_client_abort on;
                fastcgi_param  SERVER_NAME $http_host;
        }

        location ~ /\.ht {
                deny  all;
        }
}
Then, restart Nginx for the changes to take effect:
/etc/init.d/nginx restart
Create a blank new ‘config.inc.php’ file:
touch /var/www/modx/core/config/config.inc.php
Make it writable to the webserver user. Also, the webserver user (Nginx) needs to be able to write to ‘/core/packages’, ‘/core/cache’, ‘/core/import’ and ‘/core/export’ directories so you can easily accomplish that by executing the following command:
chown nginx:nginx -R /var/www/modx/
Open http://your-domain.com/setup/index.php in your favorite web browser and follow the easy instructions. Once the installation is complete, it is recommended to delete the ‘install’ directory from your server:
# rm -rf /var/www/modx/install
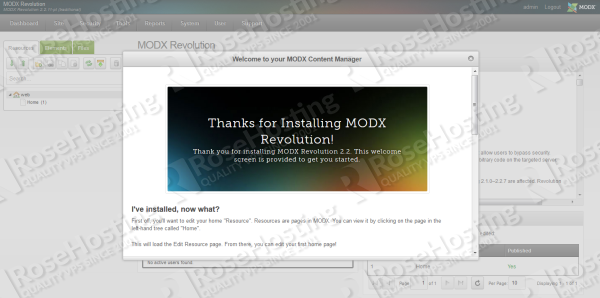
Log in at http://your-domain.com/manager/ using the Administrator user credentials and start building the website.
Of course you don’t have to do any of this if you use one of our Linux VPS Hosting services, in which case you can simply ask our expert Linux admins to install MODX for you. They are available 24×7 and will take care of your request immediately.
PS. If you liked this post please share it with your friends on the social networks using the buttons on the left or simply leave a reply below. Thanks.