Joomla is an open-source content management system (CMS) that allows users to build and manage websites and web applications. It is a popular and widely used CMS known for its flexibility, scalability, and ease of use. Joomla is written in PHP and uses a MySQL/MariaDB database to store content and data.
It is a versatile CMS that can be adapted to meet various website needs, and its open-source nature means it is free to use and can be customized to suit specific requirements.
In this article, we will show you how to install Joomla on Debian 12.
Table of Contents
Prerequisites
- A Debian VPS
- Root access or regular system user with sudo privileges
Step 1. Log in to your server via SSH
First, you will need to log in to your Debian 12 VPS via SSH as the root user:
# ssh root@IP_Address -p Port_number
You will need to substitute the “IP_Address” and “Port_number” with your server’s respective IP address and SSH port number. Additionally, replace ‘root’ with the username of the system user with sudo privileges.
Step 2. Install Nginx Web Server
To install the Nginx web server, run the following command:
# apt install nginx
Once the installation is completed, enable and start the Nginx service:
# systemctl enable nginx && systemctl start nginx
To check if everything is OK, check the status of the service with the following command:
# systemctl status nginx
You should receive the following output:
# systemctl status nginx
● nginx.service - A high performance web server and a reverse proxy server
     Loaded: loaded (/lib/systemd/system/nginx.service; enabled; preset: enabled)
     Active: active (running)
       Docs: man:nginx(8)
    Process: 618 ExecStartPre=/usr/sbin/nginx -t -q -g daemon on; master_process on; (code=exited, status=0/SUCCESS)
    Process: 708 ExecStart=/usr/sbin/nginx -g daemon on; master_process on; (code=exited, status=0/SUCCESS)
   Main PID: 712 (nginx)
      Tasks: 2 (limit: 2273)
     Memory: 4.7M
        CPU: 142ms
     CGroup: /system.slice/nginx.service
             ├─712 "nginx: master process /usr/sbin/nginx -g daemon on; master_process on;"
             └─716 "nginx: worker process"
Step 3. Install PHP
You can install the PHP with extensions using this command:
# apt install php php-common php-curl php-fpm php-imap php-cli php-xml php-zip php-mbstring php-gd php-mysql
After successful installation, check the PHP version:
# php -v
You should get the following output:
PHP 8.2.7 (cli) (built: Jun  9 2023 19:37:27) (NTS)
Copyright (c) The PHP Group
Zend Engine v4.2.7, Copyright (c) Zend Technologies
    with Zend OPcache v8.2.7, Copyright (c), by Zend Technologies
Step 4: Install MariaDB
You can install MariaDB using the following command:
# apt install mariadb-server mariadb-client
Start and enable the mariadb.service with the following commands:
# systemctl start mariadb && systemctl enable mariadb
Check the status of the mariadb.service
# systemctl status mariadb
Now, we can create a new database and database user for the Joomla installation.
# mysql -u root
Once logged in to the MariaDB shell, run the following commands:
MariaDB [(none)]> CREATE DATABASE joomla_db;
MariaDB [(none)]> CREATE USER joomla_user@'localhost' IDENTIFIED BY 'G7duJn5rtF';
MariaDB [(none)]>  GRANT ALL on joomla_db.* to joomla_user@localhost;
MariaDB [(none)]> FLUSH PRIVILEGES;
MariaDB [(none)]> EXIT
Step 5: Download Joomla
To get the most stable version, you can check the Joomla download page. At the time of writing, the latest version is Joomla 4.3.4.
You can download it using the following command:
# wget https://downloads.joomla.org/cms/joomla4/4-3-4/Joomla_4-3-4-Stable-Full_Package.zip
Once the download is complete, create a directory for your Joomla website document root:
# mkdir /var/www/joomla
Then extract the downloaded archive in the /var/www/joomla directory using the following command:
# unzip Joomla_4-3-4-Stable-Full_Package.zip -d /var/www/joomla
Change the owner and set the correct permissions for these files by running the following command:
# chown -R www-data:www-data /var/www/joomla
Step 6. Create Nginx Configuration File
It’s time to create a server block for our Joomla website.
# nano /etc/nginx/conf.d/joomla.conf
Insert the following configuration into the file. Make sure to use your actual domain instead of “yourdomain.com”
server {
  listen 80;
    server_name yourdomain.com;
    server_name_in_redirect off;

    access_log /var/log/nginx/joomla.access_log;
    error_log /var/log/nginx/joomla.error_log info;

    root /var/www/joomla;
    index index.php index.html index.htm default.html default.htm;

    location /api/ {
	try_files $uri $uri/ /api/index.php?$args;
    }

    location / {
        try_files $uri $uri/ /index.php?$args;
    }

    add_header X-Content-Type-Options nosniff;

    location ~* /(images|cache|media|logs|tmp)/.*\.(php|pl|py|jsp|asp|sh|cgi)$ {
        return 403;
        error_page 403 /403_error.html;
    }

    location ~ \.php$ {
      fastcgi_pass  unix:/run/php/php8.2-fpm.sock;
      fastcgi_index index.php;
      include fastcgi_params;
      fastcgi_param SCRIPT_FILENAME $document_root$fastcgi_script_name;
      include /etc/nginx/fastcgi.conf;
    }

    location ~* \.(ico|pdf|flv)$ {
        expires 1y;
    }

    location ~* \.(js|css|png|jpg|jpeg|gif|swf|xml|txt)$ {
        expires 14d;
    }

}
Now, restart the Nginx service.
# systemctl restart nginx
Step 7. Finish Joomla Installation
Now, open your web browser and access Joomla using the URL http://yourdomain.com. You will be redirected to the following page:
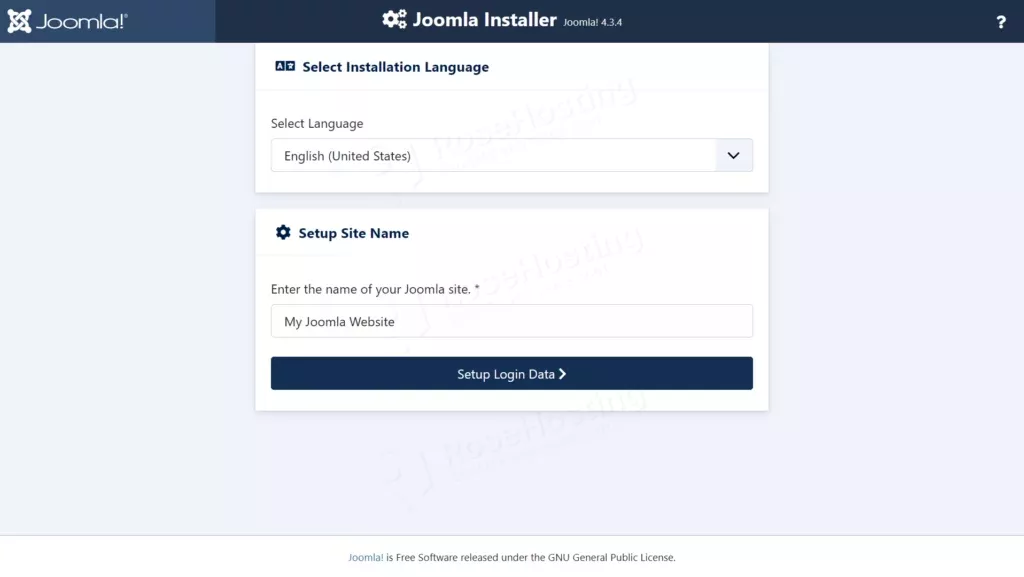
Select the language and enter the name of your website. then click on the ‘Setup Login Data’ button to continue.
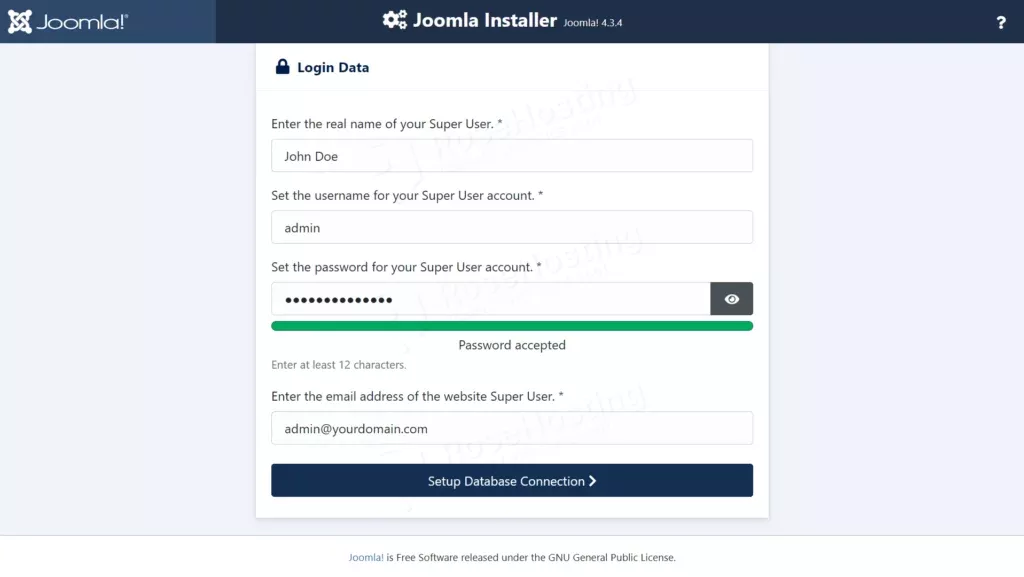
Fill in the required fields in this step, then proceed to the next step by clicking on ‘Setup Database Connection.’
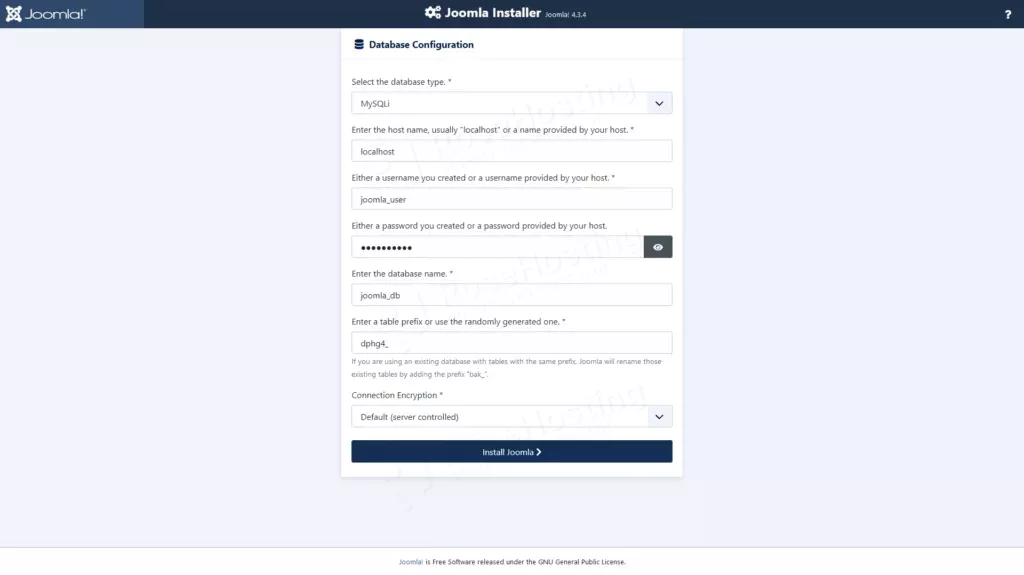
Enter the database name, database user, and database password you created before, then finally click on the ‘Install Joomla’ button.
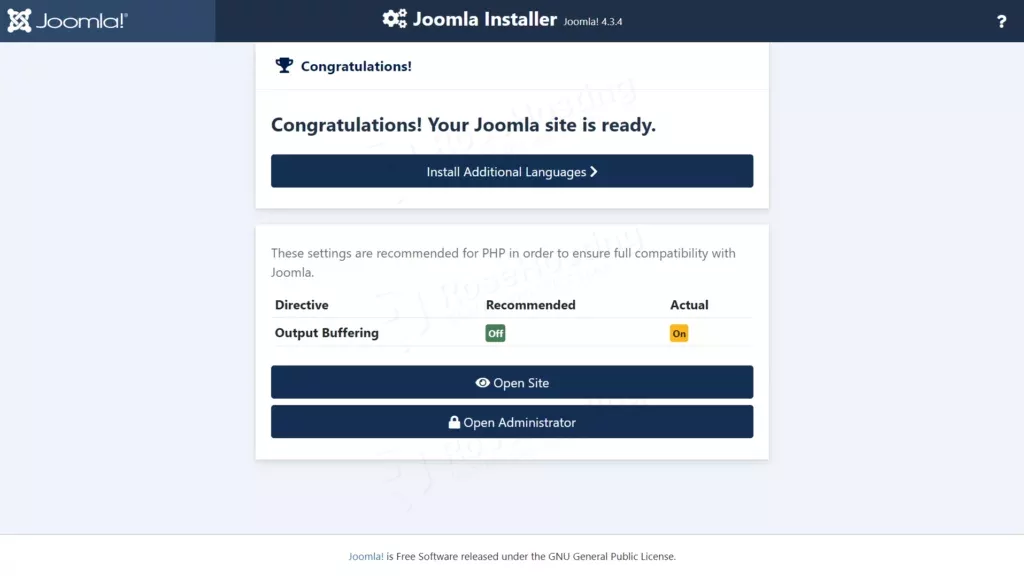
That’s it all! You have successfully installed Joomla on Debian 12.
Of course, you don’t have to pull your hair to install Joomla on Debian 12 if you have a managed Linux VPS hosting plan hosted with us. If you do, you can simply ask our support team to install Joomla on Debian 12 for you. They are available 24/7 and will be able to help you with the installation of Joomla as well as any additional requirements that you may have.
PS. If you enjoyed reading this blog post on how to install Joomla on Debian 12, feel free to share it on social networks or simply leave a comment in the comments section. Thank you.