
In this blog post, we will show you how to install n8n on Ubuntu 26.04 OS. n8n is a self-hosted automation tool that connects applications to automate tasks. The key aspects of n8n are its flexibility and the ability to be hosted on users’ servers (self-hosting) for full data control. n8n is a cost-effective and, unlike competitors, charges zero per task, making it ideal for high-volume automation. It also supports over 500 integrations with various apps, databases, and AI services.
We’re going to teach you how to install n8n on Ubuntu 26.04, which is a straightforward process that takes up to 10 minutes. Let’s get started!
Table of Contents
Prerequisites
- A server running Ubuntu 26.04 OS
- User privileges: root or non-root user with sudo privileges
- Valid domain name pointed to the server
Step 1. Update the system
Before we start installing n8n and its prerequisites, we need to update the packages to their latest available versions. To do that, execute the following command:
apt update -y && apt upgrade -y
Step 2. Install NodeJS
In order for n8n to be installed, we need to install NodeJS first. To install NodeJS, execute the following commands:
curl -sL https://deb.nodesource.com/setup_lts.x | sudo -E bash -

apt update

apt install nodejs
To check the NodeJS version, execute the command below:
node -v
You should get the following output:
root@host:~# node -v
v24.14.0
Step 3. Install PostgreSQL database
Next is to install the PostgreSQL database service, since n8n uses SQLite as a database backend. To install the PostgreSQL database service, execute the command below:
apt install postgresql postgresql-contrib
Once installed, start and enable the database service:
systemctl start postgresql && systemctl enable postgresql
To check the status of the service, execute the following command:
systemctl status postgresql
You should get the following output:
root@host:~# systemctl status postgresql
● postgresql.service - PostgreSQL RDBMS
     Loaded: loaded (/usr/lib/systemd/system/postgresql.service; enabled; preset: enabled)
     Active: active (exited) since Thu 2026-03-05 19:16:38 CST; 2min 58s ago
 Invocation: 37862c786fb14711b2ad5c63215631c9
   Main PID: 39039 (code=exited, status=0/SUCCESS)
   Mem peak: 2M
        CPU: 17ms
Next, we can create an n8n database user. First, log in to the PostgreSQL shell by executing the following commands one-by-one:
su postgres

psql
Once entered, the shell should look like this:
postgres@host:/root$ psql
psql (18.3 (Ubuntu 18.3-1))
Type "help" for help.

postgres=#
To create the n8n database, n8n user, and grant the required privileges, execute the commands below one-by-one:
CREATE DATABASE n8ndb;
CREATE USER n8nuser WITH SUPERUSER PASSWORD 'StrongDBPasswordHere';
GRANT ALL PRIVILEGES ON DATABASE n8ndb TO n8nuser;
\q
To exit from the postgres user, just type exit.
postgres@host:/root$ exit
exit
root@host:~#
Step 4. Add n8n System User
We have all the prerequisites except the n8n system user. We need to create a system user to install n8n under that user. To do that, execute the following command:
adduser n8n
After this command, you will be prompted to enter a password. Once done, we need to grant sudo privileges to the newly created n8n user:
usermod -aG sudo n8n
Step 5. Install n8n
Now, we have all prerquisites for n8n installation. To install it, first log in to the n8n user:
su - n8n
To install n8n, execute the following command, and it will automatically install n8n into the home directory of the n8n user:
sudo npm install -g n8n
It will require the password of the n8n user so you can execute the command:
n8n@host:~$ sudo npm install -g n8n
[sudo: authenticate] Password:
The installation will start, and you need to allow a couple of minutes to finish. Once done, run the following command to create the .n8n directory, which is essential for the configuration.
n8n
The output should look like this:
Finished building workflow dependency index. Processed 0 draft workflows, 0 published workflows.

Editor is now accessible via:
http://localhost:5678

Press "o" to open in Browser.
Stop the process with CTRL+D, since we will manage n8n as a service.
Next, we need to create an environment file with the database credentials we set before:
/home/n8n/.n8n/.env
Paste the following lines of code:
DB_TYPE=postgresdb
DB_POSTGRESDB_HOST=localhost
DB_POSTGRESDB_PORT=5432
DB_POSTGRESDB_DATABASE=n8ndb
DB_POSTGRESDB_USER=n8nuser
DB_POSTGRESDB_PASSWORD=StrongDBPasswordHere
DB_POSTGRESDB_SCHEMA=n8ndb
Save the file and exit. Then log out from the n8n user:
n8n@host:~/.n8n$ exit
logout
root@host:~#
Step 6. Create a systemd file
We need to manage n8n as a service; thus, we need to create a systemd file for it:
nano /etc/systemd/system/n8n.service
Paste the following lines of code:
[Unit]
Description=n8n
After=network.target

[Service]
User=n8n
WorkingDirectory=/home/n8n/.n8n
EnvironmentFile=/home/n8n/.n8n/.env
ExecStart=/usr/bin/n8n
Restart=on-failure
RestartSec=5s

[Install]
WantedBy=multi-user.target
Save the file, close it, and reload the daemon:
systemctl daemon-reload
To start and enable the n8n service, you can use the following command:
systemctl start n8n && systemctl enable n8n
To check the status of the service:
systemctl status n8n
You should get output similar to this:
root@host:~# systemctl status n8n
● n8n.service - n8n
     Loaded: loaded (/etc/systemd/system/n8n.service; enabled; preset: enabled)
     Active: active (running) since Thu 2026-03-05 20:00:46 CST; 1min 7s ago
 Invocation: 892510db0e954fa391a0aad28244dfd6
   Main PID: 41577 (MainThread)
      Tasks: 19 (limit: 4027)
     Memory: 387.4M (peak: 704M)
        CPU: 27.872s
     CGroup: /system.slice/n8n.service
             ├─41577 node /usr/bin/n8n
             └─41595 node --disallow-code-generation-from-strings --disable-proto=delete /usr/lib/node_modules/n8n/node_modules/@n8n/task-runner/dist/start.js
Mar 05 20:00:59 host.test.vps n8n[41577]: Finished migration MigrateExternalSecretsToEntityStorage1771500000000
Mar 05 20:00:59 host.test.vps n8n[41577]: n8n Task Broker ready on 127.0.0.1, port 5679
As you can see, the n8n service is running on port 5679, and in the next step, we will set up a reverse proxy so we can access the n8n installation via a domain name.
Step 7. Install Nginx and create a Reverse Proxy
To install Nginx, execute the following command:
apt install nginx -y
Once installed, start and enable the Nginx service:
systemctl start nginx && systemctl enable nginx
Check the status of the service:
systemctl status nginx
You should get the following output:
root@host:~# systemctl status nginx
● nginx.service - A high performance web server and a reverse proxy server
     Loaded: loaded (/usr/lib/systemd/system/nginx.service; enabled; preset: enabled)
     Active: active (running) since Thu 2026-03-05 20:06:07 CST; 1min 5s ago
 Invocation: ae8be846641342a5b6f7e0f314291d71
       Docs: man:nginx(8)
   Main PID: 41933 (nginx)
      Tasks: 4 (limit: 4027)
     Memory: 3.8M (peak: 9.1M)
        CPU: 117ms
     CGroup: /system.slice/nginx.service
Next, we need to create an Nginx configuration file:
nano /etc/nginx/conf.d/n8n.conf
Paste the following lines of code:
upstream n8n {
   server 127.0.0.1:5678;
   }

server {
   listen 80;
   server_name yourdomain.com;

   access_log /var/log/nginx/n8n.access.log;
   error_log /var/log/nginx/n8n.error.log;

   location / {
        proxy_pass http://n8n;
        proxy_set_header Host $host;
        proxy_set_header X-Real-IP $remote_addr;
        proxy_set_header X-Forwarded-For $proxy_add_x_forwarded_for;
        proxy_set_header X-Forwarded-Proto $scheme;

        proxy_http_version 1.1;
        proxy_set_header Upgrade $http_upgrade;
        proxy_set_header Connection "upgrade";
    }
}
Save the file, close it, and check the Nginx syntax:
nginx -t
If everything is OK, you should receive the following output:
root@host:~# nginx -t
nginx: the configuration file /etc/nginx/nginx.conf syntax is ok
nginx: configuration file /etc/nginx/nginx.conf test is successful
Restart the Nginx service:
systemctl restart nginx
Next, we will install an SSL certificate for the domain. First, install Certbot for Nginx:
apt install python3-certbot-nginx -y
Then you can obtain an SSL certificate:
certbot --nginx -d yourdomain.com
After this process is completed, the website will be securely accessible via HTTPS.
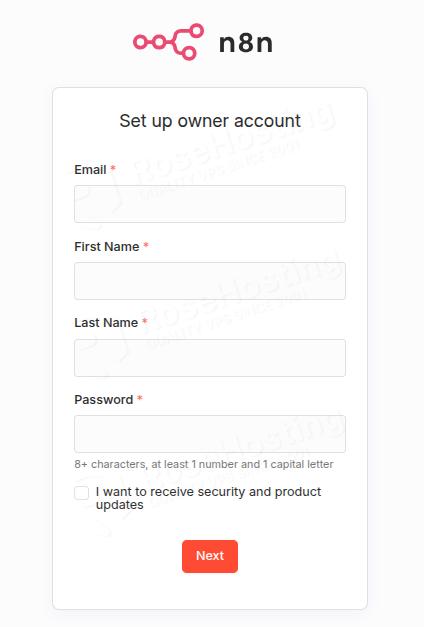
Now you can access your domain at https://yourdomain.com and complete the n8n installation by entering your personal account information as the owner.
Congratulations! You successfully installed n8n on Ubuntu 26.04 OS.
Of course, you do not have to install it yourself if you have difficulties or are not familiar with Linux. All you have to do is sign up for one of our NVMe n8n VPS plans and submit a support ticket. Our admins are available 24/7 and will help you with any aspect of installing n8n.
If you liked this post on how to install n8n on Ubuntu 26.04, please share it with your friends on social networks or simply leave a reply below. Thanks.