![]() CiviCRM is a web-based, open source, customer relationship management software that is specifically designed for the needs of non-profit, non-governmental, and advocacy groups. It is designed to manage information about an organization’s donors, members, event registrants, subscribers, grant application seekers and funders, and case contacts.
CiviCRM is a web-based, open source, customer relationship management software that is specifically designed for the needs of non-profit, non-governmental, and advocacy groups. It is designed to manage information about an organization’s donors, members, event registrants, subscribers, grant application seekers and funders, and case contacts.
CiviCRM can be deployed in conjunction with either Drupal, Joomla or WordPress CMS to track contacts and their relationships to projects and initiatives.
In this article we will cover the steps needed for installing CiviCRM for your Drupal based website on an Ubuntu 14.04 VPS.
An active and working Drupal installation is needed so if you don’t have Drupal installed on your server, feel free to check our excellent article and install Drupal yourself.
REQUIREMENTS
We will be using our SSD 1 Linux VPS Hosting plan for this tutorial.
Login to your server via SSH
# ssh root@server_ip
You can check whether you have the proper version of Ubuntu installed on our server with the below command:
# lsb_release -a
Which should give you the underneath output:
Distributor ID: Ubuntu
Description:    Ubuntu 14.04.3 LTS
Release:        14.04
Codename:       trusty
UPDATE THE SYSTEM
Make sure your server is fully up to date.
# apt-get update && apt-get upgrade
After that, you’ll need to create a database for your CiviCRM installation. Log into MySQL as root:
# mysql -u root -p
Use the below statements:
mysql> create database civic;

mysql> grant all privileges on civic.* to civicu@localhost identified by 'your_password';

mysql> flush privileges;

mysql> exit
INSTALL CIVICRM
CiviCRM can be installed from your Drupal website dashboard. It can be either installed directly from URL or by downloading the installation archive to your server. You can also upload the file from your local machine by navigating to Modules -> Install new module from your Drupal dashboard.
We will proceed with the latter method. Enter the modules directory in your Drupal document root. For example: /drupal_document_root/sites/all/modules.
If you installed Drupal from the article we provided you with above, then the path to the modules directory will be: /var/www/html/drupal/sites/all/modules
So, enter the below command:
# cd /var/www/html/drupal/sites/all/modules
Download the latest CiviCRM version (when this tutorial was written, the latest stable version was 4.6.10):
# wget http://sourceforge.net/projects/civicrm/files/civicrm-stable/4.6.10/civicrm-4.6.10-drupal.tar.gz/download -O civicrm-4.6.10-drupal.tar.gz
Unpack the archive:
# tar -xzvf civicrm-4.6.10-drupal.tar.gz
Assign the proper ownership:
# chown www-data: -R civicrm/
Make the default directory writable:
# chmod +w //var/www/html/drupal/sites/default
Now, log into your Drupal site with administrator level permissions. Then, point your web browser to the following URL: http://your_drupal_site/sites/all/modules/civicrm/install/index.php
You should see the CiviCRM installer screen. The installer will verify that you’ve downloaded the correct version of CiviCRM, and will check your server environment to make sure it meets CiviCRM requirements. It will then populate the database for CiviCRM as well as create your CiviCRM settings file (civicrm.settings.php).
Do not be alarmed from the read bar (like the picture below) with “Your database settings don’t appear to be correct.” message. This is expected because you haven’t entered the database details yet.
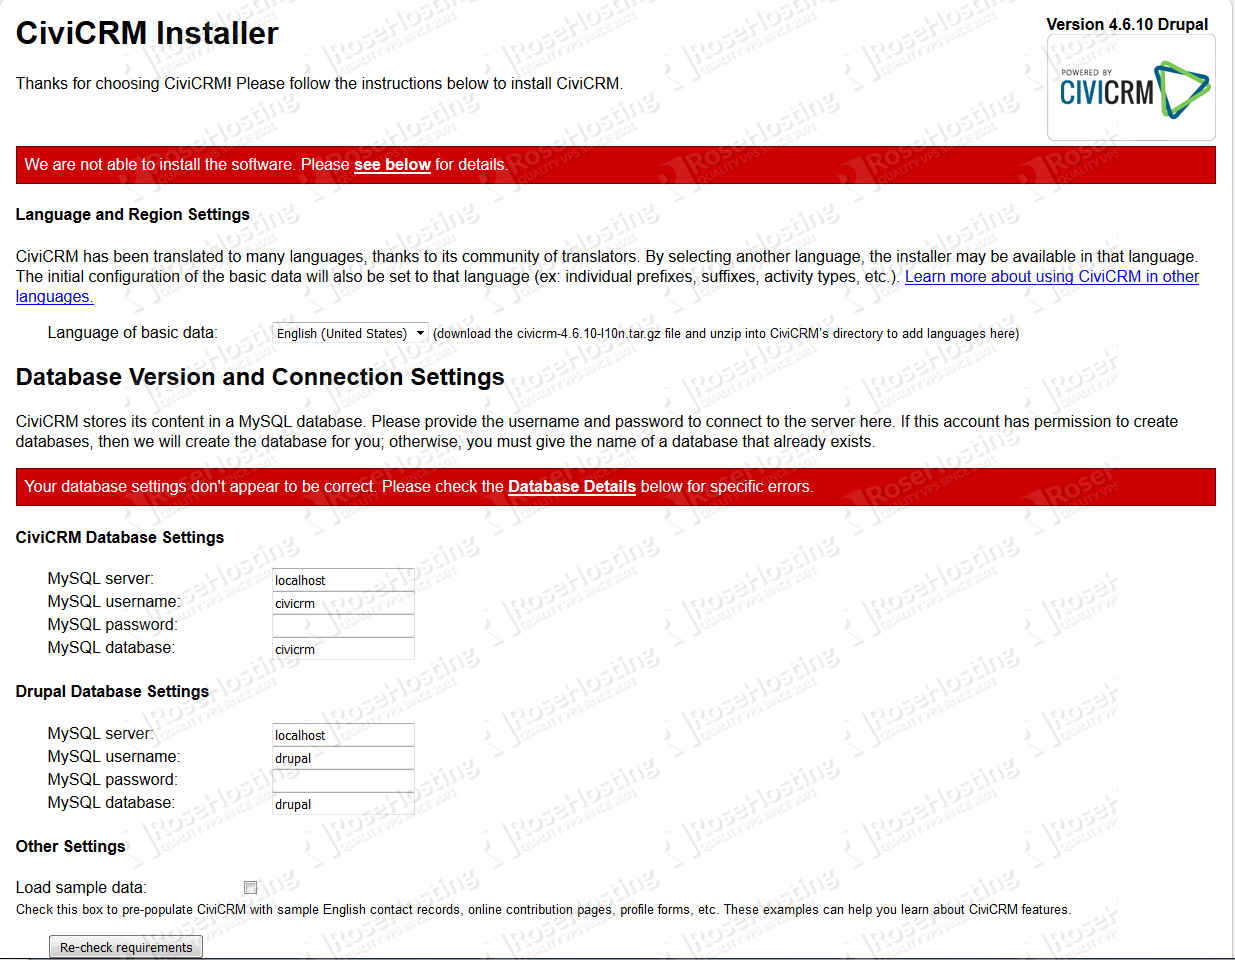
Fill in the the CiviCRM/Drupal database settings with the values of your newly created CiviCRM database and your Drupal installation database.
The Installer includes an option to load a set of sample contact, group, and relationship data by default. Sample data can provide a useful head-start in learning to use CiviCRM. So check the Loadsample data option if you want to test CiviCRM.
Now, click ‘Re-check requirements’. If everything is OK, you will see green banners telling you ‘You’re ready to install’ like the image below. Click on ‘Check Requirements and Install CiviCRM’ after which the installer will configure your databases, create the settings file and redirect you to your Drupal Home page.

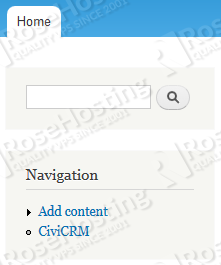
You can now access CiviCRM through a link in the left-hand navigation menu of the site. For reference check the picture below:
Congratulations, you have successfully deployed CiviCRM in conjunction with Drupal on your Ubuntu 14.04 VPS.
Of course you don’t have to do any of this if you use one of our Linux VPS Hosting services, in which case you can simply ask our expert Linux admins to do this for you. They are available 24×7 and will take care of your request immediately.
PS. If you liked this post please share it with your friends on the social networks using the buttons on the left or simply leave a reply below. Thanks.