 cPanel/WHM is the most popular Linux hosting control panel and it is widely used in shared hosting environments. In this tutorial, we’ll show you how to create a new cPanel account in WHM. It’s quite an easy process, all you have to do is fill the form with required information and submit it.
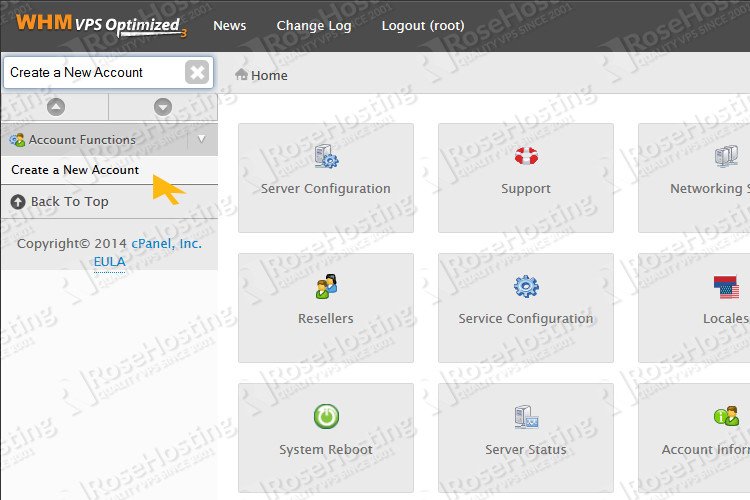
1. Log into WHM (https://<ip_address>:2087) using the root login details.
2. Type “Create a New Account” (without quotes) into the Search box in the upper left corner and click on that option when it comes up or scroll down to Account Functions > Create a New Account.
3. You will be taken to a page where you can enter all the details of your new account.
4. Domain Information
– Domain: Enter the name of the domain (without www) you would like to add to the cPanel.
– Username: WHM will use the domain you entered in the previous step to create a username for the cPanel account. You can use the one created by default or you can enter a username to your liking.
– Password: You can use the built-in password generator to create a password or enter your own password (at least eight characters, containing upper and lowercase alpha characters, numbers and symbols) .
– Re-type Password: If you entered your own password, you will have to confirm it manually.
– Email: WHM will send important information about the account to this email address. Please make sure you enter a valid email address.
5. Package
– Choose a Package from the drop down menu. This drop down will be empty if no package exists.
– If you don’t have any packages yet, select the “Select Options Manually” option and enter the settings manually. By default, most of the options are set to Unlimited, but feel free to customize it to your liking.
– If you want to save the manual settings as a new package, select the “Save Manual Settings as a Package” option and enter the new package name in the “Package Name” field.
6. Settings
– Dedicated IP: Generally, you don’t need to assign a dedicated IP to a cPanel account.
– Shell Access: Allowing shell access to shared servers can cause security issues. In general, it is a good idea not to use this option.
– CGI Access: In most cases, you should leave this option on.
– cPanel Theme: You can select a different cPanel theme from the drop down list, but it is best to stick with the default one.
– Locale: Select the appropriate locale for the user.
7. Reseller Settings
– Make the account a reseller: Select this box if you want to make the account a reseller.
– Make the account own itself (the user can modify the account): This option is pretty self-explanatory.
8. DNS Settings
– Enable DKIM on this account. : This box is checked by default and it will enable DKIM (email validation system).
– Enable SPF on this account: Select this box to enable SPF (another email validation system)
– Use the nameservers specified at the Domain’s Registrar. (Ignore locally specified name-servers.): This option is also self-explanatory.
– Overwrite any existing DNS zones for the account: When creating a new account, if a DNS zone exists WHM will not allow you to create the account until the zone is deleted, you should leave the box unchecked.
9. Mail Routing Settings
These settings are used to specify how mail will be routed for the new account. Our recommendation is to select the “Automatically Detect Configuration” option.
After you have filled in all the required information, click the “Create” button at the bottom of the page.
That’s it! You have successfully created a new cPanel account.
Of course you don’t have to do any of this if you use one of our Linux VPS Hosting services, in which case you can simply ask our expert Linux admins to set this up for you. They are available 24×7 and will take care of your request immediately. For updates, you can also check our post on How to Install cPanel and WHM on CentOS 7.
PS. If you liked this post please share it with your friends on the social networks using the buttons on the left or simply leave a reply below. Thanks.