In this tutorial, we will show you how to host a website on a shared hosting account. Hosting a website on our shared hosting plans is a very easy task, and if you carefully follow all the instructions provided below, you should have your website up and running in less than 10 minutes. This tutorial has been written for and tested on Linux servers with DirectAdmin and cPanel.
In order to connect your website on a shared hosting account, you will need to change the authoritative name servers of your domain name, or to change the A record of the domain name, and point it to the IP address of your shared hosting account.
Log in to your domain registrar and change the authoritative name servers of your domain name with the name servers provided in our welcome email. Or, log in to your domain registrar and modify the domain name’s A record to point the IP address of your shared hosting account. Please keep in mind that after setting the name servers or changing the A record of your domain name it may take up to 48 hours for the DNS changes to propagate throughout the Internet, but usually it propagates much faster.
How to Host a Website on a cPanel Shared Hosting Account
Open your favorite web browser and log in to your cPanel control panel to start managing your shared hosting account.
Once you have logged in, you should see a screen something like this:

If you already have a website, create a zip archive of your website files and upload the newly created archive file in the document root directory of your website (e.g. public_html). Once you are logged in to the cPanel web interface, click on the ‘File Manager’ icon available under ‘Files’ section and upload the zip archive file in the public_html directory of your shared hosting account. Once the archive of your website files is successfully uploaded, select the archive file and with the archive selected, click the ‘Extract’ icon from the top toolbar.
If your website has a database, you need to create a new MySQL database and MySQL user in cPanel, and import the database. To do so, click on the ‘MySQL Database’ icon under the ‘Databases’ section. Enter a name for the MySQL database next to the ‘New Database’ text box. To create a new MySQL user, go to ‘MySQL Users’ in the top-right corner of the page and create a new MySQL user by entering a username next to ‘Username’ text box. Generate a strong password for the newly create MySQL user by clicking on the ‘Generate Password’ button and enter the password in the ‘Password’ and ‘Password (Again)’ fields. Click on the ‘Create User’ button. Select the newly created MySQL username from the ‘User’ drop down selection box and select the MySQL database from the ‘Database’ drop down selection box, then click on the ‘Add’ button. On the next page, click on the ‘All Privileges’ check box and finally click on the ‘Make changes’ button.
Now you need to import the MySQL database. It is easiest to do so using phpMyAdmin. From the main cPanel menu, click on the ‘phpMyAdmin’ icon. Once logged into phpMyAdmin, click on the ‘Import’ tab and click on the ‘Choose File’ button, select the MySQL dump file created/stored on your local PC, click ‘Go’ and your database date should be imported into the newly created MySQL database. Depending on the CMS you used on your website, you may have to modify the MySQL username, password and database name in your website configuration.
If you don’t have a website yet, you can easily create a new one using Softaculous or RVSiteBuilder. Softaculous and RVSiteBuilder are integrated with all our cPanel hosting accounts. Softaculous and RVSiteBuilder are accessible from the main cPanel menu:
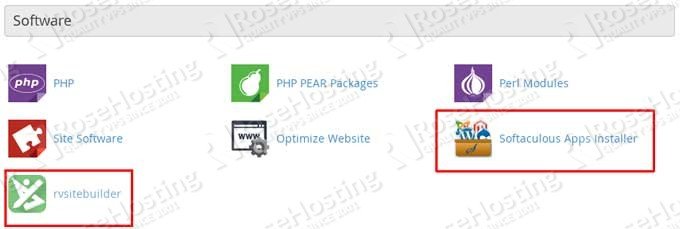
You can use Softaculous to install more than 440 software applications, like blogs, forums, social networking, e-commerce etc. You can install all of these apps using a few mouse clicks. Or, use RVSiteBuilder to create unique websites.
How to Host a Website on a DirectAdmin Shared Hosting Account
It is fairly easy to host a website on a shared hosting account using DirectAdmin control panel. Open your favorite web browser and log in to your DirectAdmin control panel. Once you have logged in to DirectAdmin, you should see a screen something like this:
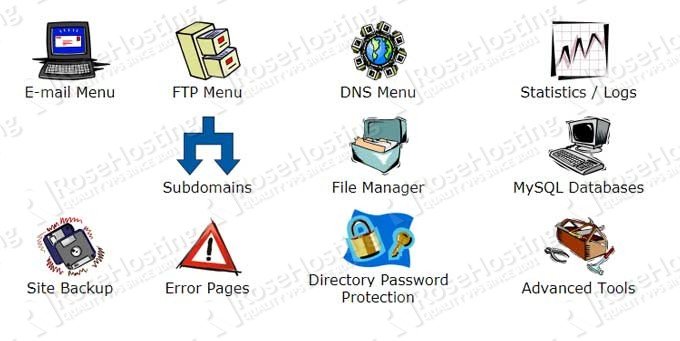
You can upload the website files using the ‘File Manager’ tool which is available from the main menu. You can also upload the website files using some FTP client like FileZilla or so. If your website has a database, you can import it using phpMyAdmin. First create a new MySQL database. From the main menu, click on the ‘MySQL databases’ icon. On the next page, click on the ‘Create a new Database’ hyperlink. Enter the database name, database username, click on the ‘Random’ button to generate a random password and finally click on the ‘Create’ button. Then, click on the ‘phpMyAdmin’ hyperlink and import the MySQL database. You may have to change the database name, database username and password in your website configuration file.
If you do not have a website yet, you can use Softaculous to install more than 440 software applications, or you can use RVSiteBuilder website building tool to create a unique website, similarly to cPanel. Softaculous and RVSiteBuilder are integrated with all our cPanel hosting accounts. Softaculous and RVSiteBuilder are accessible from the DirectAdmin ‘Advanced tools’ menu. Simply click on the ‘Advanced Tools’ icon from the main menu of DirectAdmin control panel and on the next page you can see all the advanced tools, including Softaculous and RVSiteBuilder:

Of course, you don’t have to do any of this, if you use one of our Optimized Web Hosting Solutions, in which case you can simply ask our expert Linux admins to help you with this. They are available 24×7 and will take care of your request immediately.
PS. If you liked this post on how to host a website on a shared hosting account, please share it with your friends on the social networks using the buttons on the left or simply leave a reply below. Thanks.