MySQL/MariaDB is one of the most popular database servers and is widely used by developers worldwide to build websites, both CMS-based, like WordPress, and framework-based, like CodeIgniter and Laravel. phpMyAdmin is an application that serves as a front-end for MySQL/MariaDB database management, providing a graphical interface. phpMyAdmin simplifies MySQL/MariaDB database administration by allowing access via a browser with a graphical interface. In this article, we will walk you through installing phpMyAdmin on Debian 13.
Table of Contents
Prerequisites
- A Debian 13 VPS
- SSH root access or a regular system user with sudo privileges
Conventions
# – given commands should be executed with root privileges either directly as a root user or by use of sudo command
$ – given commands should be executed as a regular user
Step 1. Update the System
Let’s log in to your Debian 13 VPS through SSH as a root user or as a regular user with sudo privileges.
ssh root@IP_Address -p Port_numberIf you cannot log in as root, remember to substitute “root” with a user that has sudo privileges. Additionally, change “IP_Address” and “Port_Number”; make sure they match your server’s respective IP address and SSH port.

You can check whether you have the correct Debian version installed on your server with the following command:
$ lsb_release -aYou should get this output:
No LSB modules are available.
Distributor ID: Debian
Description:  Debian GNU/Linux 13 (trixie)
Release:  13
Codename: trixie
Step 2. Install PHP
According to their documentation page at https://www.phpmyadmin.net/downloads/, the latest version of phpMyAdmin is compatible with PHP 7.2 and newer and MySQL/MariaDB 5.5 and newer. Debian 13 ships with PHP 8.4; let’s install it and its required extensions.
# apt install php-{fpm,xml,intl,common,json,curl,mbstring,mysql,gd,imagick,zip,opcache}That’s it, PHP and its extensions have been installed. At this point, PHP-FPM is also running.
Step 3. Install and Secure MariaDB
In this step, we are going to install MariaDB server, then secure the installation.
# apt install mariadb-server mariadb-client -yOnce installed, we need to run the command below to create a password for our MySQL root user.
# mariadb-secure-installation After executing the command above, you will be prompted for these:
Set a strong SQL root password
Remove anonymous users
Disable remote root login
Remove the test database
Reload privileges
Make sure to use a strong password. You will need to type the password twice, and you will not see anything as you type; this is expected. When prompted for the Yes/No questions, simply hit ENTER, and when completed, you will see this message:
All done!  If you've completed all of the above steps, your MariaDB
installation should now be secure.

Thanks for using MariaDB!
Step 4. Install and Configure Nginx
In this tutorial, we will install and use Nginx, not Apache. Run the following command to install it.
# apt -y install nginxUpon installation, Nginx will run automatically. It is also configured to start automatically upon reboot.
Now, let’s create an Nginx server block for the domain name you will use for accessing Owncloud. For example, we will use yourdomain.com
# nano /etc/nginx/conf.d/phpmyadmin.conf Insert the following into that file.
server {
    listen 80;

    server_name pma.yourdomain.com;
    root /usr/share/phpmyadmin;

    index index.php index.html index.htm;


    location ~ ^/phpmyadmin/(doc|sql|setup)/ {
        deny all;
    }


    location / {
        try_files $uri $uri/ =404;
    }


    location ~ \.php$ {
        include snippets/fastcgi-php.conf;

        fastcgi_pass unix:/run/php/php8.4-fpm.sock;

        fastcgi_param SCRIPT_FILENAME $document_root$fastcgi_script_name;
        include fastcgi_params;
    }


    location ~ /\.ht {
        deny all;
    }
}
Step 5. Install and Configure phpMyAdmin
In Debian 13, the APT repository, the phpMyAdmin package is available. We can use this repository to install it. Let’s run the command below now.
# apt install phpmyadmin -yDuring the installation, you will be asked some questions to configure phpMyAdmin; just hit ENTER and wait until the installation finishes.
Now, let’s restart nginx.
# systemctl restart nginxAt this point, you should be able to access phpMyAdmin at http://pma.yourdomain.com
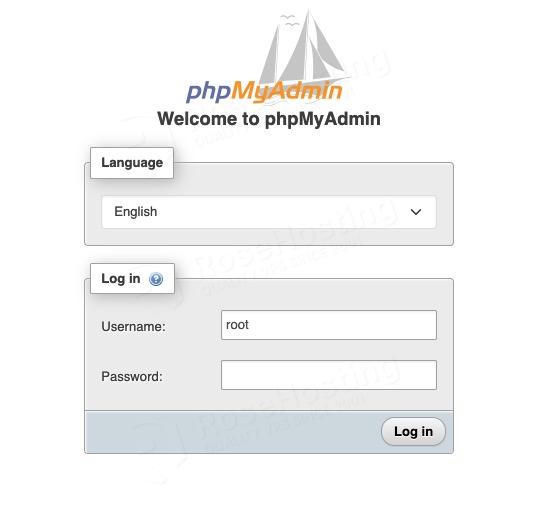
You can log in using the root credentials; you created the password for ‘root’ in step 3.
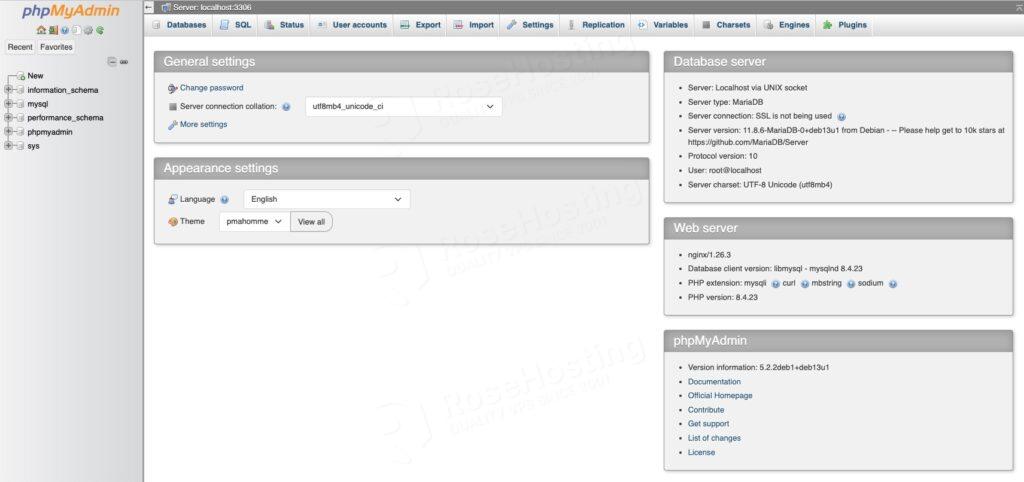
You will see this once logged in.
Now, we need to configure phpMyAdmin to run on HTTPS. Let’s install Certbot to generate an SSL certificate for this. Certbot is a tool to obtain SSL certificates from Let’s Encrypt and optionally) easier and auto-enable HTTPS on your server. It can also act as a client for any other CA certificates that use the ACME protocol.
# apt install python3-certbot-nginxOnce installed, simply run this command:
# certbotAnswer the questions; at the end, you will get this message after an SSL is installed:
Saving debug log to /var/log/letsencrypt/letsencrypt.log
Enter email address or hit Enter to skip.
 (Enter 'c' to cancel): you@yourdomain.com

- - - - - - - - - - - - - - - - - - - - - - - - - - - - - - - - - - - - - - - -
Please read the Terms of Service at:
https://letsencrypt.org/documents/LE-SA-v1.8-July-06-2026.pdf
You must agree in order to register with the ACME server. Do you agree?
- - - - - - - - - - - - - - - - - - - - - - - - - - - - - - - - - - - - - - - -
(Y)es/(N)o: y

- - - - - - - - - - - - - - - - - - - - - - - - - - - - - - - - - - - - - - - -
Would you be willing, once your first certificate is successfully issued, to
share your email address with the Electronic Frontier Foundation, a founding
partner of the Let's Encrypt project and the non-profit organization that
develops Certbot? We'd like to send you email about our work encrypting the web,
EFF news, campaigns, and ways to support digital freedom.
- - - - - - - - - - - - - - - - - - - - - - - - - - - - - - - - - - - - - - - -
(Y)es/(N)o: n
Account registered.

Which names would you like to activate HTTPS for?
We recommend selecting either all domains, or all domains in a VirtualHost/server block.
- - - - - - - - - - - - - - - - - - - - - - - - - - - - - - - - - - - - - - - -
1: pma.yourdomain.com
- - - - - - - - - - - - - - - - - - - - - - - - - - - - - - - - - - - - - - - -
Select the appropriate numbers separated by commas and/or spaces, or leave input
blank to select all options shown (Enter 'c' to cancel): 1
Requesting a certificate for pma.yourdomain.com

Successfully received certificate.
Certificate is saved at: /etc/letsencrypt/live/pma.yourdomain.com/fullchain.pem
Key is saved at:         /etc/letsencrypt/live/pma.yourdomain.com/privkey.pem
This certificate expires on 2026-10-06.
These files will be updated when the certificate renews.
Certbot has set up a scheduled task to automatically renew this certificate in the background.

Deploying certificate
Successfully deployed certificate for yourdomain.com to /etc/nginx/conf.d/phpmyadmin.conf
Congratulations! You have successfully enabled HTTPS on https://pma.yourdomain.com

- - - - - - - - - - - - - - - - - - - - - - - - - - - - - - - - - - - - - - - -
If you like Certbot, please consider supporting our work by:
 * Donating to ISRG / Let's Encrypt:   https://letsencrypt.org/donate
 * Donating to EFF:                    https://eff.org/donate-le
- - - - - - - - - - - - - - - - - - - - - - - - - - - - - - - - - - - - - - - -
Wrapping Everything Up
Congratulation! You followed this article and have now successfully installed phpMyAdmin on Debian 13.
Of course, you don’t have to spend your time following this article to install phpMyAdmin on Debian 13 if you have an active Debian VPS Hosting service with us, in which case you can simply ask our expert Linux admins to install phpMyAdmin for you. Our admins are available 24×7 and will respond to your request immediately.
If you liked this post on how to install phpMyAdmin on Debian 13, please share it with your friends or leave a comment below.