
In this tutorial, we will show you how to install Authentik on Ubuntu 26.04 with PostgreSQL and Redis. Authentik is an open-source identity provider that provides centralized authentication and access management for web applications and services. It supports single sign-on (SSO), multi-factor authentication (MFA), and user management, letting users securely access multiple applications with one account. Authentik works with PostgreSQL, Redis, and Docker to provide a complete authentication platform. PostgreSQL stores persistent data, including users, configurations, and authentication-related information. Redis supports caching and background task processing, helping Authentik manage operations efficiently. Docker runs Authentik and its supporting services in isolated containers, while Docker Compose manages them through a single configuration file.
This setup will take about 20 minutes. Let’s get things working!
Table of Contents
Prerequisites
- A server running Ubuntu 26.04 OS
- User privileges: root or a non-root user with sudo privileges
Step 1. Update your system
Before installing Authentik, we will update the system packages to the latest available versions. Run the following command in your Ubuntu 26.04 terminal:

apt update -y && apt upgrade -y
Step 2. Install Docker
To install Docker, first we need to install some dependencies:
apt install apt-transport-https software-properties-common ca-certificates -y
Next, add the Docker GPG key:
curl -fsSL https://download.docker.com/linux/ubuntu/gpg | gpg --dearmor -o /usr/share/keyrings/docker-archive-keyring.gpg
Next, we add the repository:
echo "deb [arch=amd64 signed-by=/usr/share/keyrings/docker-archive-keyring.gpg] https://download.docker.com/linux/ubuntu $(lsb_release -cs) stable" | sudo tee /etc/apt/sources.list.d/docker.list > /dev/null
Once the repo is added, update the system and install Docker:
apt update -y

apt install docker-ce docker-ce-cli containerd.io docker-buildx-plugin docker-compose-plugin -y
Once the installation is complete, start and enable the Docker service:
systemctl start docker && systemctl enable docker
To check the status of the Docker service, execute the command below:
systemctl status docker
You should get the following output:
root@host:~# systemctl status docker
● docker.service - Docker Application Container Engine
     Loaded: loaded (/usr/lib/systemd/system/docker.service; enabled; preset: enabled)
     Active: active (running) since Wed 2026-10-14 19:21:46 CDT; 33s ago
 Invocation: 77d5b10d4c66410cb1d344be11001b5e
TriggeredBy: ● docker.socket
       Docs: https://docs.docker.com
   Main PID: 23982 (dockerd)
      Tasks: 10
     Memory: 37.8M (peak: 38.2M)
        CPU: 1.582s
     CGroup: /system.slice/docker.service
             └─23982 /usr/bin/dockerd -H fd:// --containerd=/run/containerd/containerd.sock
Step 2: Create the authentik Directory and Environment File
Create a dedicated project directory and generate secure random keys for PostgreSQL and authentik:
mkdir -p /opt/authentik && cd /opt/authentik
Next, generate secure secrets and append them to the .env configuration file:
echo "AUTHENTIK_SECRET_KEY=$(openssl rand -base64 36)" >> .env
echo "PG_PASS=$(openssl rand -base64 24)" >> .env
Next, we need to append the database configuration credentials we want to use:
cat <> .env
PG_USER=authentik
PG_NAME=authentik
COMPOSE_PORT_HTTP=9000
COMPOSE_PORT_HTTPS=9443
EOF
The content of the .env file should look like this, but with different credentials of your choice:
AUTHENTIK_SECRET_KEY=Vn1ce04IRPEXeOtAx8xzrmYc1SD5BmZuJ88FYO0uVbn6dtHF
PG_PASS=lzWIDKdm7IdZUmI2iEgT3/bMIEzcp4LO
PG_USER=authentik
PG_NAME=authentik
COMPOSE_PORT_HTTP=9000
COMPOSE_PORT_HTTPS=9443
Step 3. Create the Docker Compose File
Create a docker-compose.yml file inside /opt/authentik using your favorite text editor and paste the following lines of code:
version: '3.8'

services:
  postgresql:
    image: postgres:16-alpine
    restart: unless-stopped
    healthcheck:
      test: ["CMD-SHELL", "pg_isready -U $${POSTGRES_USER} -d $${POSTGRES_DB}"]
      interval: 35s
      timeout: 5s
      retries: 5
    volumes:
      - database:/var/lib/postgresql/data
    environment:
      POSTGRES_PASSWORD: ${PG_PASS}
      POSTGRES_USER: ${PG_USER}
      POSTGRES_DB: ${PG_NAME}

  redis:
    image: redis:alpine
    command: --save 60 1 --loglevel warning
    restart: unless-stopped
    healthcheck:
      test: ["CMD-SHELL", "redis-cli ping | grep PONG"]
      interval: 35s
      timeout: 3s
      retries: 5
    volumes:
      - redis:/data

  server:
    image: ghcr.io/goauthentik/server:2026.8.4
    restart: unless-stopped
    command: server
    environment:
      AUTHENTIK_SECRET_KEY: ${AUTHENTIK_SECRET_KEY}
      AUTHENTIK_REDIS__HOST: redis
      AUTHENTIK_POSTGRESQL__HOST: postgresql
      AUTHENTIK_POSTGRESQL__USER: ${PG_USER}
      AUTHENTIK_POSTGRESQL__NAME: ${PG_NAME}
      AUTHENTIK_POSTGRESQL__PASSWORD: ${PG_PASS}
    volumes:
      - ./media:/media
      - ./templates:/templates
    ports:
      - "${COMPOSE_PORT_HTTP:-9000}:9000"
      - "${COMPOSE_PORT_HTTPS:-9443}:9443"
    depends_on:
      postgresql:
        condition: service_healthy
      redis:
        condition: service_healthy

  worker:
    image: ghcr.io/goauthentik/server:2026.8.4
    restart: unless-stopped
    command: worker
    environment:
      AUTHENTIK_SECRET_KEY: ${AUTHENTIK_SECRET_KEY}
      AUTHENTIK_REDIS__HOST: redis
      AUTHENTIK_POSTGRESQL__HOST: postgresql
      AUTHENTIK_POSTGRESQL__USER: ${PG_USER}
      AUTHENTIK_POSTGRESQL__NAME: ${PG_NAME}
      AUTHENTIK_POSTGRESQL__PASSWORD: ${PG_PASS}
    user: root
    volumes:
      - /var/run/docker.sock:/var/run/docker.sock
      - ./media:/media
      - ./templates:/templates
      - ./certs:/certs
    depends_on:
      postgresql:
        condition: service_healthy
      redis:
        condition: service_healthy

volumes:
  database:
    driver: local
  redis:
    driver: local
Save the file and close it.
Step 4. Start the Authentik Stack
Run Docker Compose to pull the container images and start PostgreSQL, Redis, the Authentik server, and the background worker in detached mode:
docker compose pull && docker compose up -d
Once the containers are pulled and started, you should receive the following output:
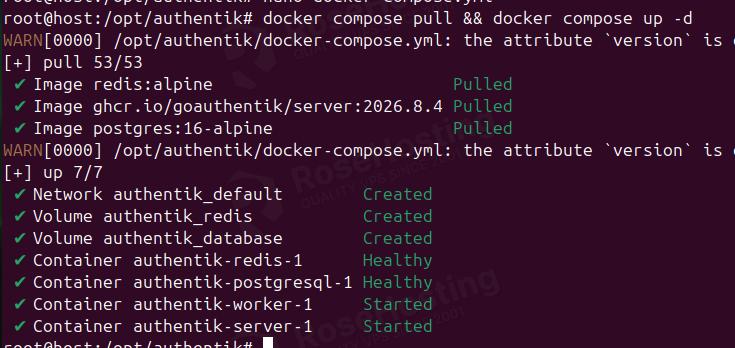
To check the status of the containers with formatted output:
docker ps -a --format "table {{.Names}}\t{{.Image}}\t{{.Status}}\t{{.Ports}}"
The output should look like this:

Step 5: Complete Initial Setup via Web Browser
Open your web browser and navigate to http://YourServerIPAddress:9000 to set up Email, password, and URL:
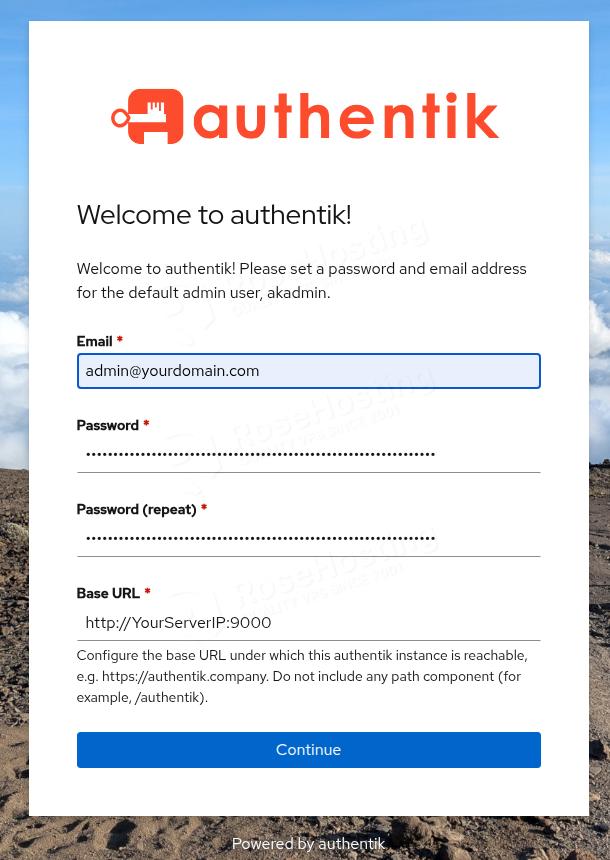
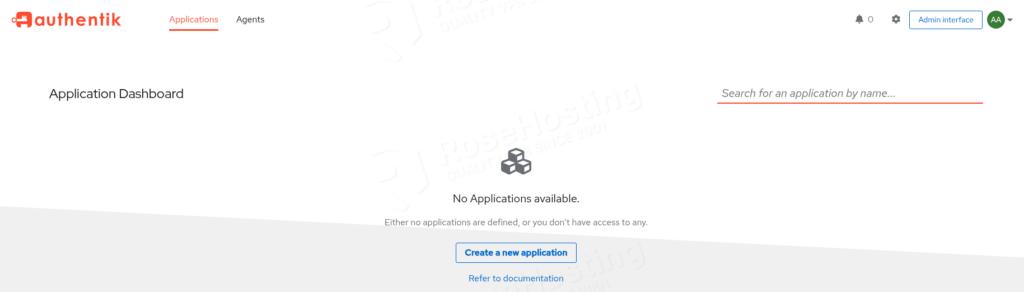
Once done, click the Continue button and you will be redirected to the Authentik admin dashboard:
Conclusion
This Docker-based setup successfully deploys Authentik on Ubuntu 26.04, pairing it with PostgreSQL for relational data persistence and Redis for efficient caching and session management. Utilizing Docker Compose simplifies the orchestration of the server, worker, and database components, ensuring isolated environments and easy version upgrades. By securing communication strings via local environment configurations, this stack creates a reliable, self-hosted single sign-on (SSO) and identity platform. You now have a highly scalable foundation to manage user authentication, enforce access policies, and securely integrate with your favorite applications via OAuth2, OIDC, or SAML.
That’s it. You’ve successfully installed Authentik with Docker Compose, PostgreSQL, and Redis on Ubuntu 26.04.
If you’re having trouble and aren’t familiar with Linux, you don’t have to install it yourself. You can always contact our technical support. Just sign up for one of our monthly management plans and submit a support ticket. We are available 24/7 and will handle your request immediately.
If you liked this post teaching you how to install Authentik on Ubuntu 26.04, please share it with your friends or leave a comment below.