
Bitwarden is a password management application that is increasingly popular among internet users. This application allows users to store their passwords securely and easily access them from various devices. Bitwarden also allows users to securely share passwords with others. We can choose to share access to our Bitwarden account or only share specific passwords with people we trust. This feature is especially useful for families or teams working together. In this article, we will show you how to install Bitwarden on Debian 13.
Table of Contents
Prerequisites
- A fresh Debian 13 server
- SSH root access or a user with sudo privileges is required
Conventions
# – given commands should be executed with root privileges either directly as a root user or by use of sudo command
$ – given commands should be executed as a regular user
Step 1. Install Dependencies
We need to install some dependencies to install Bitwarden in our Debian 13 system. Let’s install them by running the command below.
# apt install apt-transport-https ca-certificates curl gnupg-agent -y
Step 2. Install Docker
In this step, we will install Docker from their repository. Before installing it, we need to add and configure the repository first.
# install -m 0755 -d /etc/apt/keyrings
# curl -fsSL https://download.docker.com/linux/debian/gpg -o /etc/apt/keyrings/docker.asc
# chmod a+r /etc/apt/keyrings/docker.asc
It’s time to add the repository to the apt sources:
# echo \
  "deb [arch=$(dpkg --print-architecture) signed-by=/etc/apt/keyrings/docker.asc] https://download.docker.com/linux/debian \
  $(. /etc/os-release && echo "$VERSION_CODENAME") stable" | \
  tee /etc/apt/sources.list.d/docker.list > /dev/null
Do not forget to refresh the local package index with the latest information.
# apt update
We should be able to install Docker packages now, so we will install the latest version.
# apt install docker-ce docker-ce-cli containerd.io docker-buildx-plugin docker-compose-plugin
After the packages are installed, we can check the version of Docker installed with the following command:
# docker --version
You will get the following output:
Docker version 28.3.3, build 980b856
Step 3. Add a System User
In this article, we will use a specific system user to run Bitwarden. Let’s create a new user called ‘bitwarden’
# useradd -G docker,sudo -s /bin/bash -m -d /opt/bitwarden bitwarden
Now, let’s give the user a password
# passwd bitwarden
This user will be used to execute the commands in the next steps.
Step 4. Get Installation ID and Key
Now, go to https://bitwarden.com/host/ to get an installation ID and KEY. On that page, you will be prompted to type your email address and choose the data region. After typing your email address and choosing the data region, you can click on the Submit button. The Bitwarden system will print the installation ID and key. Please save a note for the installation ID and KEY, we need them to be able to install Bitwarden on our Ubuntu system
Installation ID:
6e3f2da5-1dba-4531-a7b7-b333009d88f4

Installation Key:
NbFrWNoXvz8Uapf9URj4
Note that you need to get your own installation ID and key. You cannot use the one provided as a sample in this article.
Step 5. Install Bitwarden
In this step, let’s switch to the Bitwarden user we created earlier.
# su - bitwardenThen, download the installation script.
$ wget https://go.btwrdn.co/bw-sh -O bitwarden.shThe downloaded file should be given a permission to be executed.
$ chmod +x bitwarden.shThis installation requires an empty server; the installation script will install the web server on Docker. So, make sure you do not have an active web server. We can now start the installation.
$ ./bitwarden.sh installYou will see the following output on your screen. Make sure to answer the questions.
| |__ (_) |___      ____ _ _ __ __| | ___ _ __
| '_ \| | __\ \ /\ / / _` | '__/ _` |/ _ \ '_ \
| |_) | | |_ \ V  V / (_| | | | (_| |  __/ | | |
|_.__/|_|\__| \_/\_/ \__,_|_|  \__,_|\___|_| |_|

Open source password management solutions
Copyright 2015-2025, 8bit Solutions LLC
https://bitwarden.com, https://github.com/bitwarden

===================================================

bitwarden.sh version 2024.12.1
Docker version 28.3.3, build 980b856
Docker Compose version v2.39.1

(!) Enter the domain name for your Bitwarden instance (ex. bitwarden.example.com):

(!) Do you want to use Let's Encrypt to generate a free SSL certificate? (y/n):

(!) Enter your email address (Let's Encrypt will send you certificate expiration reminders):
Wait until it finishes, then the installation will ask you this question:
(!) Enter the database name for your Bitwarden instance (ex. vault): You can name it anything; in this article, we use ‘vault’.
Next, you need to enter the installation ID and key.
(!) Enter your installation id (get at https://bitwarden.com/host):

(!) Enter your installation key:

(!) Enter your region (US/EU) [US]:
After this, it will take some time to complete. Then, you will see this message:
Installation complete

If you need to make additional configuration changes, you can modify
the settings in `./bwdata/config.yml` and then run:
`./bitwarden.sh rebuild` or `./bitwarden.sh update`

Next steps, run:
`./bitwarden.sh start`
At this point, there is nothing we need to modify. Let’s start Bitwarden now.
./bitwarden.sh startPlease wait for a few moments until Bitwarden starts. You will see an output similar to this:
Bitwarden is up and running!
===================================================

visit https://bitwarden.yourdomain.com
to update, run `./bitwarden.sh updateself` and then `./bitwarden.sh update`
That’s it! You can now access Bitwarden at https://bitwarden.yourdomain.com
Step 6. Configure Bitwarden
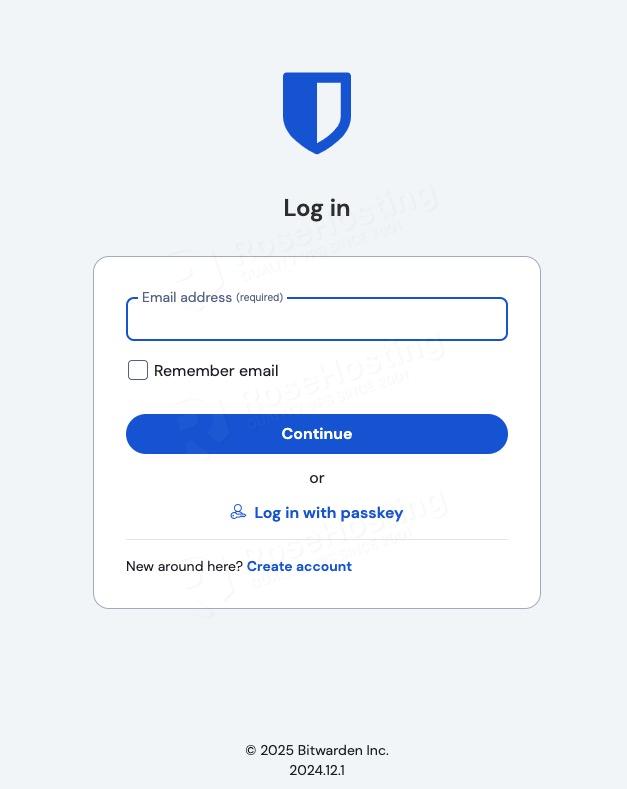
When accessing Bitwarden at https://bitwarden.yourdomain.com, you will see a login page. You cannot log in now because you do not have the necessary credentials. Let’s create an account now, without it, we cannot access the backend. Click on the “Create account” now.
You will be brought to this page as seen below. Make sure to complete them and remember to create a strong password, at least 12 characters long.
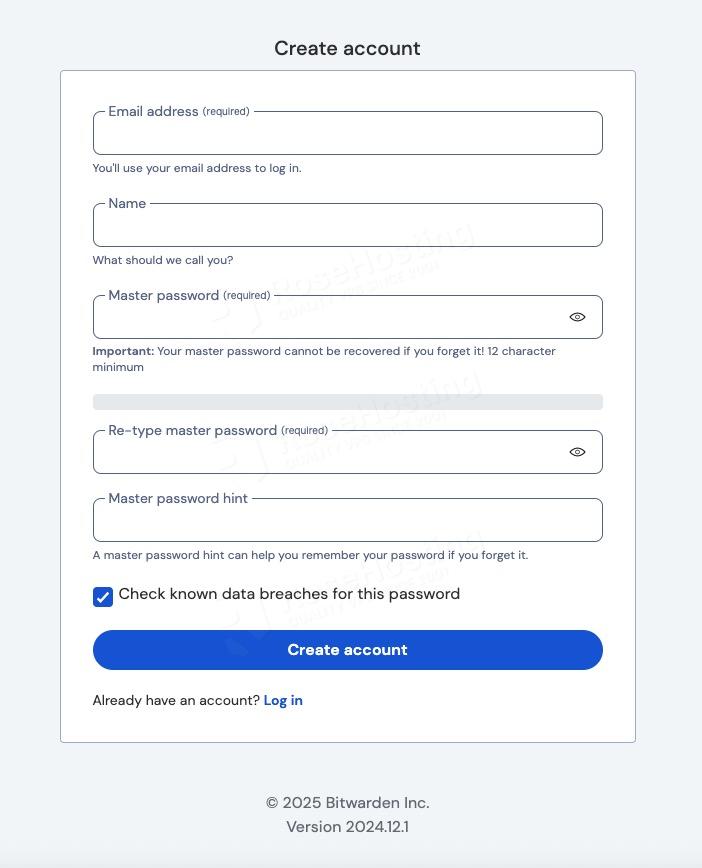
Once you fill in all the required fields, you can submit it by clicking the ‘Create Account’ button. Next, you will be redirected to the login page again. You can use this master password to log in to the Bitwarden backend.
In the dashboard, you will see this:

That’s it, you have successfully installed Bitwarden on Debian 13.
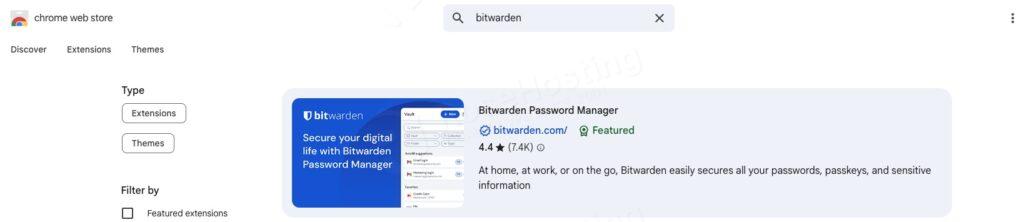
To make use of Bitwarden, you can install the Bitwarden client, such as the Bitwarden extension for Chrome. You should be able to find the extension at https://chromewebstore.google.com/category/extensions
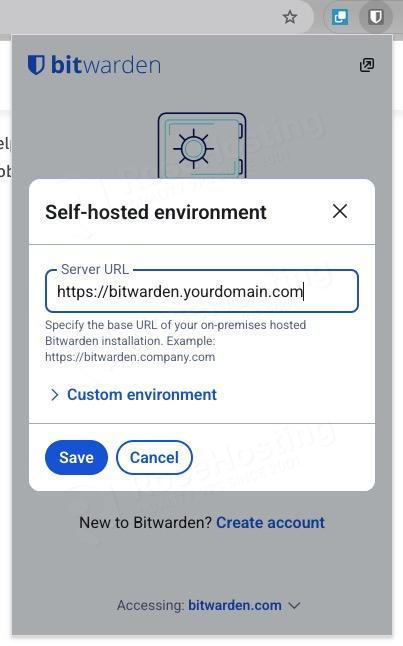
After the extension is installed, you can connect it to your Bitwarden server.
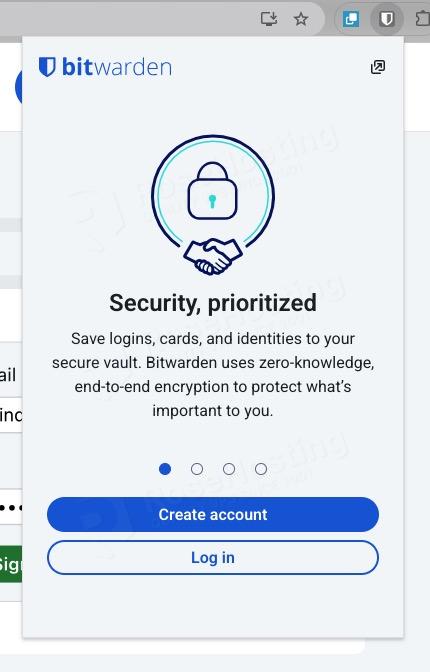
Make sure to choose the ‘self-hosted’ server to connect to your Bitwarden server.
Once connected, you will see the empty vault.

It’s empty because you have not added new passwords. You can add them later.
Congratulations
That’s it all! You have successfully installed Bitwarden on Debian 13.
If you are one of our customers and use our managed Bitwarden hosting, you don’t have to follow this tutorial and install Bitwarden on Debian 13 yourself; our experienced Linux admins will set up and configure a Bitwarden VPS for you. They are available 24×7 and will take care of your request immediately. Simply submit a ticket.
PS. If you liked this post, please share it with your friends or simply leave a comment below. Thanks.