Docker is an open-source application that provides lightweight operating-system-level virtualization through the use of containers. The key benefit of Docker is that it allows users to package an application with all of its dependencies into a standardized unit for software development. Docker Engine is available in Community Edition (CE) and Enterprise Edition (EE). In this guide, we will do the installation of Docker Community Edition on Debian 9.
Table of Contents
Requirements
- For the purposes of this tutorial, we will be using a Debian 9 Server.
- Full SSH root access or a user with sudo privileges is also required.
Step 1: Connect via SSH
Connect to your server via SSH as the root user using the following command:
ssh root@IP_ADDRESS -p PORT_NUMBER
Remember to replace “IP_ADDRESS” and “PORT_NUMBER” with your actual server IP address and SSH port number. Replace “root” with your admin username if you’re not planning on using the root account.
Before starting with the installation, we need to update the OS packages to their latest versions.
We can do this by running the following commands:
$ apt-get update
$ apt-get upgrade
Once the upgrade is complete, we can move on to the next step.
Step 2: Install Dependency packages
Start the installation by ensuring that all the packages used by docker as dependencies are installed.
apt-get install -y apt-transport-https ca-certificates curl gnupg2 software-properties-common build-essential
Step 3: Setting Up Docker Repository
To add the Docker repository to our server, we need to add the GPG keys first with the following commands:
curl -fsSL https://download.docker.com/linux/debian/gpg | sudo apt-key add -
Once added, add the repository pointing to ‘stable’ update channel.
add-apt-repository "deb [arch=amd64] https://download.docker.com/linux/debian $(lsb_release -cs) stable"
We can now update our packages, which should include the repository from Docker.
apt-get update
After applying command, you should see the repository link added:
Get:5 https://download.docker.com/linux/debian stretch InRelease [44.8 kB]
Get:7 https://download.docker.com/linux/debian stretch/stable amd64 Packages [8,437 B]
Step 4: Installing Docker CE
After setting up the repository, we can now install the Docker CE, as well as the Docker CLI by running the following command:
apt-get install -y docker-ce docker-ce-cli
This might take some time as it will also install any additional libraries that it requires.
Once the installation is done, verify that the docker service is running by typing:
systemctl status docker
Output:
docker.service - Docker Application Container Engine
   Loaded: loaded (/lib/systemd/system/docker.service; enabled; vendor preset: enabled)
   Active: active (running) since Sun 2019-07-14 03:40:16 EDT; 38s ago
     Docs: https://docs.docker.com
 Main PID: 4434 (dockerd)
   CGroup: /system.slice/docker.service
           └─4434 /usr/bin/dockerd -H fd:// --containerd=/run/containerd/containerd.sock
You can also check and verify the Docker version using:
docker -v
Output:
Docker version 18.09.7, build 2d0083d
Finally, make sure that the docker service will run at boot:
systemctl enable docker
The docker the group is created but no users are added. Add your normal user to the group to run docker commands as a non-privileged user.
sudo usermod -aG docker $USER
Step 5: Testing Docker CE
Let’s now test if we can run Docker containers. You can test your Docker installation by running the classic “Hello World”.
$ docker run hello-world

Hello from Docker.
This message shows that your installation appears to be working correctly.
...
You can use the docker images command to see a list of all images on your system.
REPOSITORY          TAG                 IMAGE ID            CREATED             SIZE
hello-world         latest              fce289e99eb9        6 months ago        1.84kB
The docker ps command shows you all containers that are currently running.
CONTAINER ID IMAGE COMMAND CREATED STATUS PORTS NAMES
Since no containers are running, we see a blank line. Let’s try a more useful variant: docker ps -a
CONTAINER ID        IMAGE               COMMAND             CREATED             STATUS                      PORTS               NAMES
1a9048235446        hello-world         "/hello"            24 minutes ago      Exited (0) 24 minutes ago                       amazing_bassi
Throughout this tutorial, you wll run docker run multiple times and leaving stray containers will eat up disk space. Hence, as a rule of thumb, I clean up containers once I’m done with them. To do that, you can run the docker rm command. Just copy the container IDs from above and paste them alongside the command.
docker rm 1a9048235446
1a9048235446
In later versions of Docker, the docker container prune command can be used to achieve the same effect.
$ docker container prune
WARNING! This will remove all stopped containers.
Are you sure you want to continue? [y/N] y
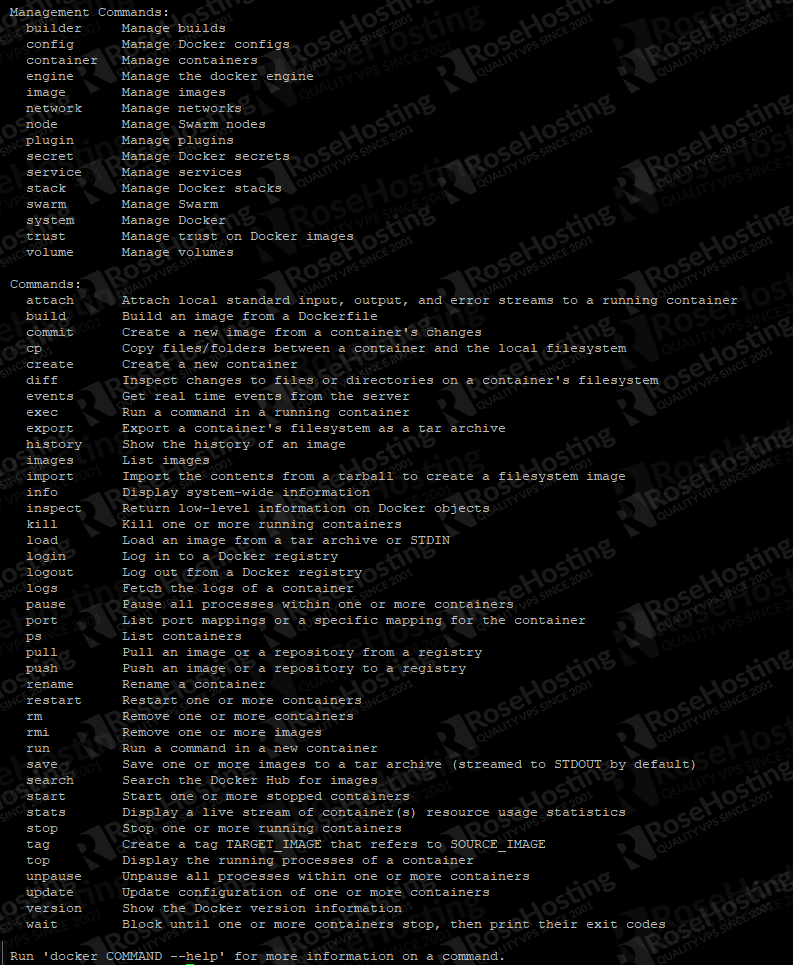
If you want to see the options available to a specific command execute the following command:
docker --help
The output should be similar to this:
That’s it! Docker CE has been successfully installed on your Debian 9 server.
Of course, you don’t need to do any of this if you use one of our Linux VPS Hosting services, in which case you can simply ask our expert Linux admins to install Docker CE onto your Managed Debian 9 VPS for you. They are available 24×7 and will take care of your request immediately.
PS. If you liked this post, please share it with your friends on the social networks using the buttons below, or simply leave a comment in the comment section. Thanks.