
Joomla is one of the most popular CMS. It was initially released in 2005 as an alternative to WordPress. This CMS may be better suited for more experienced website users because it’s more flexible in both the back and front end. Unlike WordPress, Joomla has a more powerful design toolkit and is suitable for experienced users to make the most of its features. It is very flexible, allowing users to create various types of websites, including personal, business, e-commerce, and other websites. In this article, we will show you how to install Joomla on AlmaLinux 10.
Table of Contents
Prerequisite
- An AlmaLinux 10 VPS.
- SSH access with sudo privileges, or root access.
Conventions
# – given commands should be executed with root privileges either directly as a root user or by use of sudo command
$ – given commands should be executed as a regular user
Step 1. Install PHP
In this article, we will install Joomla 5.3, which requires at least PHP 8.1. AlmaLinux 10 ships with PHP 8.3, so we can simply install PHP and the required extensions for Joomla installation.
# dnf install php-{bcmath,common,cli,curl,fpm,gd,json,intl,mbstring,mysqlnd,pear,simplexml,soap,xml,zip,zlib}
Once installed, we can start the PHP-FPM service.
# systemctl enable --now php-fpmFirst, we need to turn off the PHP output_buffering.
# nano /etc/php.iniIn this file, locate output_buffering = 4096 then replace it with output_buffering = off
Save the file, then exit from the editor.
Now, we will create a PHP-FPM pool for our Joomla website.
# nano /etc/php-fpm.d/joomla.conf Paste the following into the file.
[joomla]

user = nginx
group = nginx

listen = /run/php-fpm/joomla.sock

listen.acl_users = apache,nginx
listen.owner = nginx
listen.group = nginx

pm = ondemand
pm.max_children = 50
pm.process_idle_timeout = 5s
Save the file, then exit. We need to restart PHP-FPM to apply the changes.
# systemctl restart php-fpmStep 2. Install and Configure Nginx
Nginx is a fast and secure, one of the most popular and widely used web servers in the world. In this step, we are going to install Nginx as the web server essential for Joomla on AlmaLinux 10.
# dnf install nginx -yNginx is not running automatically upon installation. Let’s start it now and make sure it starts upon server reboot.
# systemctl enable --now nginxThen, let’s create an nginx server block or virtual host.
# nano /etc/nginx/conf.d/joomla.yourdomain.com.confInsert this into the file
upstream php-handler {
    server unix:/run/php-fpm/joomla.sock;
}
server {
    listen 80;
    server_name joomla.yourdomain.com;

    root /var/www/html/joomla;
    index index.php;

    server_tokens off;
    access_log /var/log/nginx/joomla_access.log;
    error_log /var/log/nginx/joomla_error.log;

    location / {
        try_files $uri $uri/ /index.php?$args;
        }
    location ~ \.php$ {
        try_files $uri =404;
        include /etc/nginx/fastcgi_params;
        fastcgi_read_timeout 3600s;
        fastcgi_buffer_size 128k;
        fastcgi_buffers 4 128k;
        fastcgi_param SCRIPT_FILENAME $document_root$fastcgi_script_name;
        fastcgi_pass php-handler;
        fastcgi_index index.php;
            }
        }
Save the file, then exit from the editor. We can now restart the nginx service to apply the changes.
# systemctl restart nginxStep 3. Install SSL Certificate
We will install the free SSL certificate from Let’s Encrypt using certbot. Certbot is an ACME tool to generate SSL certificates provided by Let’s Encrypt. Prior to generating a new SSL certificate for your joomla.yourdomain.com, make sure you have pointed the domain/subdomain DNS A record to your server IP address already.
# dnf install certbot python3-certbot-nginx -yOnce installed, you can run this command to issue an SSL certificate. Again, make sure to replace the subdomain with your actual domain or subdomain name; it should match the one in the nginx server block configuration file we created earlier.
# certbot You will be prompted for a few questions, and you will see an output like this:
Saving debug log to /var/log/letsencrypt/letsencrypt.log
Enter email address (used for urgent renewal and security notices)
 (Enter 'c' to cancel): you@yourdomain.com

- - - - - - - - - - - - - - - - - - - - - - - - - - - - - - - - - - - - - - - -
Please read the Terms of Service at
https://letsencrypt.org/documents/LE-SA-v1.5-February-24-2025.pdf. You must
agree in order to register with the ACME server. Do you agree?
- - - - - - - - - - - - - - - - - - - - - - - - - - - - - - - - - - - - - - - -
(Y)es/(N)o: y

- - - - - - - - - - - - - - - - - - - - - - - - - - - - - - - - - - - - - - - -
Would you be willing, once your first certificate is successfully issued, to
share your email address with the Electronic Frontier Foundation, a founding
partner of the Let's Encrypt project and the non-profit organization that
develops Certbot? We'd like to send you email about our work encrypting the web,
EFF news, campaigns, and ways to support digital freedom.
- - - - - - - - - - - - - - - - - - - - - - - - - - - - - - - - - - - - - - - -
(Y)es/(N)o: n
Account registered.

Which names would you like to activate HTTPS for?
We recommend selecting either all domains, or all domains in a VirtualHost/server block.
- - - - - - - - - - - - - - - - - - - - - - - - - - - - - - - - - - - - - - - -
1: joomla.yourdomain.com
- - - - - - - - - - - - - - - - - - - - - - - - - - - - - - - - - - - - - - - -
Select the appropriate numbers separated by commas and/or spaces, or leave input
blank to select all options shown (Enter 'c' to cancel): 1
Requesting a certificate for joomla.yourdomain.com

Successfully received certificate.
Certificate is saved at: /etc/letsencrypt/live/joomla.yourdomain.com/fullchain.pem
Key is saved at:         /etc/letsencrypt/live/joomla.yourdomain.com/privkey.pem
This certificate expires on 2025-11-10.
These files will be updated when the certificate renews.
Certbot has set up a scheduled task to automatically renew this certificate in the background.

Deploying certificate
Successfully deployed certificate for joomla.yourdomain.com to /etc/nginx/conf.d/joomla.yourdomain.com.conf
Congratulations! You have successfully enabled HTTPS on https://joomla.yourdomain.com

- - - - - - - - - - - - - - - - - - - - - - - - - - - - - - - - - - - - - - - -
If you like Certbot, please consider supporting our work by:
 * Donating to ISRG / Let's Encrypt:   https://letsencrypt.org/donate
 * Donating to EFF:                    https://eff.org/donate-le
- - - - - - - - - - - - - - - - - - - - - - - - - - - - - - - - - - - - - - - -
If there is an issue when generating the SSL certificate or Certbot is unable to generate a certificate, it is likely that the DNS update is not fully propagated.
Step 4. Install MariaDB Server
There are several database engines we can use to install Joomla. Joomla supports MySQL server version 8.0+ or equivalent MariaDB server, and PostgreSQL. AlmaLinux 10 ships with MariaDB 10.11. We can use MariaDB as the database server. Let’s install it from the default AlmaLinux 10 repository to facilitate Joomla installation.
# dnf install mariadb-serverUpon installation, MariaDB will not start automatically. We need to execute the command below to start it now and enable it to start every time the server reboots.
# systemctl enable --now mariadbNow, we can proceed with creating a new database and database user.
# mysql Once logged in to the MySQL shell, we can run the following commands. You can replace m0d1fyth15 with a stronger password.
mysql> CREATE DATABASE joomla_db;

mysql> GRANT ALL on joomla_db.* to joomla_user@localhost IDENTIFIED BY 'm0d1fyth15';

mysql> FLUSH PRIVILEGES;

mysql> \q
That’s it, the database user and name have been created.
Step 5. Download Joomla
We can get the compressed Joomla installation file from https://downloads.joomla.org/. Let’s download the file necessary for the Joomla setup on AlmaLinux 10.
# cd /tmp
# wget https://downloads.joomla.org/cms/joomla5/5-3-2/Joomla_5-3-2-Stable-Full_Package.zip?format=zip -O joomla.zip
# unzip /tmp/joomla.zip -d /var/www/html/joomla
# chown -R nginx: /var/www/html/joomla
Step 6. Install Joomla
We have downloaded the Joomla installation file and extracted it to the directory configured as the document root of our Joomla website. To start the installation, navigate to your https://joomla.yourdomain.com/ using any web browser.

In this step, you need to type your Joomla website name, for example, ‘New Joomla Site’, then click on the ‘Setup Login Data’ button to continue.
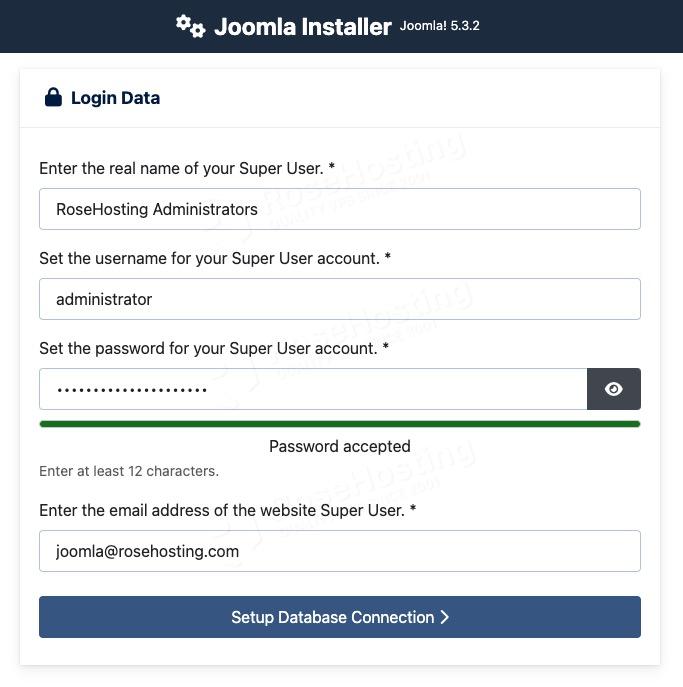
Now, we need to create a super administrator. Fill the required fields in this step, then proceed to the next step by clicking on ‘Setup Database Connection’
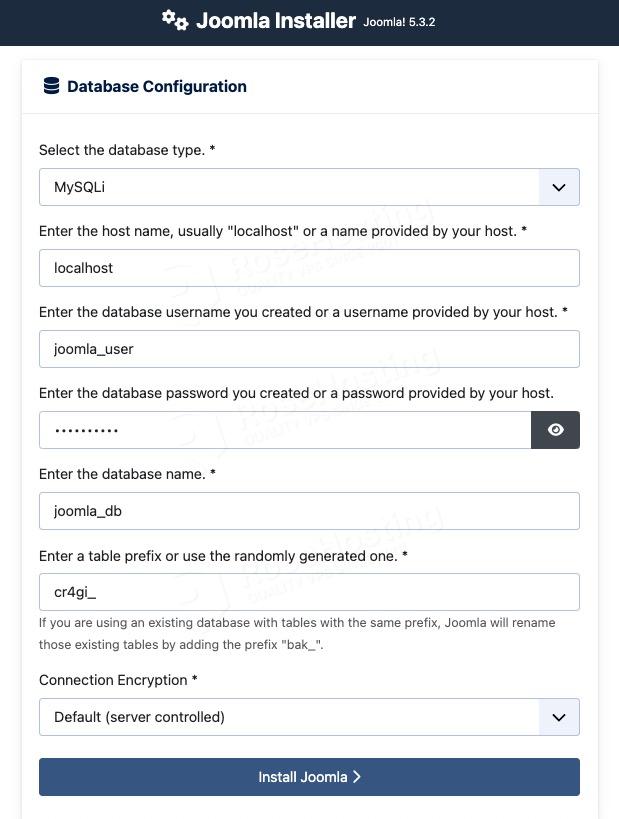
Next, you need to enter the database details you created in step 5 above, then finally click on the ‘Install Joomla’ button.
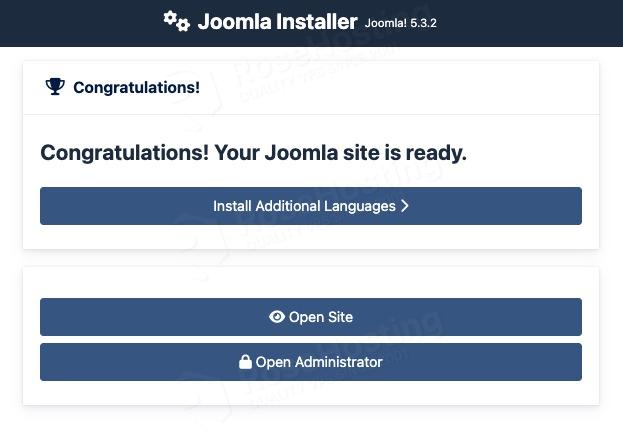
That’s it. Joomla has been installed at https://joomla.yourdomain.com/, and you can go to the website backend by clicking the ‘Open Administrator’ button. You will be brought to the administrator login page.
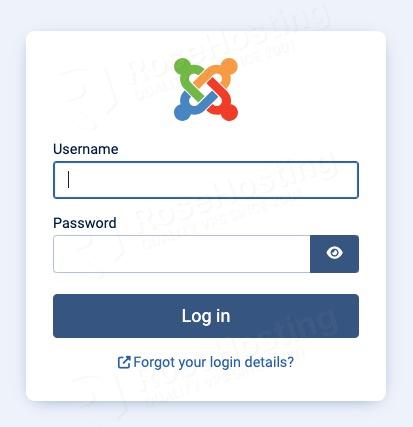
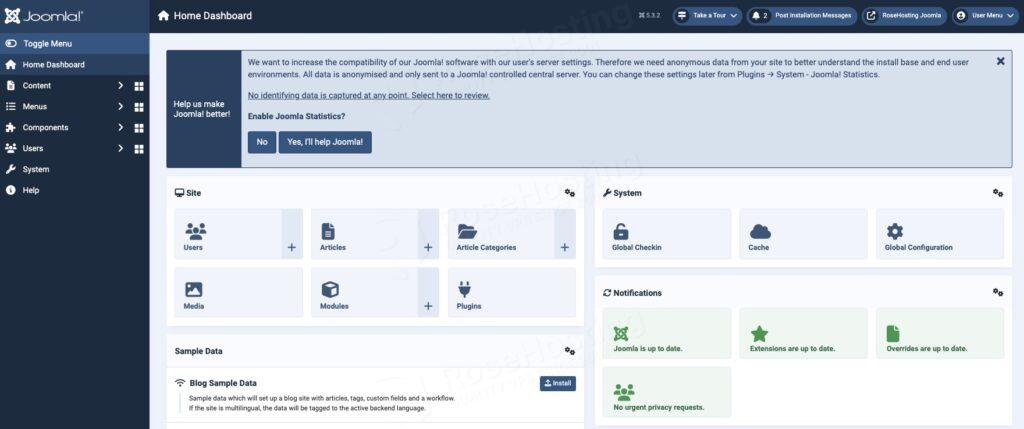
After logging in, you will be in your Joomla dashboard, and you can continue customizing your Joomla website there.
Congratulation! You have successfully completed the installation of Joomla on AlmaLinux 10.
If you are one of our web hosting customers and use our managed AlmaLinux Hosting, you don’t have to follow this tutorial and install Joomla on AlmaLinux 10 yourself; our Linux admins will set up and configure a Joomla VPS for you. They are available 24×7 and will take care of your request immediately. Simply submit a ticket. Installing Joomla is not just about the installation; we can help you optimize your Joomla website if you have an active service with us.
If you liked this post, please share it with your friends or leave a comment below.