Magento is an open-source e-commerce platform designed to help business owners easily and efficiently build and manage their online stores. First launched in 2008, the platform has since become one of the most widely used e-commerce solutions worldwide. Magento offers flexibility and the ability to customize online stores to suit the specific needs of users, from small businesses to medium-sized businesses to enterprises. Magento offers two main versions: Magento Open Source (free) and Magento Commerce (paid). In this article, we will show you how to install Magento on Ubuntu 26.04.
Table of Contents
Prerequisites
- An Ubuntu 26.04 VPS Hosting with at least 8GB of RAM.
- SSH root access, or a user with sudo privileges.
- A domain or subdomain pointing to your server.
Conventions
# – given commands should be executed with root privileges either directly as a root user or by use of sudo command
$ – given commands should be executed as a regular user
Step 1. Log in to the server
First, log in to your Ubuntu 26.04 server through SSH as the root user:
ssh root@IP_Address -p Port_numberYou will need to replace ‘IP_Address’ and ‘Port_number’ with your server’s respective IP address and SSH port number. Additionally, replace ‘root’ with the username of the system user with sudo privileges.

You can check whether you have the proper Ubuntu version installed on your server with the following command:
# lsb_release -aYou should get this output:
No LSB modules are available.
Distributor ID: Ubuntu
Description:  Ubuntu Resolute Raccoon
Release:  26.04
Codename: resolute
Step 2. Add System User
The new system user will run Magento. Let’s create a new system user now. Execute the command below.
# /usr/sbin/adduser \
   --system \
   --shell /bin/bash \
   --gecos 'Magento user' \
   --group \
   --home /opt/magento \
magento
Now, it is time to give the new user a password.
# passwd magentoThe command will prompt you to enter the password for the ‘magento’ user twice; the password will not be displayed on your screen.
Next, let’s give the new user a sudo privilege and add the www-data user to the Magento group.
# usermod -aG sudo magento
# gpasswd -a www-data magento
Let’s switch to the new user now. From now on, we will execute the commands under that username.
# su - magentoStep 3. Install PHP
Ubuntu 26.04 ships with PHP 8.4, and at the moment, Magento 2.4.8-p3 supports this PHP version. Let’s install PHP 8.4 and its extensions.
$ sudo apt install php-{bcmath,gd,common,curl,fpm,intl,mbstring,mysql,soap,xml,zip,cli}Next, we need to modify the following settings in the php.ini file:
Increase memory_limit to 512M
Set short_open_tag to On
Set upload_max_filesize to 128M
Increase max_execution_time to 3600
Let’s update the default values by executing these commands
$ sudo sed -i "s/memory_limit = .*/memory_limit = 512M/" /etc/php/8.4/fpm/php.ini
$ sudo sed -i "s/upload_max_filesize = .*/upload_max_filesize = 128M/" /etc/php/8.4/fpm/php.ini
$ sudo sed -i "s/short_open_tag = .*/short_open_tag = On/" /etc/php/8.4/fpm/php.ini
$ sudo sed -i "s/max_execution_time = .*/max_execution_time = 3600/" /etc/php/8.4/fpm/php.ini
Then, we need to create a PHP-FPM pool.
$ sudo nano /etc/php/8.4/fpm/pool.d/magento.conf Insert the following into the file.
[magento]
user = magento
group = magento

listen = /run/php/magento.sock
listen.owner = magento
listen.group = magento
pm = ondemand
pm.max_children = 50
pm.start_servers = 10
pm.min_spare_servers = 5
pm.max_spare_servers = 10
Save the file and then exit from the file editor, and don’t forget to restart the php-fpm service
$ sudo systemctl restart php8.4-fpmStep 4. Install Nginx
We can use Apache or Nginx as the web server. You can find detailed information on the system requirements on the Adobe site. In this step, we will use Nginx as the web server. Let’s install it now.
$ sudo apt install nginx -yThen, we need to create an nginx server block for our Magento website.
$ sudo nano /etc/nginx/sites-enabled/magento.confInsert the following into the configuration file.
upstream fastcgi_backend {
server unix:/run/php/magento.sock;
}

server {
    server_name yourdomain.com;
    listen 80;
    set $MAGE_ROOT /opt/magento/website;
    set $MAGE_MODE production;

    access_log /var/log/nginx/magento-access.log;
    error_log /var/log/nginx/magento-error.log;

    include /opt/magento/website/nginx.conf.sample;
}
Save the file, then exit.
Step 5. Install Opensearch
Magento 2.4.8 has completely dropped official support for Elasticsearch and mandates a migration to OpenSearch as the default and required catalog search solution. In this step, we will install OpenSearch and then modify its default settings. Let’s execute the commands below to proceed.
$ sudo apt install curl gnupg2
$ curl -o- https://artifacts.opensearch.org/publickeys/opensearch.pgp | sudo gpg --dearmor --batch --yes -o /usr/share/keyrings/opensearch-keyring
$ echo "deb [signed-by=/usr/share/keyrings/opensearch-keyring] https://artifacts.opensearch.org/releases/bundle/opensearch/2.x/apt stable main" | sudo tee /etc/apt/sources.list.d/opensearch-2.x.list
$ sudo apt update
With the repository information added, we can list all available versions of OpenSearch:
$ sudo apt list -a opensearchThe command will return this output:
magento@ubuntu26:~$ sudo apt list -a opensearch
Listing... Done
opensearch/stable 2.19.4 amd64
opensearch/stable 2.19.3 amd64
opensearch/stable 2.19.2 amd64
opensearch/stable 2.19.1 amd64
opensearch/stable 2.19.0 amd64
opensearch/stable 2.18.0 amd64
opensearch/stable 2.17.1 amd64
opensearch/stable 2.17.0 amd64
opensearch/stable 2.16.0 amd64
opensearch/stable 2.15.0 amd64
opensearch/stable 2.14.0 amd64
opensearch/stable 2.13.0 amd64
opensearch/stable 2.12.0 amd64
opensearch/stable 2.11.1 amd64
opensearch/stable 2.11.0 amd64
opensearch/stable 2.10.0 amd64
opensearch/stable 2.9.0 amd64
opensearch/stable 2.8.0 amd64
opensearch/stable 2.7.0 amd64
opensearch/stable 2.6.0 amd64
opensearch/stable 2.5.0 amd64
Now, let’s install OpenSearch 2.19.4 by running the command below
$ sudo env OPENSEARCH_INITIAL_ADMIN_PASSWORD='m0d1fyth15' apt install opensearch=2.19.4Make sure to replace m0d1fyth15 with a stronger password, or else it will return an error when installing Opensearch. We need to use a minimum 8-character password that must contain at least one uppercase letter, one lowercase letter, one digit, and one special character that is strong
By default, OpenSearch uses SSL, but Magento doesn’t. So we need to disable the SSL plugin in OpenSearch for a successful Magento installation:
$ sudo nano /etc/opensearch/opensearch.ymlAnd add this to the end of yml file:
plugins.security.disabled: trueSave the file, then exit. Finally, we can enable the service and start it now.
$ sudo systemctl enable --now opensearchOnce it’s up and running, we can run this command to verify.
$ curl -X GET localhost:9200The command will return an output similar to this:
root@rh:/opt/magento/website# curl -X GET localhost:9200
{
  "name" : "ubuntu26",
  "cluster_name" : "opensearch",
  "cluster_uuid" : "GuqBUEY8TRi0EJGTdxy0bA",
  "version" : {
    "distribution" : "opensearch",
    "number" : "2.19.4",
    "build_type" : "deb",
    "build_hash" : "e2e89961c9a327daf514a7ce1320a6189bfd08cd",
    "build_date" : "2025-11-01T02:35:34.092584983Z",
    "build_snapshot" : false,
    "lucene_version" : "9.12.3",
    "minimum_wire_compatibility_version" : "7.10.0",
    "minimum_index_compatibility_version" : "7.0.0"
  },
  "tagline" : "The OpenSearch Project: https://opensearch.org/"
}
Step 6. Install MySQL Server
Ubuntu 26.04 ships with MySQL 8.4 and MariaDB 11.8. At the moment of this writing, only MariaDB version 11.4 and lower and MySQL 8.4 are supported by Magento. So, we need to install the MySQL server instead of MariaDB.
$ sudo apt install mysql-serverOnce installed, we can proceed to create a new database and a user for our Magento website.
$ sudo mysql Once logged in to the MySQL shell, we can run these commands:
mysql> CREATE USER 'magento'@'localhost' IDENTIFIED BY 'm0d1fyth15';
mysql> CREATE DATABASE magentodb;
mysql> GRANT ALL PRIVILEGES ON magentodb.* TO 'magento'@'localhost';
mysql> FLUSH PRIVILEGES;
mysql> \q
Step 7. Install Composer
Magento will be installed using Composer. In this step, we will install Composer. The installation is fairly easy and straightforward.
$ curl -sS https://getcomposer.org/installer -o composer-setup.php
$ sudo php composer-setup.php --install-dir=/usr/local/bin --filename=composer
That’s it. To check the version of the installed Composer, you can run this command:
$ composer -VThe command will print this output:
Composer version 2.9.5 2026-01-29 11:40:53
PHP version 8.4.11 (/usr/bin/php8.4)
Run the "diagnose" command to get more detailed diagnostics output
Step 8. Download and Install Magento
Go to https://marketplace.magento.com/ and create an account or log in if you already have an account. Once logged in, create an access key. We need the key to proceed with the installation.
$ composer create-project --repository-url=https://repo.magento.com/ magento/project-community-edition=2.4.8-p3 /opt/magento/websiteYou will be asked for your username and password. The username is the public key, and the password is the private key. The keys are the ones you created earlier at https://marketplace.magento.com/
After all required files are downloaded, we can proceed with the installation by running the command below.
$ cd /opt/magento/website
$ bin/magento setup:install \
--base-url=http://yourdomain.com \
--db-host=localhost \
--db-name=magentodb \
--db-user=magento \
--db-password=m0d1fyth15 \
--admin-firstname=Magento \
--admin-lastname=Admin \
--admin-email=admin@yourdomain.com \
--admin-user=admin \
--admin-password=m0d1fyth15 \
--language=en_US \
--currency=USD \
--timezone=America/Chicago \
--use-rewrites=1 \
--search-engine=opensearch
At the end of the installation, you will see an output similar to this:
[SUCCESS]: Magento installation complete.
[SUCCESS]: Magento Admin URI: /admin_8sutYht
Nothing to import.
Before logging in to the backend, we can disable Two-Factor Authentication and re-enable it later. We need to run these commands to disable the 2FA modules.
$ php bin/magento module:disable Magento_AdminAdobeImsTwoFactorAuth
$ php bin/magento module:disable Magento_TwoFactorAuth
$ php bin/magento setup:di:compile
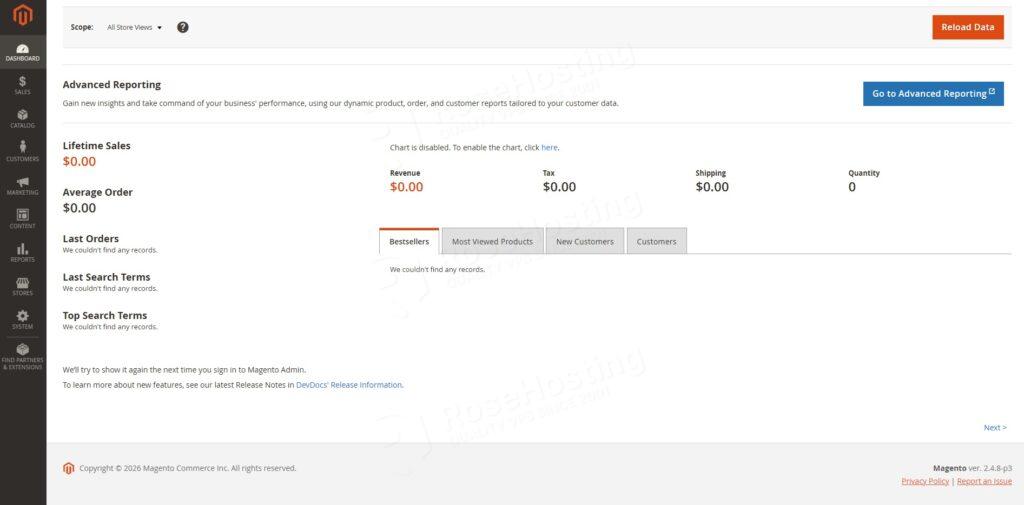
$ php bin/magento cache:cleanAt this point, Magento is installed, and we can navigate to the backend at http://yourdomain.com/admin_8sutYht using our favourite web browser. Please note that you will need to use your own link to access the backend.
Once logged in, we can see the Magento dashboard.
Step 9. Set up Cron jobs
Magento requires cron jobs to run its important system functions. Let’s execute the command below to create Magento cron jobs for the Magento user.
$ php bin/magento cron:installWrapping it up
Congratulation! You have successfully installed Magento on Ubuntu 26.04.
Of course, you don’t have to install Magento 2.4.8-p3 on your Ubuntu 26.04 server if you have a server with us, in which case you can simply ask our expert Linux hosting admins to set all of this up for you, quickly and easily. Our expert system administrators are available 24×7 and will respond to your request immediately. Our admins will also help you with more complex Magento installations, like using Varnish, Elasticsearch, and other customizations.
If you liked this post on how to install Magento on Ubuntu 26.04, please share it with your friends or leave a comment below.