
Server monitoring is the main and most important part of Linux administration. Regardless of the complexity of our infrastructure – a single VPS or high availability clusters, we should constantly monitor many different aspects of our network and hardware infrastructure. to ensure that everything is functioning as it should be, in order to avoid possible issues.

Without a good monitoring tool, we will have to manually check all server resources using the built-in monitoring tools that come shipped with Ubuntu 20.04. Some of the basic tools and commands are available and shipped with the distribution and can be accessed through the command line, while others come in the form of open-source tools, custom scripts, or third-party applications and we need to install them manually.
Not everyone has the knowledge of installing and configuring third-party monitoring tools through the command line, and we can replace everything with a single, web-based monitoring tool – Netdata.
Netdata is one of the best, free, and open-source monitoring tools that allow users to monitor almost every part of your systems. It collects thousands of hardware and software metrics from any virtual or dedicated server and organizes them in a user-friendly interface. All metrics are visualized and displayed on an intuitive interactive dashboard in form of graphical charts. In this tutorial With Netdata we can easily monitor the health of the VPS or an entire IT infrastructure from any browser, and receive notifications of possible anomalies, problems, or outages with pre-configured alarm notifications.
Netdata can be installed on most of the major Linux distributions such as Ubuntu, Debian, CentOS, and more. In this tutorial, we will show you how to install Netdata on an Ubuntu 20.04 VPS.
Table of Contents
Prerequisites
- Ubuntu 20.04 VPS or Cloud Dedicated Server.
- System user with SSH access.
Login to the server and update the packages
In order to install Netdata on the Ubuntu 20.04 VPS we will have to access the VPS via SSH. We will login to our test Ubuntu VPS as user root, but you can feel free to use any user you want:
ssh root@IP_Address -p Port_number
Replace ‘IP_Addres’ and ‘Port_number’ with the actual IP address of your VPS and the SSH port number.
You should always keep the system up to date so once you are in, run the following command to make sure that all packages installed on the VPS are updated to the latest available version:
apt update && apt update
Install Netdata with the one-line installer
After we connect to the Ubuntu 20.04 VPS through SSH, we can proceed and install Netdata. We can do it easily by running a single kickstart script:
bash <(curl -Ss https://my-netdata.io/kickstart.sh)
The script will check what OS you have installed on the server, install all dependencies, create the necessary directories and system users and configure everything required by Netdata. If there is an active Netdata installation on the VPS, the installation script will update it. The installation may take a while to complete, so sit back and relax.
Once everything is installed the script will display all necessary details on the screen:
netdata by default listens on all IPs on port 19999,

so you can access it with:
http://this.machine.ip:19999/

To stop netdata run:
systemctl stop netdata

To start netdata run:
systemctl start netdata

Uninstall script copied to: /usr/libexec/netdata/netdata-uninstaller.sh
You can confirm that Netdata is running on the server by running the following command
systemctl status netdata

● netdata.service - Real time performance monitoring
Loaded: loaded (/lib/systemd/system/netdata.service; enabled; vendor preset: enabled)
Active: active (running) since Tue 2021-07-06 08:32:11 UTC; 9s ago
Process: 136800 ExecStartPre=/bin/mkdir -p /var/cache/netdata (code=exited, status=0/SUCCESS)
Process: 136803 ExecStartPre=/bin/chown -R netdata:netdata /var/cache/netdata (code=exited, status=0/SUCCESS)
Process: 136812 ExecStartPre=/bin/mkdir -p /var/run/netdata (code=exited, status=0/SUCCESS)
Process: 136813 ExecStartPre=/bin/chown -R netdata:netdata /var/run/netdata (code=exited, status=0/SUCCESS)
Main PID: 136815 (netdata)
Tasks: 48 (limit: 4620)
Memory: 72.0M
Access Netdata via web browser
To access the Netdata dashboard, open you favorite web browser and navigate to http://your_IP_Address:19999
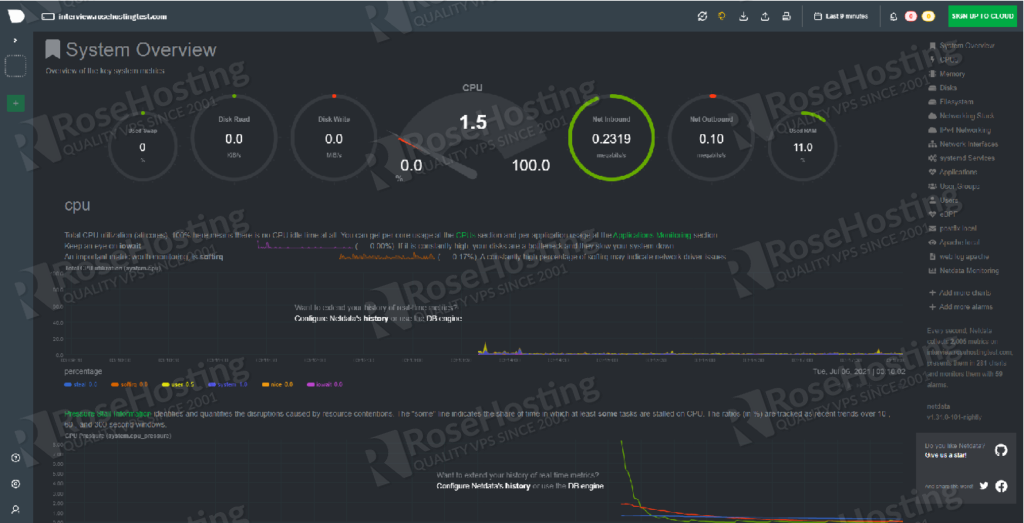
The main dashboard will display an overview of the main system metrics such as swap usage, CPU utilization, network inbound/outbound statistics, disk read/write, and RAM utilization. On the right panel, there are more system options that display visualized real-time statistics of different system metrics.
Of course, you don’t have to install Netdata Monitoring Tool on Ubuntu 20.04 if you use one of our Managed Hosting services, in which case you can simply ask our expert Linux admins to install Netdata on your Ubuntu server for you. They are available 24×7 and will take care of your request immediately.

PS. If you liked this post on how to install Netdata Monitoring Tool on Ubuntu 20.04, please share it with your friends on the social networks using the buttons on the left or simply leave a reply below. Thanks.