
In this tutorial, we are going to explain how to install Netdata Monitoring Tool on the latest Ubuntu 22.04.
Netdata Monitoring tool is an open-source software developed to track and show the statistic of server usage. System Administrators, Developers, or even non-technical users are using this software to check the CPU usage, RAM usage, available DISK space, Network bandwidth and etc. Netdata Monitoring tool is mainly written in C, JavaScript, and Python and can be installed on various operating systems such as Ubuntu, Debian, and CentOS.
Installing the Netdata Monitoring tool on Ubuntu 22.04 can take up to 10 minutes. Let’s get started!

Table of Contents
Prerequisites
- A server with Ubuntu 22.04 as OS
- User privileges: root or non-root user with sudo privileges
- NVMe 1 VPS plan (1GB of RAM and 1 CPU core)
Step 1. Update the System
Before we install Netdata monitoring we are going to update the system packages to the latest versions available.
sudo apt update -y && sudo apt upgrade -y
Step 2. Install Netdata Monitoring Tool
sudo apt install netdata
Type Y for the installation to continue.
The following NEW packages will be installed:
  fonts-font-awesome fonts-glyphicons-halflings javascript-common libc-ares2 libjs-bootstrap libjs-highlight.js libjudydebian1 libnetfilter-acct1 libnode72 netdata
  netdata-core netdata-plugins-bash netdata-plugins-nodejs netdata-plugins-python netdata-web nodejs nodejs-doc python3-urllib3
0 upgraded, 18 newly installed, 0 to remove and 4 not upgraded.
Need to get 21.9 MB of archives.
After this operation, 87.1 MB of additional disk space will be used.
Do you want to continue? [Y/n] Y
Once, the installation is completed start and enable the netdata service to start on system boot.
sudo systemctl start netdata && sudo systemctl enable netdata
To check if everything is ok, check the status of the netdata service:
sudo systemctl status netdata
You should receive the following output:
root@vps:~# sudo systemctl status netdata
● netdata.service - netdata - Real-time performance monitoring
     Loaded: loaded (/lib/systemd/system/netdata.service; enabled; vendor preset: enabled)
     Active: active (running) since Tue 2022-05-17 21:06:24 UTC; 5min ago
       Docs: man:netdata
             file:///usr/share/doc/netdata/html/index.html
             https://github.com/netdata/netdata
   Main PID: 82101 (netdata)
      Tasks: 33 (limit: 4566)
     Memory: 63.3M
        CPU: 41.201s
     CGroup: /system.slice/netdata.service
             ├─82101 /usr/sbin/netdata -D
             ├─82111 /usr/sbin/netdata --special-spawn-server
             ├─82322 /usr/bin/python3 /usr/lib/netdata/plugins.d/python.d.plugin 1
             ├─82324 /usr/lib/netdata/plugins.d/nfacct.plugin 1
             ├─82325 bash /usr/lib/netdata/plugins.d/tc-qos-helper.sh 1
             └─82326 /usr/lib/netdata/plugins.d/apps.plugin 1

May 17 21:06:24 host.test.vps systemd[1]: Started netdata - Real-time performance monitoring.
May 17 21:06:25 host.test.vps netdata[82101]: CONFIG: cannot load cloud config '/var/lib/netdata/cloud.d/cloud.conf'. Running with internal defaults.
The netdata service is running on port 19999. To check this you can execute the following command:
netstat -tunlp | grep 19999
You should receive the following output:
root@vps:~# netstat -tunlp | grep 19999
tcp        0      0 127.0.0.1:19999         0.0.0.0:*               LISTEN      82101/netdata
Step 3. Configure Netdata
If you try to access the Netdata Monitoring tool via your server IP address and port 19999 you won’t succeed because there are some additional changes that we need to configure.
First we are going to enable the UFW firewall:
sudo ufw allow 19999/tcp
sudo ufw reload
If your server is using iptables then:
sudo iptables -I INPUT -p tcp --dport 19999 -j ACCEPT

iptables-save
Next, is to open the /etc/netdata/netdata.conf and paste the following lines of code:
# NetData Configuration

# The current full configuration can be retrieved from the running
# server at the URL
#
#   http://localhost:19999/netdata.conf
#
# for example:
#
#   wget -O /etc/netdata/netdata.conf http://localhost:19999/netdata.conf
#

[global]
        run as user = netdata
        web files owner = root
        web files group = root
        # Netdata is not designed to be exposed to potentially hostile
        # networks. See https://github.com/netdata/netdata/issues/164
        bind socket to IP = YourSeverIPAddress
Save the file, close it and restart the netdata service.
sudo systemctl restart netdata
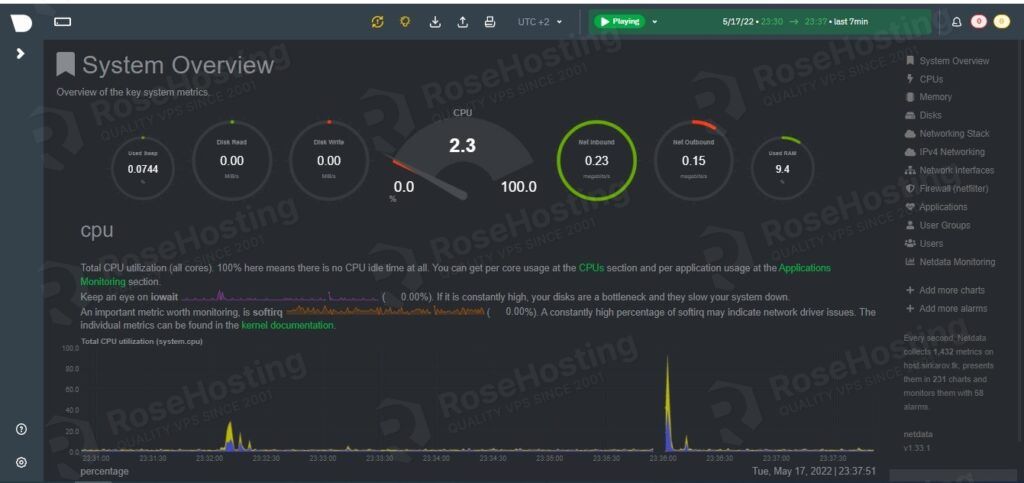
Step 4. Access Netdata in Browser
Once, the service is restarted you can access the Netdata GUI at http://YourServerIPAddress:19999
Of course, if you want to access the Netdata via domain name we can easily set up a reverse proxy.
Create the Apache configuration file:
touch /etc/apache2/sites-available/netdata.conf
Paste the following lines of code:
<VirtualHost *:80>
    ServerName yourdomain.com
    RewriteEngine On
    ProxyRequests Off
    ProxyPreserveHost On

    <Proxy *>
        Require all granted
    </Proxy>

    ProxyPass "/" "http://YourServerIPAddress:19999/" connectiontimeout=5 timeout=30 keepalive=on
    ProxyPassReverse "/" "http://YourServerIPAddress:19999/"

</VirtualHost>
Enable the Apache configuration and the proxy modules:
a2ensite netdata.conf

a2enmod proxy

a2enmod proxy_http

a2enmod rewrite
Check the syntax of the Apache2 configuration.
apachectl -t
You should receive the following output:
root@vps:~# apachectl -t
Syntax OK
If you receive this output you can safely restart the Apache service.
sudo systemctl restart apache2
Now, you can access the Netdata Monitoring tool http://YourDomain.com
That’s it. It was a very easy setup to install the Netdata Monitoring Tool on Ubuntu 22.04
You only need to sign up for one of our NVMe VPS plans and submit a support ticket about installing the Netdata Monitoring tool on Ubuntu 22.04. Our admins are available 24/7 and will take up your request immediately.
If you liked this post on how to install Netdata Monitoring Tool on Ubuntu 22.04, please share it with your friends on social networks or simply leave a reply below. Thanks.