
This blog post explains, in step-by-step detail, how to install Odoo 19 on Ubuntu 26.04. Odoo is business management software that serves as a modular ERP (Enterprise Resource Planning) system. Odoo allows businesses to start with one app and add others as needed, making it fully customizable and scalable for small- to mid-market companies. It includes a variety of features, such as CRM (Customer Relationship Management), sales, inventory, accounting, and a user-friendly GUI.
Installing Odoo 19 on Ubuntu 26.04 is a straightforward process that may take around 15 minutes. Let’s get started!
Table of Contents
Prerequisites
- A server running Ubuntu 26.04 OS, which is essential for the steps to install Odoo 19 successfully.
- User privileges: root or non-root user with sudo privileges
Step 1. Update the System
Before we start installing Odoo 19, it is recommended to update the system packages to their latest versions. To do that, execute the following command, and note that these updates are a foundational step in preparing to install Odoo 19 on Ubuntu 26.04.
apt update -y && apt upgrade -y
Step 2. Install Python
Odoo 19 requires Python 3.10 or higher, with Python 3.12 recommended for optimal performance and compatibility. If the version of Python you are using is very new (e.g., Python 3.13 OR Python 3.14), a pre-built wheel (binary distribution) for lxml may not be available yet, forcing a source build that can fail. That is why, in this blog post, we will install Python 3.12 from source, since packages for Python 3.12 are not available in the Ubuntu 26.04 repository.
To download, configure, compile, and install Python 3.12 on Ubuntu 26.04, follow these instructions and proceed as you prepare for Odoo 19 installation.
cd /usr/src

wget https://www.python.org/ftp/python/3.12.0/Python-3.12.0.tgz

tar xzf Python-3.12.0.tgz

cd Python-3.12.0

./configure --enable-optimizations

make -j$(nproc)

make altinstall
Once installed, we need to set Python 3.12 as the default version with the command below:
update-alternatives --install /usr/bin/python3 python3 /usr/local/bin/python3.12 1
Check the installation with the command below:
python3 -V
You should get the following output:
root@host:~# python3 -V
Python 3.12.0
Step 3. Install PostgreSQL database service
To install the PostgreSQL database service, execute the command below. This is also a vital step when you want your Odoo 19 running on Ubuntu 26.04.
apt-get install postgresql -y
To start and enable the PostgreSQL service, you need to do the following:
systemctl start postgresql && systemctl enable postgresql
To check the status of the service:
systemctl status postgresql
You should get output similar to this:
root@host:~# systemctl status postgresql
● postgresql.service - PostgreSQL RDBMS
     Loaded: loaded (/usr/lib/systemd/system/postgresql.service; enabled; preset: enabled)
     Active: active (exited) since Thu 2026-03-05 21:16:38 CST; 5h ago
 Invocation: 37862c786fb14711b2ad5c63215631c9
   Main PID: 39039 (code=exited, status=0/SUCCESS)
   Mem peak: 2M
        CPU: 17ms

Mar 05 19:16:38 host.test.vps systemd[1]: Starting postgresql.service - PostgreSQL RDBMS...
Mar 05 19:16:38 host.test.vps systemd[1]: Finished postgresql.service - PostgreSQL RDBMS
Step 4. Install Wkhtmltopdf
The Wkhtmltopdf is used to convert HTML pages to PDF files in Odoo. To install it, execute the following commands one by one in your terminal. This is required for generating PDFs with Odoo 19 on Ubuntu 26.04.
wget https://github.com/wkhtmltopdf/wkhtmltopdf/releases/download/0.12.4/wkhtmltox-0.12.4_linux-generic-amd64.tar.xz

tar xvf wkhtmltox*.tar.xz

mv wkhtmltox/bin/wkhtmlto* /usr/bin
Once installed, check the wkhtmltopdf version with the command below:
wkhtmltopdf -V
You should get the following output:
root@host:~# wkhtmltopdf -V
wkhtmltopdf 0.12.4 (with patched qt)
Step 5. Create Odoo System and Database User
Next, create an Odoo 19 system and an Odoo 19 database user named odoo19. These steps are part of setting up Odoo 19 for operation on Ubuntu 26.04.
To create an Odoo 19 system user in the /opt directory, execute the following:
useradd -m -U -r -d /opt/odoo19 -s /bin/bash odoo19
An Odoo database user can be created with the command below:
su - postgres -c "createuser -s odoo19"
Step 6. Download and Install Odoo 19
First log in as “odoo19”:
su - odoo19
Download Odoo files from the Odoo GitHub repository:
git clone https://www.github.com/odoo/odoo --depth 1 --branch 19.0 /opt/odoo19/odoo19
Once downloaded, create a Python virtual environment and install the Odoo 19 requirements with the following commands one by one. This process directly relates to how you install Odoo 19 on Ubuntu 26.04 systems.
python3.12 -m venv odoo19-venv
source odoo19-venv/bin/activate
pip3 install --upgrade pip
pip3 install wheel
pip3 install -r odoo19/requirements.txt
Once the requirements are installed, deactivate the environment with:
deactivate
And then press CTRL+D to log out from the odoo19 user. The screen should look like this:
(odoo19-venv) odoo19@host:~$ deactivate
odoo19@host:~$
logout
root@host:~#
Next, we need to create the Odoo 19 custom addons directory, the Log file directory, along with the Log file for Odoo, and grant the correct permissions as part of the installation steps for Odoo 19 on Ubuntu 26.04.
mkdir /opt/odoo19/odoo19-custom-addons
chown -R odoo19:odoo19 /opt/odoo19/odoo19-custom-addons
mkdir -p /var/log/odoo19/ && touch /var/log/odoo19/odoo19.log
chown -R odoo19:odoo19 /var/log/odoo19/
Step 7. Create Odoo configuration file
The Odoo configuration file can be created as explained below, and this is a key element when you install Odoo 19 on Ubuntu 26.04.
nano /etc/odoo19.conf
Paste the following lines of code:
[options]
admin_passwd = StrongAdminPasswordHere
db_host = False
db_port = False
db_user = odoo19
db_password = False
xmlrpc_port = 8069
logfile = /var/log/odoo19/odoo19.log
addons_path = /opt/odoo19/odoo19/addons,/opt/odoo19/odoo19-custom-addons
Save the file and close it.
Step 8. Create Odoo 19 Service file
Next, we need to create an Odoo 19 service file that is essential for Ubuntu 26.04 environments.
nano /etc/systemd/system/odoo19.service
Paste the following lines of code:
[Unit]
Description=odoo19

[Service]
Type=simple
SyslogIdentifier=odoo19
PermissionsStartOnly=true
User=odoo19
Group=odoo19
ExecStart=/opt/odoo19/odoo19-venv/bin/python3 /opt/odoo19/odoo19/odoo-bin -c /etc/odoo19.conf
StandardOutput=journal+console

[Install]
WantedBy=multi-user.target
Save the file and close it.
Start and enable the odoo service for automatic start on system boot:
systemctl start odoo19 && systemctl enable odoo19
To check the status of the Odoo service, execute the following command on your Ubuntu 26.04 server to ensure Odoo 19 is running.
systemctl status odoo19
You should get output similar to this:
root@host:/opt/odoo19# systemctl status odoo19
● odoo19.service - odoo19
     Loaded: loaded (/etc/systemd/system/odoo19.service; enabled; preset: enabled)
     Active: active (running) since Thu 2026-03-05 21:36:38 CST; 5h ago
 Invocation: 51cc23441f064aba8a17b2c452858357
   Main PID: 80943 (python3)
      Tasks: 4 (limit: 4027)
     Memory: 78.4M (peak: 78.4M)
        CPU: 3.746s
     CGroup: /system.slice/odoo19.service
             └─80943 /opt/odoo19/odoo19-venv/bin/python3 /opt/odoo19/odoo19/odoo-bin -c /etc/odoo19.conf

Mar 06 05:31:54 host.test.vps systemd[1]: Started odoo19.service - odoo19.
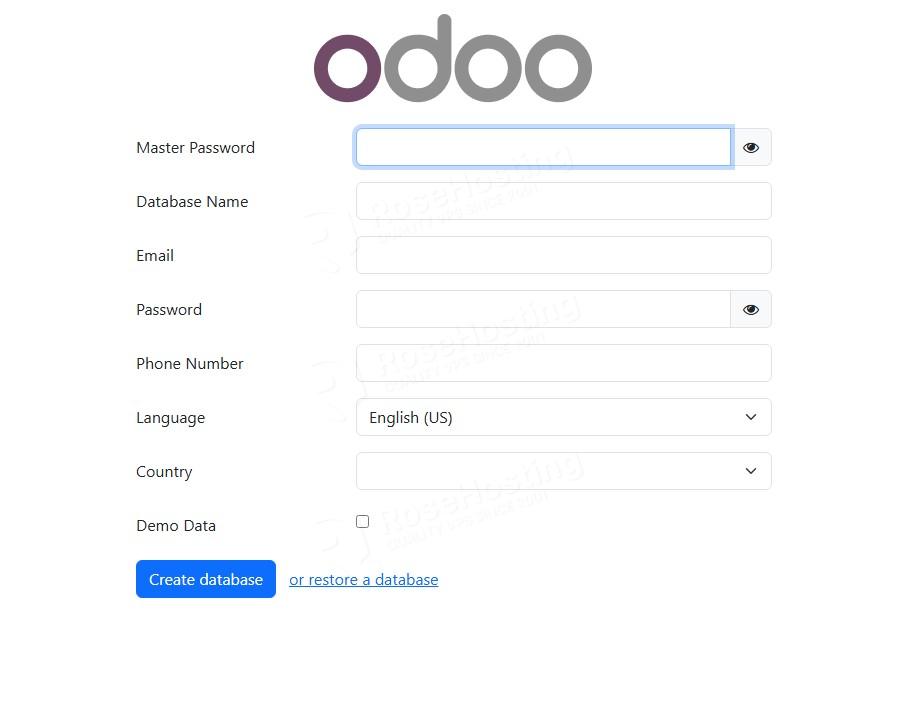
Now you can access Odoo 19 at http://YourServerIPAddress:8069.
That’s it. You successfully installed the latest Odoo 19 on Ubuntu 26.04.
Of course, you don’t have to do this if you have difficulties and are not familiar with Linux. You can always contact our technical support. You only need to sign up for one of our managed Odoo hosting server plans and submit a support ticket. We are available 24/7 and will take care of your request immediately.
If you liked this post about the steps to install Odoo 19 on Ubuntu 26.04, please share it with your friends or leave a comment below.