
In this tutorial, we will show you how to install Open Web Analytics on a Debian 9 VPS.
Open Web Analytics is an open-source traffic analysis tool that helps website owners analyze how visitors use their websites. Open Web Analytics also allows owners to track their website’s visitors, including mouse movements, scrolling, and key-presses.  Additionally, Open Web Analytics has built-in support for tracking websites that are created with popular content management systems, such as WordPress and MediaWiki.
Table of Contents
Prerequisites:
- A VPS running Debian 9. For this tutorial, we’ll be using one of our Debian SSD 1 VPSes.
- Access to the root user, or a user with sudo privileges.
Step 1: Log in to the server update your server OS Packages
Log in to your Debian 9 server with SSH as the root user, or as a user that has sudo privileges:
ssh root@IP_Address -p Port_number
Before we can start with the installation of Open Web Analytics, we have to make sure that all Debian OS packages installed on the server are up-to-date. We can do this by running the following commands:
sudo apt-get update
sudo apt-get upgrade
Step 2: Install Apache
Apache is a user-friendly and highly popular web server available on almost all Linux distributions. This is the web server we will be using for this tutorial.
First, check whether Apache is already installed and running on your Debian server:
ps aux | grep apache2
We can also check if there are Apache2 packages installed on the server:
dpkg -l | grep apache2
If Apache is already installed on the server, we can skip the Apache installation steps and proceed with step 4, which is installing PHP.
If Apache is not installed on your system, we can install it using:
apt-get install apache2
Once installed, start the Apache server and enable it to start on server boot:
systemctl start apache2
systemctl enable apache2
Step 3: Enable the Apache ‘Rewrite’ Module
Enable Apache’s rewrite module, if not already enabled:
a2enmod rewrite
Restart the Apache service for the changes to take effect:
systemctl restart apache2
Step 4: Install PHP and Required PHP extensions
The default PHP version available from the official Debian 9 repository is PHP 7.0. Install PHP 7.0, along with some PHP extensions that are required for Open Web Analytics to function correctly:
sudo apt-get update
sudo apt-get install php7.0 php7.0-common php7.0-curl php7.0-gd php7.0-curl php7.0-dom php7.0-mysql php7.0-intl
sudo a2enmod php7.0
Step 5: Configure PHP
Locate the PHP configuration file:
php -c /etc/php/7.0/apache2/ -i |grep "Loaded Configuration File"
The output should be something like this:
Loaded Configuration File => /etc/php/7.0/apache2/php.ini
Edit the php.ini configuration file using your preferred text editor:
vi /etc/php/7.0/apache2/php.ini
Add/modify the following options:
memory_limit = 256M
file_uploads = On
allow_url_fopen = On
allow_url_include = Off
post_max_size 32M
upload_max_filesize = 8M
max_execution_time = 300
default_charset = "UTF-8"
date.timezone = "America/Chicago"
Step 6: Create a Virtual Host in Apache
In order to be able to access Open Web Analytics using a domain name, we need to create a virtual host in Apache for your domain.
Note: you must already have a domain registered and set up for your server.
Open the file using your preferred text editor:
vi /etc/apache2/sites-available/your-domain.com.conf
Then add the following content to the file:
<VirtualHost *:80> ServerAdmin admin@your-domain.com ServerNameyour-domain.comServerAliaswww.your-domain.comDocumentRoot /var/www/html/your-domain.com <Directory /var/www/html/your-domain.com> Options Indexes FollowSymLinks AllowOverride All Require all granted </Directory> ErrorLog ${APACHE_LOG_DIR}/your-domain.com_error.log CustomLog ${APACHE_LOG_DIR}/your-domain.com_access.log combined </VirtualHost>
Remember to replace ‘your-domain.com’ with your actual domain name.
To enable the virtual host that we have just created, run the following command:
a2ensite your-domain.com.conf
Then, disable the default Apache configuration:
a2dissite 000-default.conf
Restart Apache service for the changes to take effect:
systemctl restart apache2
Step 7: Install MariaDB
We will use MariaDB as a database engine. We can install MariaDB server from the Debian 9 base repository using the following commands:
sudo apt-get install mariadb-server-10.1 mariadb-server-core-10.1
If desired, you can further improve the security of your MariaDB server by running a command that will go through a few questions.
mysql_secure_installation
We suggest answering every question with the character ‘Y’ for yes.
Step 8: Create a Database for OWA
Create a MySQL database for the Open Web Analytics website:
mysql -u root -p
MariaDB [(none)]> CREATE DATABASE owa;
MariaDB [(none)]> GRANT ALL PRIVILEGES ON owa.* TO 'owa'@'localhost' IDENTIFIED BY 'Password';
MariaDB [(none)]> FLUSH PRIVILEGES;
MariaDB [(none)]> exit;
Don’t forget to replace ‘Password’ with an actual strong password.
Step 9: Install Open Web Analytics
Download the latest version of OWA, available at (http://downloads.openwebanalytics.com) and extract it to the document root directory of your website ( e.g /var/www/html/your-domain.com).
Our example below has the link for the latest version at the time of writing already set up:
cd /opt/
wget https://github.com/padams/Open-Web-Analytics/archive/1.6.2.tar.gz
tar -xvzf 1.6.2.tar.gz
mkdir -p /var/www/html/your-domain.com/owa/
mv /opt/Open-Web-Analytics-*/* /var/www/html/your-domain.com/owa/
chown -R www-data:www-data /var/www/html/your-domain.com/owa/
rm  1.6.2.tar.gz
Open http://your-domain.com/owa/ in a web browser and and follow the on-screen instructions:
Click on the “Let’s Get Started” button, and on the next page enter the following information for the MySQL database:
- Database Host: localhost
- Database Name: owa
- Database User: owa
- Database Password: enter the password of your ‘owa’ MySQL user (in this tutorial, it is set to Password).
Click ‘Continue’.
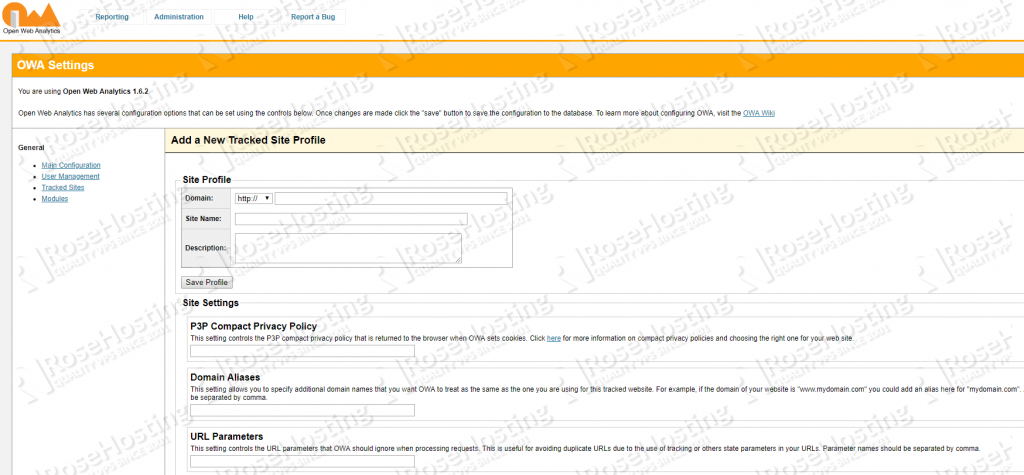
On the next page, enter the the domain of the website to track, your email address and set a password for the OWA admin user. Click ‘Continue’.
That’s it. The Open Web Analytics installation is complete.
You can now log in to the OWA administrator back-end and create a tracker for your website.
Step 10: Install and Enable Open Web Analytics on a WordPress website
OWA can easily be installed and enabled on a WordPress website. Simply follow these steps:
Download the latest version of OWA in the ‘plugins’ directory of your WordPress website, for example:
cd /opt/
wget https://github.com/padams/Open-Web-Analytics/archive/1.6.2.tar.gz
tar -xvzf 1.6.2.tar.gz
mkdir -p /path-to-the-wordpress-website/wp-content/plugins/owa/
mv /opt/Open-Web-Analytics-*/* /path-to-the-wordpress-website/wp-content/plugins/owa/
chown -R www-data:www-data /path-to-the-wordpress-website/wp-content/plugins/owa/
Do not forget to replace ‘path-to-the-wordpress-website’ with the actual path to the document root directory of your WordPress website.
Log in to your WordPress backend and activate the plugin. This will create all of the required database tables with the owa_ prefix in the same database that WordPress is using. Open Web Analytics will immediately start tracking all of the WordPress-generated webpages and feeds. Also, there are many OWA options which can be configured according to your needs. These options are available under the main options tab in the WordPress back-end.
 Of course, you don’t have to install Open Web Analytics on Debian 9, if you use one of our Managed Debian Hosting solutions, in which case you can simply ask our expert Linux admins to set up and configure Open Web Analytics on Debian 9 for you. They are available 24×7 and will take care of your request immediately.
PS. If you liked this post on how to install Open Web Analytics on a Debian 9 VPS, please share it with your friends on the social networks using the share shortcuts below, or simply leave a comment in the comments section. Thanks.