 OpenMRS or Open Medical Record System is a Java based collaborative open source project used to create customized medical records system with no programming knowledge.
To install OpenMRS on a CentOS VPS follow the very easy steps described below. OpenMRS requires Java 6, Java servlet container such as Apache Tomcat, and an existing database such as MySQL.
Install JAVA
Install Java 6 using the following command:
yum install java-1.6.0-openjdk java-1.6.0-openjdk-devel ant
Verify the Java version installed on the server:
java -version

java version "1.6.0_33"
OpenJDK Runtime Environment (IcedTea6 1.13.5) (rhel-1.13.5.1.el6_6-x86_64)
OpenJDK 64-Bit Server VM (build 23.25-b01, mixed mode)
Install Tomcat
Download and install the latest version of Apache Tomcat 7 (do not install Tomcat 8 if you intend to use it with Java 6):
cd /opt

wget http://www.webhostingreviewjam.com/mirror/apache/tomcat/tomcat-7/v7.0.57/bin/apache-tomcat-7.0.57.tar.gz

tar -zxf apache-tomcat-7.0.57.tar.gz -C /usr/local

mv /usr/local/apache-tomcat-7.0.57 /usr/local/tomcat

useradd -r tomcat --shell /bin/false

chown -R tomcat: /usr/local/tomcat
Edit the ‘/usr/local/tomcat/bin/catalina.sh’ file and add the following line before ‘# OS specific support. $var _must_ be set to either true or false.’ line:
export JAVA_HOME=/usr
Install OpenMRS
For advanced users using OpenMRS in production it is recommended to download OpenMRS Platform 1.10.1 WAR file. It can be downloaded at http://openmrs.org/download/
cd /usr/local/tomcat/webapps
wget http://sourceforge.net/projects/openmrs/files/releases/OpenMRS_Platform_1.10.1/openmrs.war/download -O openmrs.war
mkdir -P /usr/local/tomcat/.OpenMRS
chown tomcat: /usr/local/tomcat/webapps/openmrs.war
chown tomcat: /usr/local/tomcat/.OpenMRS/
Since ‘openmrs.war’ file is located to the ‘/usr/local/tomcat/webapps’ directory, it will automatically be deployed by Tomcat on start-up, so start Tomcat service:
cd /usr/local/tomcat/bin
./startup.sh
OpenMRS requires a database to work as this is where data is saved, so create a new ‘openmrsdb’ MySQL database on your server:
mysql -u root -p
mysql> CREATE DATABASE openmrsdb;
mysql> CREATE USER openmrs@localhost;
mysql> SET PASSWORD FOR 'openmrs'@'localhost' = PASSWORD("openmrs-password");
mysql> GRANT ALL PRIVILEGES ON openmrsdb.* TO 'openmrs'@'localhost' IDENTIFIED BY 'openmrs-password' WITH GRANT OPTION;
mysql> FLUSH PRIVILEGES;
mysql> quit
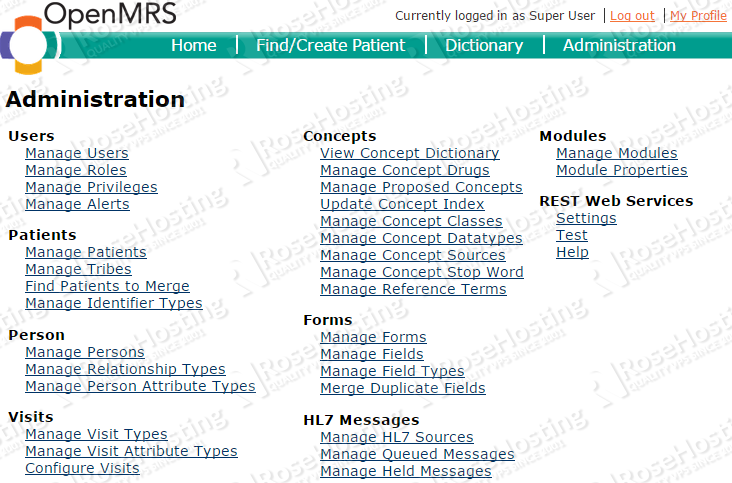
Open http://server-ip-address:8080/openmrs and follow the easy instructions: select install language, choose ‘Advanced’ type of installation, enter ‘openmrsdb’ as database name, ‘openmrs’ as MySQL username and the MySQL password for the ‘openmrs’ user defined earlier and finally specify a new password for your administrator user.
If you like to eliminate the 8080 from the URL and open OpenMRS through a regular URL (i.e. reverse proxy OpenMRS web application behind Apache), edit Apache configuration file and add the following lines:
<VirtualHost *:80>
   ServerAdmin admin@your-domain.com
   ServerName your-domain.com
   ErrorLog logs/your-domain.com-error_log
   CustomLog logs/your-domain.com-access_log common

ProxyRequests Off

   <Proxy *>
   Order deny,allow
   Allow from all
   </Proxy>

      ProxyPass / http://server-ip-address:8080/openmrs/
      ProxyPassReverse / http://server-ip-address:8080/openmrs/

   <Location />
      Order allow,deny
      Allow from all
   </Location>
In order to open OpenMRS using http://your-domain.com , change ‘server-ip-address’ with ‘your-domain.com’ in the ProxyPass and ProxyPassReverse directives. Do not forget to restart Apache web server for the changes to take effect:
service httpd restart
That is it. The OpenMRS installation is now complete. Of course you don’t have to do any of this if you use one of our Super-Fast CentOS Hosting services, in which case you can simply ask our expert Linux admins to install OpenMRS for you. They are available 24×7 and will take care of your request immediately.
PS. If you liked this post please share it with your friends on the social networks using the buttons on the left or simply leave a reply below. Thanks.