In this tutorial, we will explain how to install ownCloud on Debian 13. ownCloud is free and open-source file sync-and-share software that enables users to host their own cloud storage on a server. ownCloud gives users control over their data, accessible from any device connected to the ownCloud server. It also provides a web interface, as well as desktop and mobile applications. The core functions of ownCloud include data synchronization, security, collaboration, file access and sharing, and flexibility. In this blog post, we will install ownCloud with the LAMP stack.
Installing ownCloud on Debian 13 is a straightforward process that may take up to 15 minutes. Let’s get things done!
Table of Contents
Prerequisites
- A server running Debian 13 OS
- User privileges: root or non-root user with sudo privileges
- A valid domain with a pointed A record to the server
Step 1. Update the System
Before we begin installing ownCloud and the LAMP stack, we will update the system packages to their latest versions. Execute the following command:
sudo apt update -y && sudo apt upgrade -y
Step 2. Install Apache Web Server
First, installing the Apache web server is the first step in the LAMP stack. To install Apache, execute the command below:
sudo apt install apache2 -y
Once installed, start and enable the service for automatic start on system boot:
sudo systemctl start apache2 && sudo systemctl enable apache2
Check the status of the service:
sudo systemctl status apache2
You should get the following output:
root@host:~# sudo systemctl status apache2
● apache2.service - The Apache HTTP Server
     Loaded: loaded (/usr/lib/systemd/system/apache2.service; enabled; preset: enabled)
     Active: active (running) since Sat 2025-11-08 02:17:51 CST; 43s ago
 Invocation: a75d47f607b04682b64b05007ca6724c
       Docs: https://httpd.apache.org/docs/2.4/
   Main PID: 3228 (apache2)
      Tasks: 55 (limit: 4640)
     Memory: 5.4M (peak: 5.9M)
        CPU: 188ms
     CGroup: /system.slice/apache2.service
             ├─3228 /usr/sbin/apache2 -k start
             ├─3230 /usr/sbin/apache2 -k start
             └─3231 /usr/sbin/apache2 -k start
Step 3. Install PHP along with the Extensions
Next in the LAMP stack is PHP, along with its various extensions. ownCloud does not support the newer PHP 8. x versions, but it does support PHP 7.4. To install it, first, we need to install some prerequisites:
sudo apt install gnupg apt-transport-https ca-certificates
Then we need to add the repository:
wget -qO - https://packages.sury.org/php/apt.gpg | sudo gpg --dearmor -o /usr/share/keyrings/sury-archive-keyring.gpg

echo "deb [signed-by=/usr/share/keyrings/sury-archive-keyring.gpg] https://packages.sury.org/php/ bookworm main" | sudo tee /etc/apt/sources.list.d/sury-php.list

curl -sSL https://packages.sury.org/php/README.txt | sudo bash -x
Once the repositories are added, update the system:
sudo apt update -y
To install PHP7.4 with its extensions, execute the following command:
sudo apt install php7.4 php7.4-cli php7.4-curl php7.4-mysql php7.4-gd php7.4-readline php7.4-mbstring php7.4-apcu php7.4-xml php7.4-opcache php7.4-common php7.4-bcmath php7.4-json php7.4-zip php7.4-intl -y
This will install PHP7.4, and to check the installed version, you can execute the command below:
php -v
The output should look like this:
root@host:~# php -v
PHP 7.4.33 (cli) (built: Jul  3 2025 16:45:48) ( NTS )
Copyright (c) The PHP Group
Zend Engine v3.4.0, Copyright (c) Zend Technologies
    with Zend OPcache v7.4.33, Copyright (c), by Zend Technologies
Step 4. Install MariaDB database service
The last component of the LAMP stack is the MariaDB database service. To install the MariaDB database server, execute the command below:
sudo apt install mariadb-server -y
Once installed, start and enable the MariaDB database service:
sudo systemctl start mariadb && sudo systemctl enable mariadb
To check the status of the service, execute the command below:
sudo systemctl status mariadb
You should get the following output:
root@host:~# sudo systemctl status mariadb
● mariadb.service - MariaDB 11.8.3 database server
     Loaded: loaded (/usr/lib/systemd/system/mariadb.service; enabled; preset: enabled)
     Active: active (running) since Sat 2025-11-08 02:26:58 CST; 1min 16s ago
 Invocation: 892dac7505a1406aa43c563b853039cb
       Docs: man:mariadbd(8)
             https://mariadb.com/kb/en/library/systemd/
   Main PID: 25885 (mariadbd)
     Status: "Taking your SQL requests now..."
      Tasks: 10 (limit: 30624)
     Memory: 123.1M (peak: 128M)
        CPU: 9.090s
     CGroup: /system.slice/mariadb.service
             └─25885 /usr/sbin/mariadbd
Step 5. Create ownCloud Database and User
To create a ownCloud database and user login to the MariaDB first with the mariadb command:
root@host:~# mariadb
Welcome to the MariaDB monitor.  Commands end with ; or \g.
Your MariaDB connection id is 31
Server version: 11.8.3-MariaDB-0+deb13u1 from Debian -- Please help get to 10k stars at https://github.com/MariaDB/Server

Copyright (c) 2000, 2018, Oracle, MariaDB Corporation Ab and others.

Type 'help;' or '\h' for help. Type '\c' to clear the current input statement.

MariaDB [(none)]>
Then you should execute the following commands one by one:
CREATE DATABASE ownClouddb;
CREATE USER 'ownCloud'@'localhost' IDENTIFIED BY 'StrongPasswordHere';
GRANT ALL ON ownClouddb.* TO 'ownCloud'@'localhost' WITH GRANT OPTION;
FLUSH PRIVILEGES;
EXIT;
Step 6. Download and install ownCloud
Download the ownCloud into the Apache document root:
cd /var/www/html

wget https://download.owncloud.com/server/stable/owncloud-latest.zip
Unzip the owncloud-latest.zip file and set the correct permissions:
unzip owncloud-latest.zip

chown -R www-data:www-data owncloud/

find . -type f -exec chmod 644 {} \;

find . -type d -exec chmod 755 {} \;
Once done, you can remove the latest.zip file:
rm owncloud-latest.zip
Step 7. Create Apache Virtual Host File
The Apache Configuration file for the ownCloud installation is required to access it via a domain name. To create the file, execute the following command:
sudo touch /etc/apache2/sites-available/owncloud.conf
Open the file and paste the following lines of code
<VirtualHost *:80>
ServerName yourdomainhere.com
DocumentRoot /var/www/html/owncloud

<Directory /var/www/html/owncloud>
AllowOverride All
</Directory>

ErrorLog ${APACHE_LOG_DIR}/error.log
CustomLog ${APACHE_LOG_DIR}/access.log combined

</VirtualHost>
Save the file and close it.
Enable the Apache configuration files for ownCloud, including the rewrite module.
sudo a2enmod rewrite

sudo a2ensite owncloud.conf

sudo a2dissite 000-default.conf
Check the Apache2 syntax:
apachectl -t
You should receive the following output:
root@host:/var/www/html/owncloud.conf# apachectl -t
Syntax OK
If the syntax is OK, restart the Apache service.
systemctl restart apache2
That’s it. Now you can access the ownCloud at http://yourdomainhere.com
Step 8. Finish the ownCloud Installation
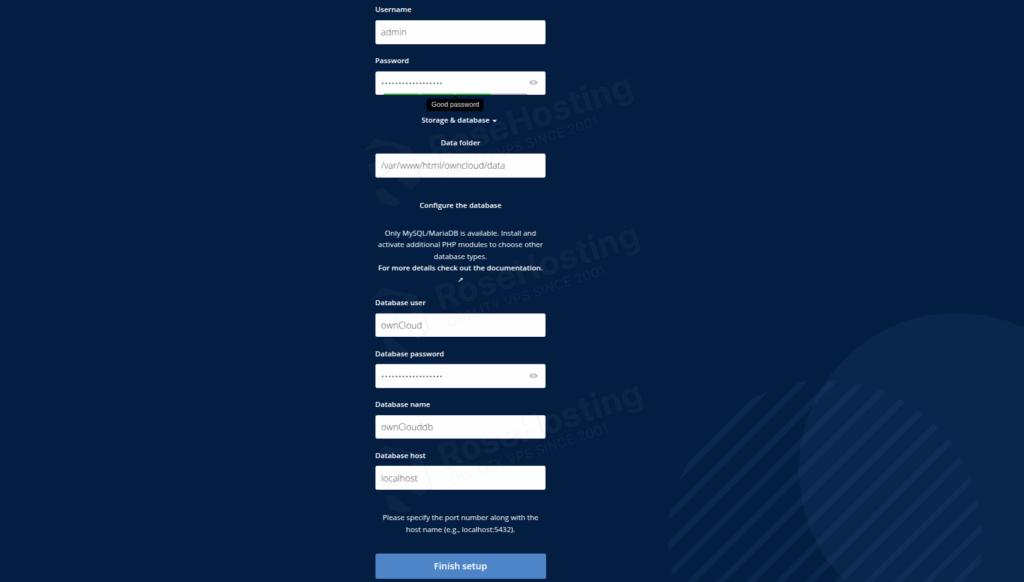
Accessing the domain for the first time after the ownCloud installation will prompt you to enter the administrator username and password you want to use, along with the database credentials you set in Step 5. Fill in this info and click on the “Finish Setup” button link at the bottom of the page:
After clicking on the Finish Setup, you will be redirected to the login page:

After logging in, you should see the following screen:
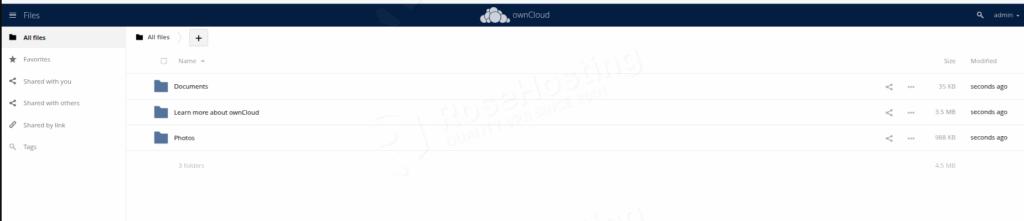
That’s it. You successfully installed ownCloud on Debian 13 OS.
Of course, you don’t have to install ownCloud if you have difficulties and you are not familiar with Linux. You can always contact our technical support. You only need to sign up for one of our NVMe VPS plans and submit a support ticket. We are available 24/7 and will attend to your request promptly.
If you liked this post on how to install ownCloud on Debian 13, please share it with your friends or leave a comment down below.