 In this tutorial we will show you how to install ProjectPier on a CentOS VPS with Apache, PHP and MariaDB.
ProjectPier is an open source project management and group collaboration software which allows developers and users to create and manage multiple projects online using a web browser.
In order to install ProjectPier on your server, you need to make sure it meets the following requirements:
- PHP 5.2 or higher with the following PHP extensions enabled: GD, MySQL and SimpleXML;
- Apache Web Server 2.0 or higher installed on your virtual server and compiled with mod_rewrite module;
- MySQL (MariaDB) with InnoDB support.
Make sure that all services are up to date by executing the following command:
yum -y update
Install the required packages:
yum install mariadb mariadb-server httpd php php-common php-gd php-ldap php-xml
Start the Apache web server and MariaDB database server and enable them to start on boot:
systemctl start httpd
systemctl start mariadb

systemctl enable httpd
systemctl enable mariadb
Download the latest stable version of ProjectPier at http://www.projectpier.org/download to the ‘/opt’ directory on the server. Then, extract it and move the ProjectPier files and directories to the ‘/var/www/html/projectpier’ directory. At the time of writing this tutorial, the latest stable version of ProjectPier is 0.8.8.
cd /opt/
wget http://www.projectpier.org/files/pp088wSP2_2014-08-14.zip
mkdir -p /var/www/html/projectpier
unzip -d /var/www/html/projectpier pp088wSP2*.zip
Configure your server to support InnoDB, if it is not set by default. To do so, edit the ‘/etc/my.cnf’ MySQL configuration file and the comment the skip-innodb line by adding # in front of it (i.e. #skip-innodb). Then, increase the max_allowed_packet variable to 128MB by adding this line to ‘/etc/my.cnf’ file:
max_allowed_packet = 128M
Restart MariaDB for the changes to take effect:
systemctl restart mariadb
Create a new database and a new username and password for the ProjectPier database:
mysql -uroot -p
MariaDB [(none)]> CREATE DATABASE projectpier CHARACTER SET utf8;
MariaDB [(none)]> GRANT ALL PRIVILEGES ON projectpier.* TO 'projectpier'@'localhost' IDENTIFIED BY 'your_projectpier_passwd';
MariaDB [(none)]> FLUSH PRIVILEGES;
MariaDB [(none)]> \q
Edit the Apache configuration file (/etc/httpd/conf/httpd.conf) and create a new virtual host in Apache:
vi /etc/httpd/conf/httpd.conf
<VirtualHost YOUR_SERVER_IP:80>
ServerAdmin webmaster@your-domain.com
DocumentRoot "/var/www/html/projectpier"
ServerName your-domain.com
ServerAlias www.your-domain.com
ErrorLog "/var/log/httpd/your-domain.com-error_log"
CustomLog "/var/log/httpd/your-domain.com-access_log" combined
<Directory "/var/www/html/your-domain.com/">
DirectoryIndex index.html index.php
Options FollowSymLinks
AllowOverride All
Require all granted
</Directory>
</VirtualHost>
Restart the Apache service for the changes to take effect:
systemctl restart httpd
The webserver user (Apache) needs to be able to write to ‘cache/autoloader.php’ and ‘cache/log.php’ files and ‘cache’, ‘upload’, ‘config’ and ‘tmp’ directories so you can easily accomplish that by executing the following command:
chown apache:apache -R /var/www/html/projectpier
Open http://yourdomain.com/public/install in your favorite web browser to run the ProjectPier installer, then follow the installer’s instructions: check if all ProjectPier requirements are met, enter the database username and password, create an administrator account and click ‘submit’ to complete the installation.
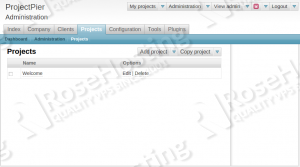
That is it. The ProjectPier installation is now complete. Log in to the administrator back-end using the newly created administrator account and create new projects via ProjectPier.
Of course you don’t have to do any of this if you use one of our Linux VPS Hosting services, in which case you can simply ask our expert Linux admins to install ProjectPier project management and online group collaboration software for you. They are available 24×7 and will take care of your request immediately.
PS. If you liked this post please share it with your friends on the social networks using the buttons on the left or simply leave a reply below. Thanks.
i cant find the installation setup file in the unzipped folder and also i am using wampserver2.5 which in its my.ini file, thier is no line like skip-innodb
There is no such file, to run the installer you need to open
http://localhost/public/installin your web browser . As for the InnoDB, it seams that your MySQL server supports InnoDB by default.