
Sensu is an open-source monitoring solution that has the capability to monitor different environments, especially for mixed environments like public, private, and hybrid clouds. Sensu also provides numerous plugins that can be used as what they call “Sensu checks”. These plugins monitor the health of services, server resources, and collect different server metrics from different services. It also provides alerts and notifications.
It is developed using the Ruby language. It utilizes RabbitMQ as the intermediary for the messages, and Redis for data-caching and storage.
In this article, we will show you step-by-step instructions on how to install Sensu on Ubuntu 18.04.
Table of Contents
Prerequisites:
For this tutorial, we recommend using a fresh Ubuntu 18.04 VPS installation.
Make sure that your server meets the following minimum hardware and software configuration for the Sensu server back-end:
Hardware:
- 4 CPU Cores
- 4 GB of RAM
- 4 GB of free disk space
- Reliable network link
Software:
- Ubuntu 18.04
- A Dedicated IP address
- Full root privileges, or the root user
To learn more about back-end and agent requirements for Sensu, you may visit their official article about hardware requirements.
Check for Updates and Install Dependencies
Log in to your server via SSH:
ssh [username]@[server_ip_address]
Be sure to replace “username” with the account name of a root user found on the server (or the root user itself), and replace “server_ip” with the IP address of your server.
Before starting with the installation, it is recommended to update all Ubuntu packages to their latest versions:
apt-get update
apt-get upgrade
To avoid the “missing libraries” issue in future installations, installing basic dependencies is recommended:
apt-get install software-properties-common build-essential -y
Installing and Setting Up RabbitMQ
RabbitMQ is the most-popular message broker. It will act as the intermediary messaging system for Sensu. RabbitMQ requires Erlang – a programming language which is used for building real-time application systems.
To install Erlang, use the following commands to install the Erlang repository package:
cd /opt
wget https://packages.erlang-solutions.com/erlang-solutions_1.0_all.deb
dpkg -i erlang-solutions_1.0_all.deb
After setting up the Erlang and RabbitMQ repository and updating our Ubuntu installation, we can now proceed to install the Erlang package by simply typing the following:
apt-get update
apt-get install erlang rabbitmq-server
To verify if the RabbitMQ service was successfully installed, run the following to check the status of the RabbitMQ service:
systemctl status rabbitmq-server
You should be able to see a message similar to this one:
rabbitmq-server.service - RabbitMQ Messaging Server

Loaded: loaded (/lib/systemd/system/rabbitmq-server.service; enabled; vendor

Active: active (running) since Sun 2019-03-17 23:12:51 CDT; 1min 22s ago
Now, we need to create a vhost for our Sensu installation:
rabbitmqctl add_vhost /sensu
Next is to add a user to the vhost. Please replace [password] with a strong password.
rabbitmqctl add_user sensu [password]
Finally, grant full permissions to our “sensu” user:
rabbitmqctl set_permissions -p /sensu sensu ".*" ".*" ".*"
Installing and Setting Up Redis
Redis is being used by Sensu as its main data-caching system for the data produced by monitoring agents, including checks, events, alerts, and notifications.
Installing the Redis server is simple – you only need to type the following:
apt-get -y install redis-server
To verify that the Redis server is running:
systemctl status redis-server
You should see “Active(running)” in the results:
redis-server.service - Advanced key-value store

Loaded: loaded (/lib/systemd/system/redis-server.service; enabled; vendor pre

Active: active (running) since Sun 2019-03-17 23:23:15 CDT; 1min 15s ago
Installing Sensu
After installing the two main requirements, we can now proceed with the Sensu Core installation and configuration.
As of this writing, Sensu Core package is not yet officially available in Ubuntu repository. To add Sensu’s official repository and keys, use the following commands:
echo "deb https://sensu.global.ssl.fastly.net/apt bionic main" | sudo tee /etc/apt/sources.list.d/sensu.list
wget -O- https://sensu.global.ssl.fastly.net/apt/pubkey.gpg | sudo apt-key add -
The next step is to update and finally install the Sensu package:
apt-get update
apt-get install sensu -y
Configuring Sensu
After installing Sensu, we will need to configure API, RabbitMQ, and Redis for Sensu by creating individual configuration files which are in the JSON format. We will be using nano to open the configuration files.
API:
nano /etc/sensu/conf.d/api.json
{
  "api": {
    "host": "localhost",
    "bind": "0.0.0.0",
    "port": 4567
  }
}
RabbitMQ:
nano /etc/sensu/conf.d/rabbitmq.json
{
  "rabbitmq": {
    "host": "127.0.0.1",
    "port": 5672,
    "vhost": "/sensu",
    "user": "sensu",
    "password": "[password]"
  }
}
Redis:
nano /etc/sensu/conf.d/redis.json
{
  "redis": {
    "host": "127.0.0.1",
    "port": 6379
  }
}
Installing and Setting Up Uchiwa as Sensu’s Dashboard Web Interface
Sensu has no monitoring dashboard installed by default. Uchiwa is an open-source dashboard designed for Sensu.
To install Uchiwa, type the following commands:
apt-get install uchiwa -y
Once installed, we need to create the config file for Sensu. It is recommended to use a strong password for the Uchiwa admin account:
nano /etc/sensu/uchiwa.json
{
  "sensu": [
    {
      "name": "sensu.your-domain.com",
      "host": "127.0.0.1",
      "port": 4567,
      "timeout": 10
    }
  ],
  "uchiwa": {
    "host": "0.0.0.0",
    "port": 3000,
    "refresh": 10,
    "user": "admin",
    "pass": "[password]"
  }
}
Remember to replace [password] with a strong password of your choice.
Configure Sensu Server as a Client
We can setup Sensu to monitor itself by creating the following file:
nano /etc/sensu/conf.d/client.json
{
  "client": {
    "environment": "development",
    "name": "sensu-server",
    "address": "127.0.0.1",
    "subscriptions": [
      "development",
      "sensu-server"
    ]
  }
}
Finally, setting the correct permissions for the configuration is required.
chown -R sensu:sensu /etc/sensu/conf.d/*
chown sensu:sensu /etc/sensu/uchiwa.json
Managing Sensu Services
To enable automatic startup of all services at boot:
systemctl enable sensu-server
systemctl enable sensu-api
systemctl enable sensu-client
systemctl enable uchiwa
Let’s make sure that all services are started:
systemctl start sensu-server
systemctl start sensu-api
systemctl start sensu-client
systemctl start uchiwa
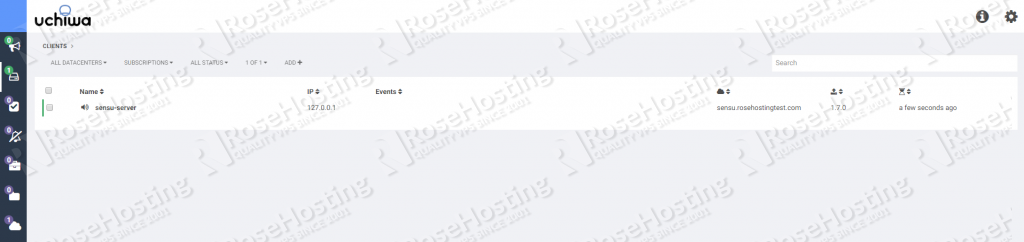
You may now access your Uchiwa dashboard using http://[server's public IP]:3000. You should be able to see sensu-server as a client.
That’s it – you now have a working Sensu monitoring server on your Ubuntu 18.04 server.
Of course, you don’t have to install Sensu on Ubuntu 18.04 if you have an Ubuntu VPS with us. You can simply ask our support team to install Sensu on Ubuntu 18.04 for you. They are available 24/7 and will be able to help you with the installation.
There is a new updated article on how to Install Sensu on Ubuntu 20.04 in our step-by-step guide.
PS. If you enjoyed reading this blog post on how to install Sensu on Ubuntu 18.04, feel free to share it on social networks using the shortcuts below, or simply leave a comment in the comments section. Thanks.