SuiteCRM is a free and open-source CRM application. It is a customizable CRM solution that offers more functionality than platforms like Salesforce, SAP, SugarCRM, and others. SuiteCRM is a powerful, cost-effective CRM solution for companies looking to better manage their customers without being tied to expensive paid solutions. In this article, we will show you how to install SuiteCRM on Ubuntu 24.04
Table of Contents
Prerequisites
- An Ubuntu 24.04 VPS with at least 2GB of RAM
- SSH access with sudo privileges, or root access
Conventions
# – given commands should be executed with root privileges either directly as a root user or by use of sudo command
$ – given commands should be executed as a regular user
Step 1. Update the System
First of all, we need to log in to our Ubuntu 24.04 VPS through SSH:
ssh root@IP_Address -p Port_numberReplace “root” with a user that has sudo privileges or root if necessary. Additionally, replace “IP_Address” and “Port_Number” with your server’s respective IP address and SSH port number. Next, let’s make sure that we’re on Ubuntu 24.04. You can verify it with this command:
# lsb_release -aYou should get this as the output:
No LSB modules are available.
Distributor ID: Ubuntu
Description:    Ubuntu 24.04.3 LTS
Release:        24.04
Codename:       noble
Then, run the following command to make sure that all installed packages on the server are updated to their latest available versions:
# apt update Step 2. Install PHP
In this step, we will install PHP 8.5. Let’s get it done now.
# apt install php8.5-{bcmath,common,curl,fpm,gd,intl,mbstring,mysql,soap,xml,xsl,zip,cli}Next, we need to modify the following settings in the php.ini file:
upload_max_filesize = 2MThe upload_max_filesize should be set at least to 6 MB
# nano /etc/php/8.5/cli/php.iniFind the string upload_max_filesize and change the value.
Step 3. Install MariaDB Server
Ubuntu 24.04 ships with MySQL 8.0 and MariaDB 10.11. We can start installing MariaDB by executing the command below.
# apt install mariadb-serverOnce installed, we can proceed with creating a new database and its user for our SuiteCRM website.
# mysql After logging in to the MySQL shell, we can run these.
mysql> CREATE USER 'suitecrm'@'localhost' IDENTIFIED BY 'm0d1fyth15';
mysql> CREATE DATABASE suitecrm;
mysql> GRANT ALL PRIVILEGES ON suitecrm.* TO 'SuiteCRM'@'localhost';
mysql> FLUSH PRIVILEGES;
mysql> \q
Step 4. Install and Configure Nginx
In this article, we will use Nginx as the web server. Let’s install it now.
# apt install nginx -yThen, we need to create an nginx server block for our SuiteCRM website.
# nano /etc/nginx/sites-enabled/suitecrm.confInsert the following into the file.
upstream suitecrm {
server unix:/run/php/php8.5-fpm.sock;
}

server {
        listen 80;

        root /var/www/html/suitecrm8/public;


        index index.php index.html;
        server_name suitecrm.yourdomain.com;


        location / {
                try_files $uri $uri/ /index.php?$args;
        }


        location ~ \.php$ {
                include snippets/fastcgi-php.conf;
                fastcgi_pass suitecrm;
              }
                location ~ /\.ht {
                deny all;
        }
}
Make sure to replace suitecrm.yourdomain.com with your actual domain or subdomain name. Save the file, then exit.
Step 5. Install SuiteCRM
To install SuiteCRM, we need to download the installation file first. Let’s download it now.
# wget https://suitecrm.com/download/166/suite89/565627/suitecrm-8-9-1.zipTo get the more recent version, you can check their download page at https://suitecrm.com/download/
Once downloaded, we can extract the file.
# unzip suitecrm-8-9-1.zip -d /var/www/html/suitecrm8Now, we need to change the permissions.
# chown -R www-data: /var/www/html/suitecrm8
# cd /var/www/html/suitecrm8
# find . -type d -not -perm 2755 -exec chmod 2755 {} \;
# find . -type f -not -perm 0644 -exec chmod 0644 {} \;
# find . ! -user www-data -exec chown www-data: {} \;
# chmod +x bin/console
If you want to install it interactively, you can choose option one below.
Option 1 – Run
# ./bin/console suitecrm:app:install without any options, the command will ask you for the required options
Option 2 – Run
# ./bin/console suitecrm:app:install -u "admin_username" -p "admin_password" -U "db_user" -P "db_password" -H "db_host" -N "db_name" -S "site_url" -d "demo_data"Since we already have the database details, we can run the complete command with options.
# ./bin/console suitecrm:app:install -u "suitecrm" -p "2Y4kuYwFMaMWgxHH" -U "suitecrm" -P "m0d1fyth15" -H "localhost" -N "suitecrm" -S "http://suitecrm.yourdomain.com" -d "yes"Please wait until it finishes, then you will see a message similar to this in the end.
SuiteCRM Silent Install
============

Running: check-route-access
step: check-route-access | status: done
One or More Failed Checks: The SuiteCRM Title cannot be found. This is not a valid SuiteCRM Page. Please refer to the logs/install.log
One or More Failed Checks: The result of the curl call to the graphql page was empty. Please refer to the logs/install.log
One or More Failed Checks: Please refer to the logs/install.log
Running: check-install-lock
step: check-install-lock | status: done
Installer not locked. Proceeding with install
Running: check-db-connection
step: check-db-connection | status: done
DB credentials ok
Running: install-system-checks
step: install-system-checks | status: done
Running: create-config
step: create-config | status: done
Created silent install config: config_si.php
Running: create-env
step: create-env | status: done
Created .env.local
Added randomly generated APP_SECRET
Running: run-legacy-install
step: run-legacy-install | status: done
SuiteCRM Installation Completed
Running: check-cron-user
step: check-cron-user | status: done
root has been added to the allowed_cron_users list. This is not recommended.
However, if you really want to allow root to run cron jobs, please remove the suffix _REMOVE_THIS_NOTICE_IF_YOU_REALLY_WANT_TO_ALLOW_ROOT from the entry.

============
Now you should be able to access SuiteCRM with your domain name at http://suitecrm.yourdomain.com and start working on your project. For more information about SuiteCRM, its features, and configuration, please check their official documentation.
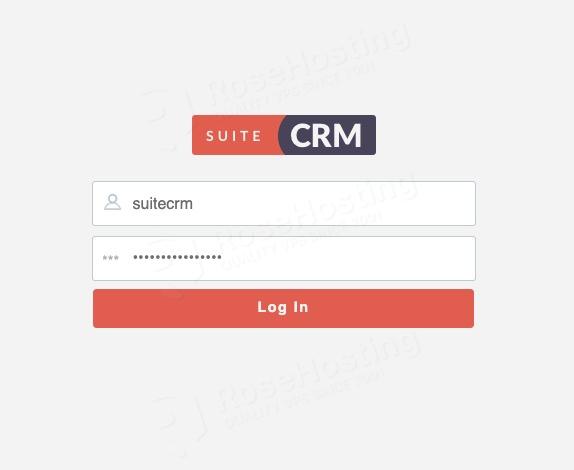
You should be able to log in using the credentials we used during installation.
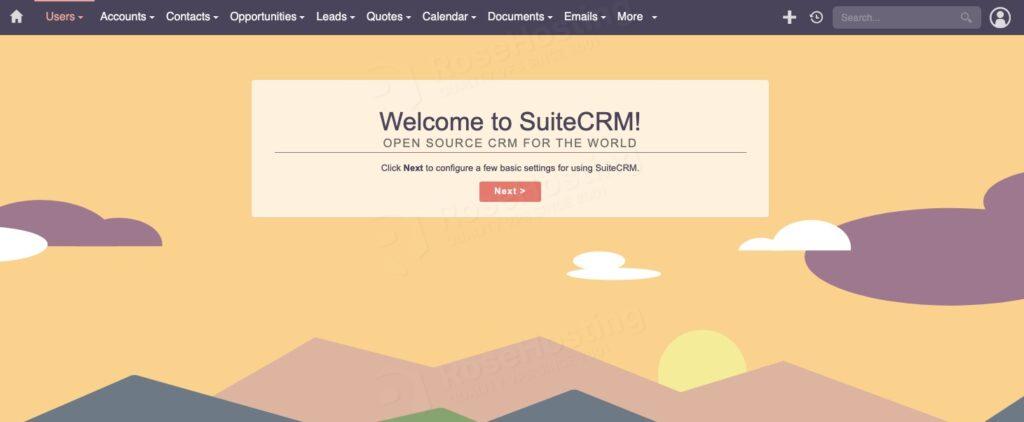
Once logged in, you can start configuring your SuiteCRM website.
You’re Done!
Of course, you don’t have to install SuiteCRM on Ubuntu 24.04 if you use one of our SuiteCRM VPS Hosting services, in which case you can simply ask our expert Linux admins to install SuiteCRM on Ubuntu 24.04 for you. They are available 24×7 and will take care of your request immediately. Managing SuiteCRM instances is not just about the installation; we can help you optimize your SuiteCRM installation if you have an active service with us.
PS. If you liked this post on installing SuiteCRM on Ubuntu 24.04, please share it with your friends on the social networks using the buttons below or simply leave a comment in the comments section. Thanks.