
WordPress is a very popular CMS and it remains the easiest and best open-source application for building websites. People mostly use WordPress for blogging, although actually it also supports other types of CMS like e-commerce, forums, etc.
It offers you the freedom to build anything you want, it has thousands of plugins and themes that you can use to customize your website. The installation is fairly easy, you can simply follow the steps in this tutorial and you will learn how to install WordPress on Ubuntu 22.04.
Table of Contents
Prerequisites
- An Ubuntu 22.04 VPS
- Full SSH root access or a user with sudo privileges is required
- A domain or subdomain name, pointing to your server IP address
Step 1: Log in to your server via SSH
First, you will need to log in to your Ubuntu 22.04 VPS via SSH as the root user:
ssh root@IP_Address -p Port_number
You will need to replace ‘IP_Address’ and ‘Port_number’ with your server’s actual IP address and SSH port number. Additionally, replace ‘root’ with the username of the system user with sudo privileges.
You can check whether you have the proper Ubuntu version installed on your server with the following command:
# lsb_release -a
It will return an output like this.
No LSB modules are available.
Distributor ID: Ubuntu
Description: Ubuntu 22.04 LTS
Release: 22.04
Codename: jammy
We will use ‘root’ in this article when running the shell commands. If you want to use your regular user with sudo privileges to run the commands, make sure to append ‘sudo’ in front of the commands.
Step 2: Update the system
Before starting, you have to make sure that all Ubuntu 22.04 packages installed on the server are up to date. You can do this by running the following commands:
# apt update
# apt upgrade
Step 3: Install SSL Certificate
In this article, WordPress will be installed on the secured protocol (HTTPS). So, we need to install an SSL certificate before we can proceed with the other steps.
# apt install python3-certbot-nginx -y
Prior to generating a new SSL certificate for your wordpress.example.com, make sure you pointed the domain/subdomain DNS A record to your server IP address already. If Certbot is unable to generate a free SSL certificate, most likely the DNS update is not fully propagated.
# certbot certonly --non-interactive --agree-tos -m you@example.com -d wordpress.example.com --standalone
If successful, you will see an output like this:
Saving debug log to /var/log/letsencrypt/letsencrypt.log
Requesting a certificate for wordpress.example.com

Successfully received certificate.
Certificate is saved at: /etc/letsencrypt/live/wordpress.example.com/fullchain.pem
Key is saved at: /etc/letsencrypt/live/wordpress.example.com/privkey.pem
This certificate expires on 2022-08-06.
These files will be updated when the certificate renews.
Certbot has set up a scheduled task to automatically renew this certificate in the background.

- - - - - - - - - - - - - - - - - - - - - - - - - - - - - - - - - - - - - - - -
If you like Certbot, please consider supporting our work by:
* Donating to ISRG / Let's Encrypt: https://letsencrypt.org/donate
* Donating to EFF: https://eff.org/donate-le
- - - - - - - - - - - - - - - - - - - - - - - - - - - - - - - - - - - - - - - -
Step 4: Install PHP 8.1
Ubuntu 22.04 ships with PHP 8.1 as the default PHP version. We are going to use this PHP version for our WordPress website. Run this command below to install PHP 8.1 and its required extensions.
# apt install php-{curl,fpm,imagick,mbstring,mysql,xml,zip}
Once completed, the PHP-FPM service will be running automatically. We are not going to edit the PHP-FPM configuration. We will use the default PHP-FPM www.conf file. To ensure PHP-FPM is running, you can verify it with this command:
# systemctl status php8.1-fpm
Step 5: Install and Configure Web Server
Nginx is a fast and secure web server and one of the most popular and widely used web servers in the world. To install the Nginx web server on Ubuntu 22.04 run the following command:
# apt install nginx
Next, let’s create a new nginx server block for our WordPress website.
# nano /etc/nginx/conf.d/wprdpress.conf
Paste the following into the new file.
upstream php-handler {
server unix:/run/php/php8.1-fpm.sock;
}

server {
listen 80;
server_name wordpress.example.com;
return 301 https://$server_name$request_uri;
}

server {
listen 443 ssl http2;
server_name wordpress.example.com;

# Path to the root of your installation
root /var/www/wordpress;
index index.php;

ssl_certificate /etc/letsencrypt/live/wordpress.example.com/fullchain.pem;
ssl_certificate_key /etc/letsencrypt/live/wordpress.example.com/privkey.pem;

# Prevent nginx HTTP Server Detection
server_tokens off;

access_log /var/log/nginx/wordpress_access.log;
error_log /var/log/nginx/wordpress_error.log;

client_max_body_size 64M;

location / {
try_files $uri $uri/ /index.php?$args;
}

location ~ \.php$ {
try_files $uri =404;
include /etc/nginx/fastcgi_params;
fastcgi_read_timeout 3600s;
fastcgi_buffer_size 128k;
fastcgi_buffers 4 128k;
fastcgi_param SCRIPT_FILENAME $document_root$fastcgi_script_name;
fastcgi_pass php-handler;
fastcgi_index index.php;
}

}
Make sure to replace wordpress.example.com with your actual domain or subdomain name. Save and close the file.
Step 6: Install MariaDB Server and Create a Database
The next step is to install the MariaDB server which will be used for the data storage of your WordPress site.
To install the MariaDB server, invoke this command:
# apt install mariadb-server
After the installation is completed, we can proceed with creating a new database and database user.
# mysql
Once logged in to the MySQL shell, we can run the following commands.
mysql> CREATE DATABASE wordpress_db;
mysql> CREATE USER wordpress_user@localhost IDENTIFIED BY 'm0d1fyth15';
mysql> GRANT ALL PRIVILEGES ON wordpress_db.* TO wordpress_user@localhost;
mysql> FLUSH PRIVILEGES;
mysql> \q
Step 7: Install WordPress using WP-CLI
In this step, we are going to download WP-CLI and use it to install WordPress. WP-CLI is a tool to manage your WordPress installation through a command-line interface.
# wget https://raw.githubusercontent.com/wp-cli/builds/gh-pages/phar/wp-cli.phar -O /usr/local/bin/wp
The command above will download wp-cli.phar file and save it as /usr/local/bin/wp, so you can just type ‘wp’ in your command. But first, let’s make the file executable.
# chmod +x /usr/local/bin/wp
Now, you should be able to run ‘wp’, for example
# sudo -u www-data wp --info
This will return an output like this:
root@ubuntu22:/var/www/html# sudo -u www-data wp --info
OS: Linux 5.15.0-1004-gcp #7-Ubuntu SMP Wed Apr 20 04:26:07 UTC 2022 x86_64
Shell: /usr/sbin/nologin
PHP binary: /usr/bin/php8.1
PHP version: 8.1.2
php.ini used: /etc/php/8.1/cli/php.ini
MySQL binary: /usr/bin/mysql
MySQL version: mysql Ver 15.1 Distrib 10.6.7-MariaDB, for debian-linux-gnu (x86_64) using EditLine wrapper
SQL modes:
WP-CLI root dir: phar://wp-cli.phar/vendor/wp-cli/wp-cli
WP-CLI vendor dir: phar://wp-cli.phar/vendor
WP_CLI phar path: /var/www/html
WP-CLI packages dir:
WP-CLI global config:
WP-CLI project config:
WP-CLI version: 2.6.0
Next, let’s create a directory for our WordPress website’s document root then download the latest version of WordPress.
# mkdir /var/www/wordpress
# cd /var/www/wordpress
# chown -R www-data: /var/www
To download WordPress core files, simply run this command below.
# sudo -u www-data wp core download
You can see that /var/www/wordpress/ has WordPress core files, you can list them with ‘ll’ command.
root@ubuntu22:/var/www/wordpress# ll
total 224
drwxr-xr-x 5 www-data www-data 4096 May 8 11:27 ./
drwxr-xr-x 4 root root 4096 May 8 11:27 ../
-rw-r--r-- 1 www-data www-data 405 May 8 11:27 index.php
-rw-r--r-- 1 www-data www-data 19915 May 8 11:27 license.txt
-rw-r--r-- 1 www-data www-data 7437 May 8 11:27 readme.html
-rw-r--r-- 1 www-data www-data 7165 May 8 11:27 wp-activate.php
drwxr-xr-x 9 www-data www-data 4096 May 8 11:27 wp-admin/
-rw-r--r-- 1 www-data www-data 351 May 8 11:27 wp-blog-header.php
-rw-r--r-- 1 www-data www-data 2338 May 8 11:27 wp-comments-post.php
-rw-r--r-- 1 www-data www-data 3001 May 8 11:27 wp-config-sample.php
drwxr-xr-x 4 www-data www-data 4096 May 8 11:27 wp-content/
-rw-r--r-- 1 www-data www-data 3939 May 8 11:27 wp-cron.php
drwxr-xr-x 26 www-data www-data 16384 May 8 11:27 wp-includes/
-rw-r--r-- 1 www-data www-data 2496 May 8 11:27 wp-links-opml.php
-rw-r--r-- 1 www-data www-data 3900 May 8 11:27 wp-load.php
-rw-r--r-- 1 www-data www-data 47916 May 8 11:27 wp-login.php
-rw-r--r-- 1 www-data www-data 8582 May 8 11:27 wp-mail.php
-rw-r--r-- 1 www-data www-data 23025 May 8 11:27 wp-settings.php
-rw-r--r-- 1 www-data www-data 31959 May 8 11:27 wp-signup.php
-rw-r--r-- 1 www-data www-data 4747 May 8 11:27 wp-trackback.php
-rw-r--r-- 1 www-data www-data 3236 May 8 11:27 xmlrpc.php
As you can see, there is no wp-config.php in the directory. Let’s proceed with creating the wp-config.php file. but before running the command below, make sure you replace the database name, database username, and password.
# sudo -u www-data wp core config --dbhost=localhost --dbname=wordpress_db --dbuser=wordpress_user --dbpass=m0d1fyth15
You will see a message that the wp-config.php file is generated.
Now we have the wp-config.php file, and we can proceed with installing WordPress. Let’s run this command to install it, you can modify the information in the command below before running it.
# sudo -u www-data wp core install --url=https://wordpress.example.com/ --title="New WordPress Website" --admin_name=wrdpadmin --admin_password=m0d1fyth15 --admin_email=you@yourdomain.com
You will see a successful message like this:
Success: WordPress installed successfully.
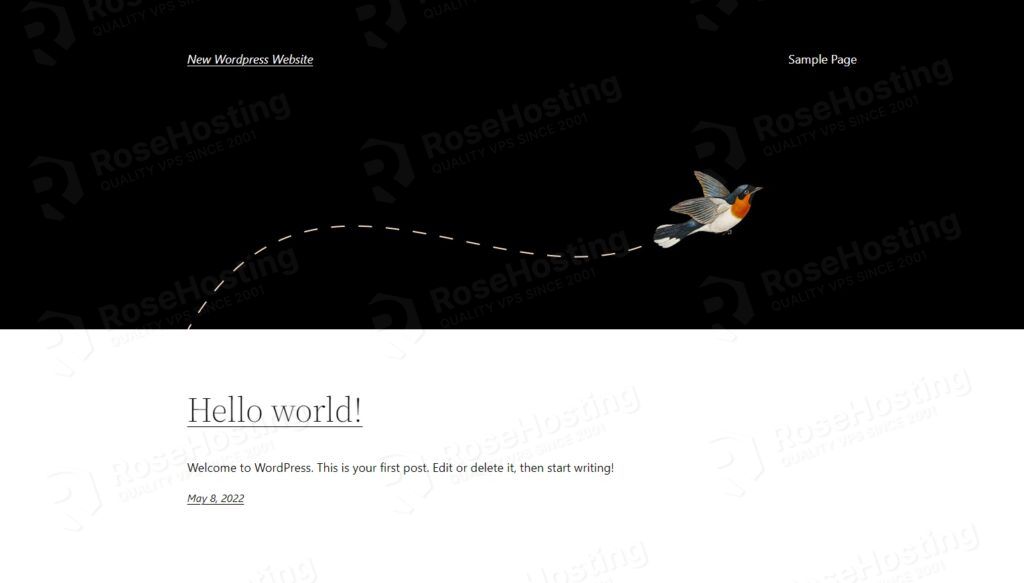
That’s it. You have successfully installed WordPress at https://wordpress.example.com/ and you can open it using any web browser you like, then build and customize it.
If you are one of our web hosting customers and use our managed Linux Hosting, you don’t have to follow this tutorial and install WordPress on Ubuntu 22.04 yourself, our Linux admins will set up and configure a WordPress VPS for you. They are available 24×7 and will take care of your request immediately, and all you need to do is to submit a ticket.
PS. If you liked this post please share it with your friends on social networks or simply leave a reply below. Thanks.