 In this article we will show you how to install Jenkins on an Ubuntu 14.04 VPS.
Jenkins is an award-winning application that monitors executions of repeated jobs, such as building a software project or jobs run by cron. Among those things, current Jenkins focuses on building/testing software projects continuously. In a nutshell, Jenkins provides an easy-to-use so-called continuous integration system, making it easier for developers to integrate changes to the project, and making it easier for users to obtain a fresh build. The automated, continuous build increases productivity.
Builds can be started by various means, including being triggered by commit in a version control system, scheduling via a cron-like mechanism, building when other builds have completed, and requesting a specific build URL.
Updated tutorial:
How to Install Jenkins on Ubuntu 16.04
REQUIREMENTS
We are using our SSD 1 VPS hosting plan for this tutorial.
UPDATE THE SYSTEM
Login to your Ubuntu 14.04 VPS as root and execute the following commands:
# apt-get update
# apt-get upgrade
On Debian-based distributions, such as Ubuntu, you can install Jenkins through the apt package manager. For the purpose of this tutorial you will need to install open source implementation of JAVA 7.
This is fairly easy and you can do this by executing the command below:
# apt-get install openjdk-7-jdk
To verify if JAVA has been successfully installed and set-up, run the following command:
# java -version
INSTALL JENKINS
Before you can install Jenkins, add the key and source list to apt. This needs to be done in 2 steps, first add the key:
# wget -q -O - https://jenkins-ci.org/debian/jenkins-ci.org.key | sudo apt-key add -
Then, create a sources list for Jenkins:
# sh -c 'echo deb http://pkg.jenkins-ci.org/debian binary/ > /etc/apt/sources.list.d/jenkins.list'
Update apt’s cache before installing Jenkins:
# apt-get update
After the cache has been updated, proceed with installing Jenkins. Please note that it has a large bunch of dependencies, so it might take a few moments to install them all.
# apt-get install jenkins
Jenkins will be launched as a daemon upon start. Check /etc/init.d/jenkins for more details. To run this service a ‘Jenkins’ user is created. The log file will be placed in /var/log/jenkins/jenkins.log . Check this file when in need of troubleshooting.
By default, Jenkins listens on port 8080.
After the installation is complete you can access Jenkins by navigating your favorite browser to http://your_domain:8080 or http://your_server_IP_address:8080.
CONFIGURE JENKINS
You will be welcomed by the default Jenkins screen.
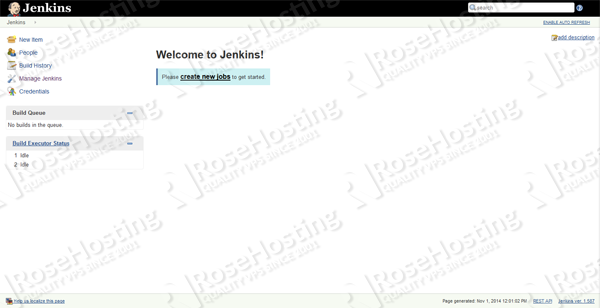
Unfortunately, the installation is insecure and allows anyone on the network to launch processes on your behalf. We need to enable authentication to discourage misuse. First, go to Manage Jenkins (in the left menu). As you can see there are different menus for Jenkins configuration.
For our purposes click ‘Setup Security’ on the page loaded. Enable security by checking the box next to Enable security.
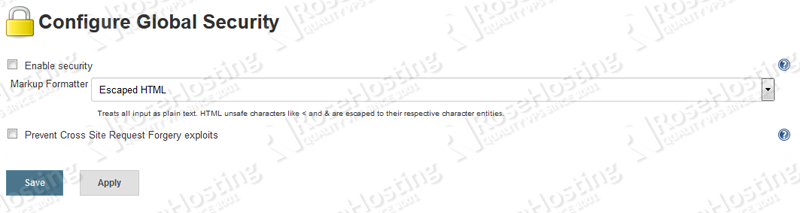
Configure Jenkins to use its own user database and disable sign-ups:
![]()
Navigate to Matrix-based security under Authorization and check the box next to it. Then make sure that Anonymous has only the Read right under the View group to prevent Jenkins from crashing.
Click save at the bottom of the page. After that, you’ll see a login form. Just ignore that and go to http://your_domain:8080 again. You will see the signup form noted in the picture below:
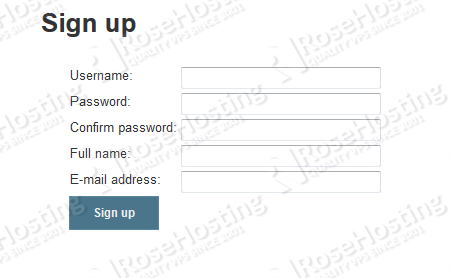
Sign up with a username to your liking, but please note that Jenkins is assuming a lower case username, so we strongly suggest you choose as such to avoid confusion. After signing up, you will be the administrator of this fresh Jenkins install.
After everything is up and running, it is up to you to create and schedule your first job, install plugins etc…
Of course you don’t have to do any of this if you use one of our Hosted Jenkins services, in which case you can simply ask our expert Linux admins to install Jenkins for you. They are available 24×7 and will take care of your request immediately. You can also read our post on How to Install Jenkins on Ubuntu 16.04 for updates.
PS. If you liked this post please share it with your friends on the social networks using the buttons on the left or simply leave a reply below. Thanks.