![]() PHP Server Monitor is an open source PHP script for monitoring.
PHP Server Monitor is an open source PHP script for monitoring.
It checks whether your websites and servers on your Linux VPS are up and running.
It comes with a web based user interface where you can manage your services and websites, check graphs of uptime, latency, etc…
In this tutorial we will guide you through the steps of installing PHP Server Monitor on a CentOS 7 VPS
In order to run PHP Server Monitor your server need to meet the following requirements:
- PHP 5.3.7+
- MySQL or MariaDB Database
- Nginx or Apache web servers
Before we start with the installation of PHP Server Monitor, log in to your server as user ‘root’ and make sure that all packages are up to date.
yum -y update
Install the following requirements
yum install php-common unzip
Now, go to PHP Server Monitor’s official website and download the latest stable release. At the moment of writing this article it is version 3.1.0
wget http://downloads.sourceforge.net/project/phpservermon/phpservermon/PHP%20Server%20Monitor%20v3.1.0/phpservermon-3.1.0.zip
Unpack the zip package in the document root directory.
unzip phpservermon-3.1.0.zip -d /var/www/html/
Change the current working directory
cd /var/www/html/
Since the package is unpacked in new ‘phpservermon-3.1.0’ directory, we will rename the directory to something simpler
mv phpservermon-3.1.0 phpservermon
Make the Apache user to be owner of all directories and files
chown -R apache:apache phpservermon
To find the correct Apache user you can execute
grep '^User' /etc/httpd/conf/httpd.conf
User apache
So, in our case it is the ‘apache’ user.
Next, log in to your MySQL server and create new database and user for PHP Server Monitor
mysql -u root -p
CREATE DATABASE phpservermon;
GRANT ALL PRIVILEGES ON phpservermon.* TO 'phpservermonuser'@localhost IDENTIFIED BY 'YOURPASSWORD' WITH GRANT OPTION;
FLUSH PRIVILEGES;
Change ‘YOURPASSWORD‘ with an actual strong password.
You can use the same commands if you run MariaDB instead of MySQL server.
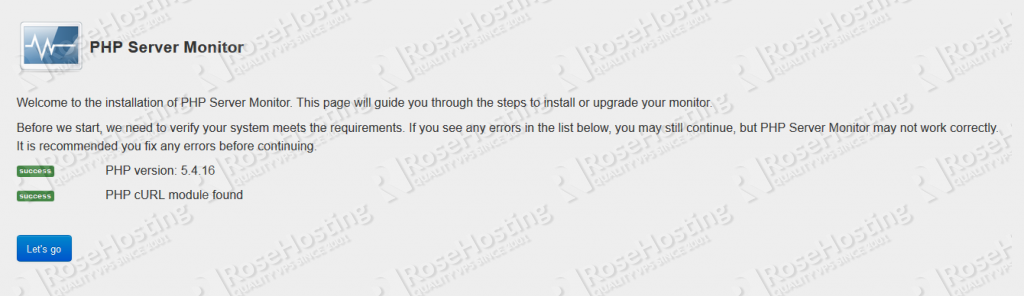
Now, open your favorite web browser and navigate to http//YOURDOMAIN.COM/phpservermon . PHP Server Monitor will verify if your server meets the requirements.
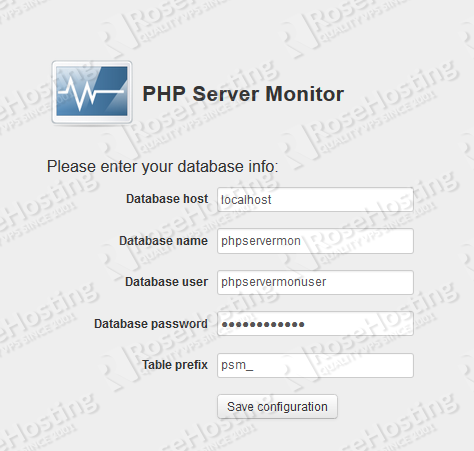
On the next screen you will be prompted to enter the information of the newly created MySQL database.
If PHP Server Monitor complains that it cannot create a configuration file as shown in the picture below, you can manually create it.

Create a config.php file
cd phpservermon/
nano config.php
with the following content
<?php
define('PSM_DB_HOST', 'localhost');
define('PSM_DB_NAME', 'phpservermon');
define('PSM_DB_USER', 'phpservermonuser');
define('PSM_DB_PASS', 'YOURPASSWORD');
define('PSM_DB_PREFIX', 'psm_');
Save the file and click ‘I have saved the configuration’
Now, you will need to create a new account to access your monitor
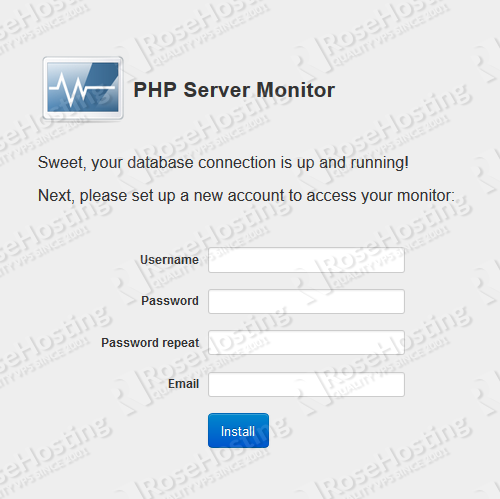
Once you create the new account the installation is completed. On the next screen you can check if error have occurred. If you followed the steps above, the installation should be completed with no errors.
For more information on how to configure and use PHP Server Monitor you can check their documentation.
Of course you don’t have to do any of this if you use one of our Linux VPS Hosting services, in which case you can simply ask our expert Linux admins to install PHP Server Monitor for you. They are available 24×7 and will take care of your request immediately.
PS. If you liked this post please share it with your friends on the social networks using the buttons on the left or simply leave a reply below. Thanks.