Status: This OS is no longer supported
This article, “Installing and securing phpMyAdmin 4 on CentOS 6,” covers a version of CentOS that reached end of life (EOL). It is no longer supported. As such, this guide is no longer maintained. If you are currently operating a server running CentOS 6, we highly recommend contacting RoseHosting’s fully managed support. They can upgrade or migrate you to a supported version of AlmaLinux.
 This guide will explain how to set up phpMyAdmin 4 on a CentOS 6 VPS and configure it to use SSL.
PhpMyAdmin is a web based MySQL administration tool made to make MySQL administration much easier. PhpMyAdmin needs to have a web server (for example Apache) and at least PHP 5.2 and MySQL 5 installed on the server.
Table of Contents
Installing Apache
To install Apache, MySQL and PHP, use the following command:
yum install httpd mysql-server php php-mysql php-gd php-mbstring
Start Apache and MySQL services:
service httpd start
service mysqld start
Set the Apache and MySQL services to start automatically when the virtual server boots:
chkconfig httpd on
chkconfig mysqld on
Setting up MySQL
Set a MySQL root password using the following command:
/usr/bin/mysql_secure_installation
Follow the instructions; enter your new MySQL root password, say ‘Yes’ to all the options and your MySQL installation should now be secure.
Install OpenSSL and mod_ssl packages using the following command:
yum install mod_ssl openssl
Download and extract the latest version of phpMyAdmin available at http://www.phpmyadmin.net/home_page/downloads.php
cd /root
wget http://sourceforge.net/projects/phpmyadmin/files/phpMyAdmin/4.0.9/phpMyAdmin-4.0.9-all-languages.tar.gz
tar -xzf /root/phpMyAdmin*.tar.gz -C /var/www/html/
mv /var/www/html/phpMyAdmin-4.0.9-all-languages /var/www/html/php-My-Admin
cd /var/www/html/php-My-Admin
cp config.sample.inc.php config.inc.php
Edit the ‘config.inc.php’ configuration file and add the following line below ‘/* Authentication type */’:
$cfg['ForceSSL'] = true;
Set Up The Self-Signed Certificate
The next step is to generate a self-signed certificate.
Generate private key:
openssl genrsa -des3 -out your-domain.com.key 4096
Generate CSR:
openssl req -new -key your-domain.com.key -out your-domain.com.csr
Generate Self-Signed Key:
openssl x509 -req -days 700 -in your-domain.com.csr -signkey your-domain.com.key -out your-domain.com.crt
Copy the files to the ‘/etc/httpd/ssl/’ directory:
mkdir -p /etc/httpd/ssl/
cp your-domain.com.crt /etc/httpd/ssl/
cp your-domain.com.key /etc/httpd/ssl/
Create new virtual hosts in Apache, for example:
vi /etc/httpd/conf.d/your-domain.com.conf
NameVirtualHost *:80
NameVirtualHost *:443
<VirtualHost *:80>
DocumentRoot "/var/www/html/php-My-Admin/"
ServerName your-domain.com
<Directory /var/www/php-My-Admin/>
Options Indexes FollowSymLinks MultiViews
AllowOverride All
Order allow,deny
allow from all
</Directory>
ErrorLog logs/your-domain.com_error_log
TransferLog logs/your-domain.com_access_log
LogLevel warn
</VirtualHost>
<VirtualHost *:443>
DocumentRoot "/var/www/html/php-My-Admin/"
ServerName your-domain.com
SSLEngine on
SSLProtocol all -SSLv2
SSLCertificateFile /etc/httpd/ssl/your-domain.com.crt
SSLCertificateKeyFile /etc/httpd/ssl/your-domain.com.key
<Directory /var/www/php-My-Admin/>
Options Indexes FollowSymLinks MultiViews
AllowOverride All
Order allow,deny
allow from all
</Directory>
ErrorLog logs/your-domain.com.ssl_error_log
TransferLog logs/your-domain.com.ssl_access_log
LogLevel warn
</VirtualHost>
Restart Apache service for the changes to take effect:
service httpd restart
SetUp phpMyAdmin
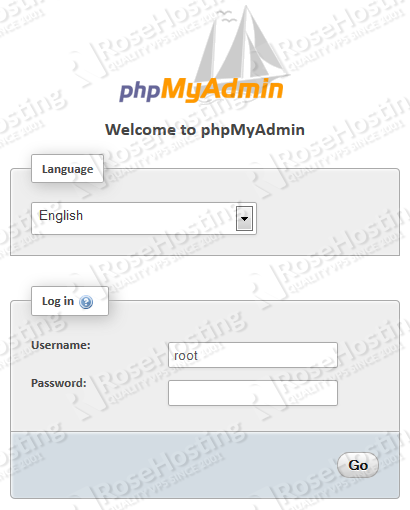
Open your popular web browser and access the phpMyAdmin interface at https://your-domain.com
You will receive a warning about the SSL certificate not being trusted. This is normal and is expected. The SSL certificate we created is self-signed which is why the web browser is complaining. You can safely ignore that, accept the certificate and proceed to log in to phpMyAdmin.
Conclusion
Of course, you don’t have to do any of this if you use one of our Linux VPS Hosting services, in which case you can simply ask our expert Linux admins to install phpMyAdmin for you. They are available 24×7 and will take care of your request immediately. For updates, you can also refer to our guide on How to Install phpMyAdmin on CentOS 8.
PS. If you liked this post please share it with your friends or leave a reply below. Thanks.
Excellent guide!
Thank you for posting it online!
You are welcome.
We are glad and proud that our tutorials are providing help to all Linux users and enthusiasts out there.