In this blog post, we will show you how to set up n8n workflow automation with Docker and PostgreSQL on Ubuntu 26.04. n8n is a powerful open-source workflow automation platform that lets you connect apps, APIs, databases, and services without writing extensive code. Using its visual drag-and-drop editor, you can automate repetitive tasks, build integrations, and create custom business workflows. Running n8n with Docker on Ubuntu 26.04 simplifies deployment by packaging the application and its dependencies into isolated containers, making updates and maintenance much easier. PostgreSQL serves as the workflow database, providing reliable, scalable, and persistent storage for workflows, credentials, and execution history. Together, Ubuntu, Docker, PostgreSQL, and n8n form a secure, flexible, and production-ready automation stack suitable for personal projects, businesses, and enterprise environments.
Configuring this software combination will take around 20 minutes. Let’s get started!
Table of Contents
Prerequisites
- A server running Ubuntu 26.04 OS
- User privileges: root or non-root user with sudo privileges
- Domain name with an A record pointed to the server IP address
Step 1. Update your system
Before installing anything on the server, it is recommended to update all system packages to the latest available versions. Run the following command in your Ubuntu 26.04 terminal:

apt update -y && apt upgrade -y
Step 2. Install Docker
To install n8n workflow automation with Docker, first we need to install Docker. Docker allows us to run n8n and PostgreSQL in isolated, portable containers, making deployment, updates, backups, and maintenance much simpler and more consistent across different systems.
There are a couple of steps to install Docker. First, we need to install the Docker dependencies:
apt install software-properties-common apt-transport-https ca-certificates -y
Next, we need to add the Docker GPG key:
curl -fsSL https://download.docker.com/linux/ubuntu/gpg | gpg --dearmor -o /usr/share/keyrings/docker-archive-keyring.gpg
Once the key is added, we need to add the repo:
echo "deb [arch=amd64 signed-by=/usr/share/keyrings/docker-archive-keyring.gpg] https://download.docker.com/linux/ubuntu $(lsb_release -cs) stable" | sudo tee /etc/apt/sources.list.d/docker.list > /dev/null
Once the repo is added, update the system and install Docker:
apt update -y

apt install docker-ce docker-ce-cli containerd.io -y
After the installation, start and enable the Docker service:
systemctl start docker && systemctl enable docker
To check the status of the Docker service, execute the command below:
systemctl status docker
You should get the following output:
root@host:/opt# systemctl status docker
● docker.service - Docker Application Container Engine
     Loaded: loaded (/usr/lib/systemd/system/docker.service; enabled; preset: enabled)
     Active: active (running) since Fri 2026-07-17 17:51:11 CDT; 3min ago
 Invocation: a6ae3961da9645dc93a1135b94031cca
TriggeredBy: ● docker.socket
       Docs: https://docs.docker.com
   Main PID: 10677 (dockerd)
      Tasks: 10
     Memory: 25.4M (peak: 26.9M)
        CPU: 3.865s
     CGroup: /system.slice/docker.service
             └─10677 /usr/bin/dockerd -H fd:// --containerd=/run/containerd/containerd.sock
Step 3. Create Project Directory and Infrastructure Files
To create an n8n project directory, execute the following command:
mkdir ~/n8n

cd ~/n8n
The first file is the .env file:
nano .env
Paste the following lines of code:
POSTGRES_USER=n8n
POSTGRES_PASSWORD=StrongPostgresPasswordHere
POSTGRES_DB=n8n

N8N_BASIC_AUTH_ACTIVE=true
N8N_BASIC_AUTH_USER=admin
N8N_BASIC_AUTH_PASSWORD=Strongn8nAdminPasswordHere

N8N_HOST=yourdomain.com
N8N_PORT=5678
N8N_PROTOCOL=https

WEBHOOK_URL=https://yourdomain.com/
Save the file and close it.
The second file is the docker-compose.yaml file:
nano docker-compose.yml
Paste the following lines of code:
services:

  postgres:
    image: postgres:16
    container_name: n8n-postgres
    restart: always

    environment:
      POSTGRES_USER: ${POSTGRES_USER}
      POSTGRES_PASSWORD: ${POSTGRES_PASSWORD}
      POSTGRES_DB: ${POSTGRES_DB}

    volumes:
      - postgres_data:/var/lib/postgresql/data

    networks:
      - n8n-network


  n8n:
    image: docker.n8n.io/n8nio/n8n
    container_name: n8n
    restart: always

    ports:
      - "5678:5678"

    environment:

      DB_TYPE: postgresdb

      DB_POSTGRESDB_HOST: postgres
      DB_POSTGRESDB_PORT: 5432
      DB_POSTGRESDB_DATABASE: ${POSTGRES_DB}
      DB_POSTGRESDB_USER: ${POSTGRES_USER}
      DB_POSTGRESDB_PASSWORD: ${POSTGRES_PASSWORD}

      N8N_BASIC_AUTH_ACTIVE: ${N8N_BASIC_AUTH_ACTIVE}
      N8N_BASIC_AUTH_USER: ${N8N_BASIC_AUTH_USER}
      N8N_BASIC_AUTH_PASSWORD: ${N8N_BASIC_AUTH_PASSWORD}

      N8N_HOST: ${N8N_HOST}
      N8N_PORT: ${N8N_PORT}
      N8N_PROTOCOL: ${N8N_PROTOCOL}

      WEBHOOK_URL: ${WEBHOOK_URL}

      GENERIC_TIMEZONE: America/Chicago

    volumes:
      - n8n_data:/home/node/.n8n

    depends_on:
      - postgres

    networks:
      - n8n-network


volumes:

  postgres_data:
  n8n_data:


networks:

  n8n-network:
Save the file and close it.
Step 4. Start the n8n Docker containers
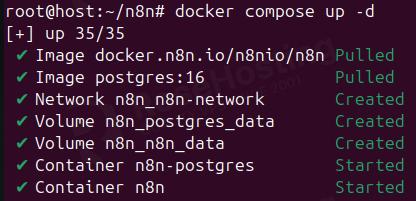
To start the containers we defined in the Docker Compose file.yaml file, execute the following command:
docker compose up -d
The process will start and will look like this:

Once completed, it should look like this:
To check the running containers, execute the command docker ps in the terminal, and the containers will be displayed:
CONTAINER ID   IMAGE                     COMMAND                  CREATED         STATUS         PORTS                                         NAMES
f04f73579c26   docker.n8n.io/n8nio/n8n   "tini -- /docker-ent…"   7 minutes ago   Up 7 minutes   0.0.0.0:5678->5678/tcp, [::]:5678->5678/tcp   n8n
c67e9449f303   postgres:16               "docker-entrypoint.s…"   7 minutes ago   Up 7 minutes   5432/tcp                                      n8n-postgres
As you can see, the n8n container is running on port 5678, and to access it in the browser, you need to use the IP address of the server and the port: http://YourServerIPAddress:5678 OR via the domain name you configured: http://YourDomainName.com:5678
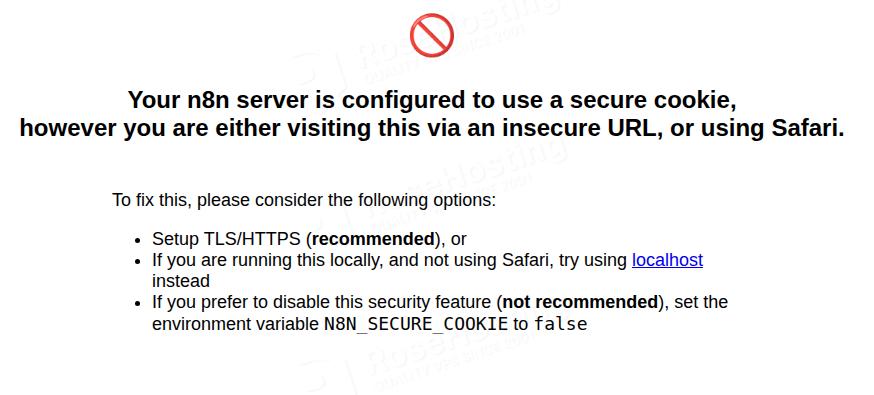
But as you can see, there is a warning about security. To fix this warning, we need to install an SSL certificate. Let’s move to the next step.
Step 5. Configure Nginx as a reverse proxy
Nginx acts as a reverse proxy, sitting between users and your n8n container and providing security, performance, and flexibility.
To install the Nginx Web server, execute the following command:
apt install nginx -y
Once installed, start and enable the nginx service:
systemctl start nginx && systemctl enable nginx
To check the status of the Nginx service, execute the command below:
systemctl status nginx
You should get the following output:
root@host:~/n8n# systemctl status nginx
● nginx.service - A high performance web server and a reverse proxy server
     Loaded: loaded (/usr/lib/systemd/system/nginx.service; enabled; preset: enabled)
     Active: active (running) since Sat 2026-07-18 06:24:50 CDT; 7s ago
 Invocation: 6859b995638d46329335791585b2a25d
       Docs: man:nginx(8)
   Main PID: 20962 (nginx)
      Tasks: 4 (limit: 3770)
     Memory: 3.7M (peak: 4.1M)
        CPU: 70ms
     CGroup: /system.slice/nginx.service
Once the service is up and running, create the Nginx configuration file for n8n.
nano /etc/nginx/sites-available/n8n.conf
Paste the following lines of code:
server {

    server_name yourdomain.com;

    location / {

        proxy_pass http://127.0.0.1:5678;

        proxy_http_version 1.1;

        proxy_set_header Upgrade $http_upgrade;
        proxy_set_header Connection "upgrade";

        proxy_set_header Host $host;

        proxy_set_header X-Real-IP $remote_addr;

    }

}
Save the file, close it, and enable it:
ln -s /etc/nginx/sites-available/n8n.conf /etc/nginx/sites-enabled/
Check the Nginx configuration file:
nginx -t
If everything is OK, you should receive the following output:
root@host:~/n8n# nginx -t
nginx: the configuration file /etc/nginx/nginx.conf syntax is ok
nginx: configuration file /etc/nginx/nginx.conf test is successful
Restart the Nginx service:
systemctl restart nginx
Now, we need to install an SSL certificate. To do that, first install Certbot for Nginx.
Certbot is a free tool that automatically obtains, installs, and renews Let’s Encrypt SSL/TLS certificates for Nginx, enabling secure HTTPS connections for your website or application.
To install Certbot, execute the command below:
apt install certbot python3-certbot-nginx -y
Once installed, obtain an SSL certificate for your domain:
certbot --nginx -d yourdomain.com
There will be a couple of questions while installing the SSL certificate, and at the end the output should look like this:
root@host:~/n8n# certbot --nginx -d yourdomain.com
Saving debug log to /var/log/letsencrypt/letsencrypt.log
Enter email address or hit Enter to skip.
 (Enter 'c' to cancel): admin@yourdomain.com

- - - - - - - - - - - - - - - - - - - - - - - - - - - - - - - - - - - - - - - -
Please read the Terms of Service at:
https://letsencrypt.org/documents/LE-SA-v1.8-July-06-2026.pdf
You must agree in order to register with the ACME server. Do you agree?
- - - - - - - - - - - - - - - - - - - - - - - - - - - - - - - - - - - - - - - -
(Y)es/(N)o: Y

- - - - - - - - - - - - - - - - - - - - - - - - - - - - - - - - - - - - - - - -
Would you be willing, once your first certificate is successfully issued, to
share your email address with the Electronic Frontier Foundation, a founding
partner of the Let's Encrypt project and the non-profit organization that
develops Certbot? We'd like to send you email about our work encrypting the web,
EFF news, campaigns, and ways to support digital freedom.
- - - - - - - - - - - - - - - - - - - - - - - - - - - - - - - - - - - - - - - -
(Y)es/(N)o: N
Account registered.
Requesting a certificate for yourdomain.com

Successfully received certificate.
Certificate is saved at: /etc/letsencrypt/live/yourdomain.com/fullchain.pem
Key is saved at:         /etc/letsencrypt/live/yourdomain.com/privkey.pem
This certificate expires on 2026-10-16.
These files will be updated when the certificate renews.
Certbot has set up a scheduled task to automatically renew this certificate in the background.

Deploying certificate
Successfully deployed certificate for yourdomain.com to /etc/nginx/sites-enabled/n8n.conf
Congratulations! You have successfully enabled HTTPS on https://yourdomain.com

- - - - - - - - - - - - - - - - - - - - - - - - - - - - - - - - - - - - - - - -
If you like Certbot, please consider supporting our work by:
 * Donating to ISRG / Let's Encrypt:   https://letsencrypt.org/donate
 * Donating to EFF:                    https://eff.org/donate-le
- - - - - - - - - - - - - - - - - - - - - - - - - - - - - - - - - - - - - - - -
Now you can access your website securely at https://yourdomain.com
Step 6. Finish N8N Installation
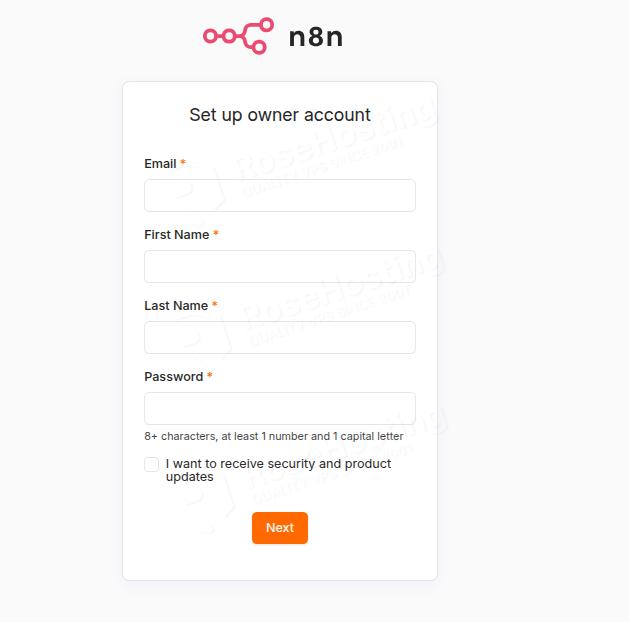
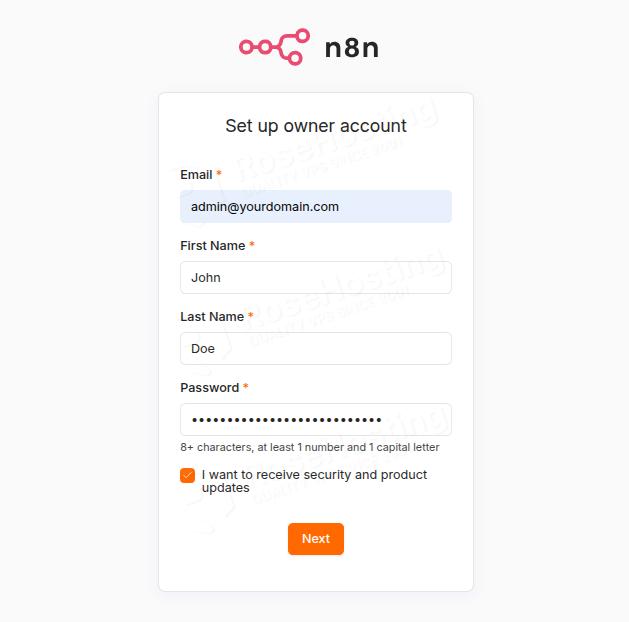
To set up an owner account, fill in the information in the fields and click on Next:
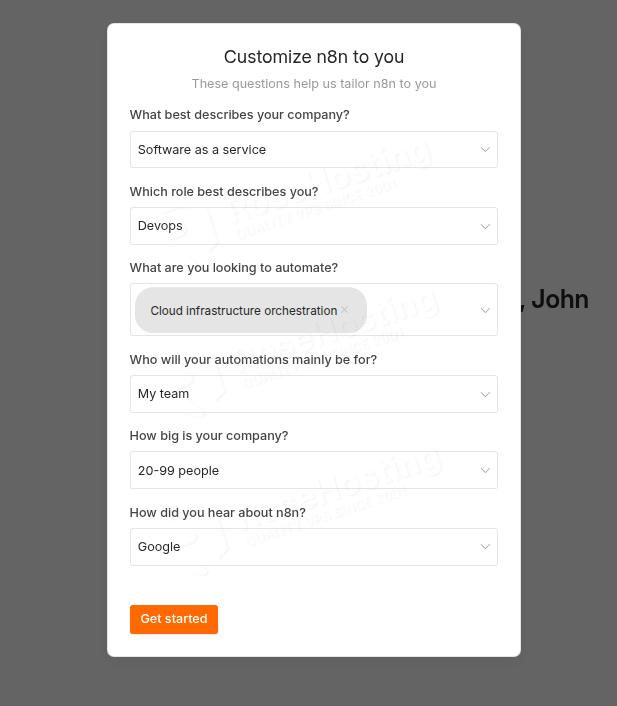
On the next screen, you will need to enter your company data:
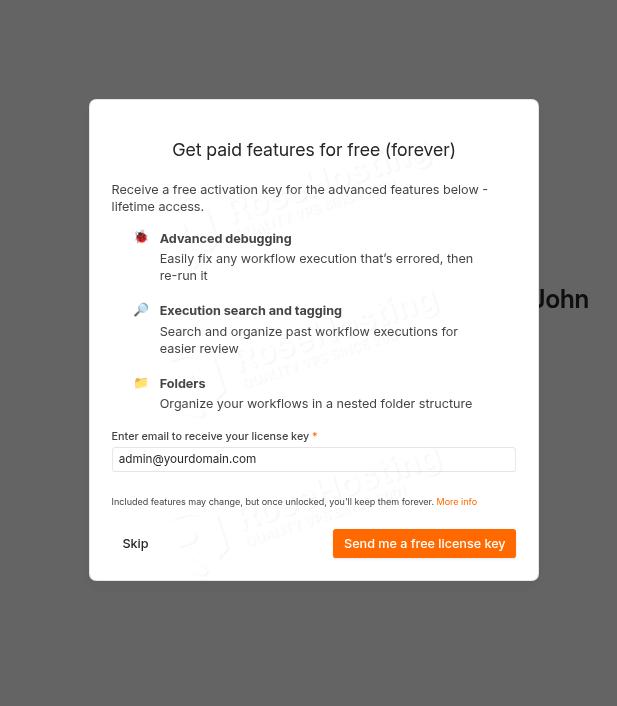
After this screen, you can click Skip to proceed without the license.
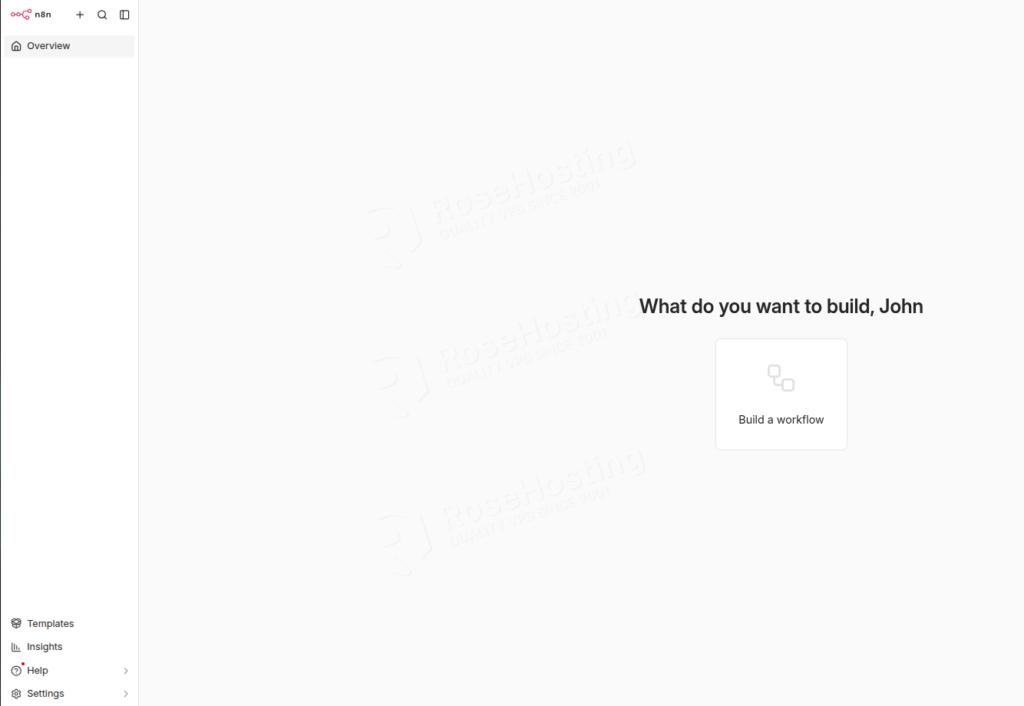
You will be redirected to the N8N admin dashboard:
Wrapping Everything Up
That’s it. You successfully installed N8N with Docker and PostgreSQL on Ubuntu 26.04 OS.
Of course, you don’t have to install it by yourself if you have difficulties and are not familiar with Linux. You can always contact our technical support. You only need to sign up for one of our n8n hosting plans and submit a support ticket. We are available 24/7 and will address your request immediately.
If you liked this post about deploying n8n workflow automation with Docker and PostgreSQL on Ubuntu 26.04, please share it with your friends or leave a comment below.