
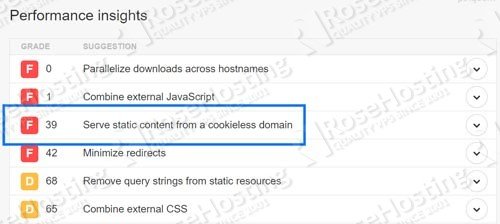
 We’ll show you how to fix serve static content from a cookieless domain error. When using a website analyzer tool such as PageSpeed Insights, GTMetrix, Pingdom, or Uptrends, a warning will often appear that says “Serve Static Content From a Cookieless Domain”. What this means is that your web server is setting cookies – this causes all future HTTP requests to include this cookie, creating unwanted network traffic. This in turn only slows down the speed of your website when a user tries to access it. If you need your website to be as fast as possible, switching to a cookieless domain is the way to go. A cookieless domain does not accept any cookies from any browsers, keeping the overall network traffic lower. The goal is to serve all static content – such as images, javascript, CSS, and more – all through a static, cookieless domain, which helps improve the speed at which these resources are downloaded.
In this tutorial, we will cover how to set up a cookieless domain in order to resolve this warning message. There are two ways to create a cookieless domain: use a new domain to serve static content, or use a subdomain to serve the static content. Using a subdomain is the most popular choice, since it doesn’t require the purchase of a new domain name – this is the method we will be covering today. However, using a new domain instead of a subdomain can be made to work easily enough with this tutorial. This tutorial discusses how to set up a cookieless domain on a Linux-based server.
NOTE: You cannot use a subdomain to serve static content if your main website is setting cookies by using the root of your domain instead of the ‘www’ prefix. If your site is setting them by using yourdomain.com instead of www.yourdomain.com, then using a subdomain to serve static content is not possible. This is due to the fact that using it on the root domain also applies it to all subdomains.
Table of Contents
1. Create a Subdomain
Creating a subdomain can be done using several methods. If you have a control panel such as cPanel or DirectAdmin, there are utilities built in to create subdomains easily and quickly. Use the built-in subdomain creation page to create a subdomain named ‘static’. When completed, your subdomain should look like this:
static.yourdomain.com
Once done, try and access your new subdomain by entering the complete URL in a web browser. You should be greeted with a fully white page.
If you do not have a control panel to create your subdomain with, that isn’t a problem – simply follow these next couple of steps. To create a subdomain without a control panel, will need to edit your website’s configuration file. The location of the configuration file you need to edit or create depends on which web server software package you use – in this tutorial, we will cover both NGINX and Apache. First things first, however, you need to create a new folder that will contain all of the website files on the new subdomain. /var/www/ is a good place to create a new folder – name it ‘static.yourdomain.com’. NOTE: You will need to place your static files from your website into this folder. Without this, your static content cannot be loaded from the static subdomain.
2. Creating a Subdomain in Apache
To create a subdomain using Apache, we only need to add a few extra lines to the existing website configuration. The location of the configuration file depends on what Linux distribution you are running. Here is the file path for RedHat-based systems:
/etc/httpd/conf.d/static.yourdomain.conf
and for Debian-based systems:
/etc/httpd/sites-available/static.yourdomain.conf
Open your website’s configuration file using your preferred text editor, and add the following paragraph to the end of the file:
<VirtualHost *:80>
ServerName static.yourdomain.com
DocumentRoot /var/www/static.yourdomain.com
ErrorLog /your/error/log/path
CustomLog /your/requested/log/path combined
</VirtualHost>
Replace ‘yourdomain’ with your domain name, and point the paths to their respective directories on the system. When this is done, you can then restart Apache with the following command:
service httpd restart
3. Creating a Subdomain in NGINX
With NGINX, we need to create an entire configuration file for this new subdomain. So, create and open a new file in /etc/nginx/sites-available using your preferred text editor, and call the file ‘static.yourdomain.com.conf’. Then, insert the following into your new file. (Be sure to change ‘yourdomain’ to your domain name):
server {
        listen 80;

        server_name static.yourdomain.com;

        log_not_found off;
        error_log off;
        fastcgi_hide_header Set-Cookie;

        root /var/www/static.yourdomain.com;
        location / { if ($request_filename ~ "\.(css|js|jpg|jpeg|gif|ico|png|bmp|pict|csv|doc|pdf|pls|ppt|tif|tiff|eps|ejs|swf|midi|mid|ttf|eot|woff|otf|svg|svgz|webp|docx|xlsx|xls|pptx|ps|class|jar|woff2|less|scss)$") {
                add_header Pragma "public"; add_header Cache-Control "public, must-revalidate, proxy-revalidate"; add_header Access-Control-Allow-Origin *; access_log off; expires 1M; break;
                   }
                return 302 http://www.yourdomain.com$request_uri;
        }
}
Now save this file, and exit your text editor. The next step is to create a symlink (a symbolic link) to enable this configuration in NGINX. You can do that with the following line:
ln -s /etc/sites-available/static.yourdomain.com.conf /etc/sites-enabled/static.yourdomain.com.conf
Now restart NGINX for the changes to take effect:
service nginx restart
4. Configure your DNS settings.
Now that a subdomain has been successfully set up, we now need to set up our DNS records to use this subdomain as an alias. We will do this using a CNAME record. Using the client-side tools that your hosting provider provides, you can easily create a CNAME record that points your subdomain to your main domain. Or, if you don’t have a control panel for your server, you can change your zone files manually. You need to add the line to your zone file that creates an alias to your main domain. This is how it should look:
static.yourdomain.com. IN CNAME yourdomain.com.
5. Set up your .htaccess file.
You need to add an extra line to your .htaccess file found in the root of your cookieless domain. So, using your preferred text editor, open .htaccess in the folder where your current website resides, and add this line to the end:
CookieDomain www.yourdomain.com
This is where the ‘www’ prefix is important. Without it, the static subdomain can’t function.
NOTE: This only works for Apache. If you’re using NGINX, the config file from earlier is made to only serve static content, meaning that it can never accept cookies.
6. Configure your website.
Now that the main setup is done, you now need to change the references in your site to point to the new static subdomain. This is where it will get its resources from now on. For example, you would change this:
<link rel="stylesheet" type="text/css" href="/css/main.css">
to this:
<link rel="stylesheet" type="text/css" href="http://static.yourdomain.com/css/main.css">
Now, when you try and access your site, it will load the static content from the subdomain instead of the main domain. This has the added benefit of simultaneous downloads of the site’s content when a user accesses your site.
 Of course, if you have a high-speed VPS hosting plan with us, you don’t need to bother fixing the serve static content from a cookieless domain, Just simply ask our expert team of Linux administrators, who will set up a static subdomain and a cookieless domain for you right away. They’re available 24/7 and can help with any questions or requests that you may have.
If you liked this tutorial on how to serve static content from a cookieless domain, feel free to share this post using the social media shortcuts, or simply leave a comment below. Thanks.