
In this tutorial, we will explain how to install and configure CyberPanel on a CentOS 8 VPS.
The web hosting industry is expanding and evolving every day. Web hosting control panels are one of the core elements of this growing industry, thanks to people that are new to web hosting needing a user-friendly way to manage their server.

There’s plenty of choice when looking at installing a control panel on your VPS. A few well-known commercial control panels are Plesk, DirectAdmin, and cPanel. To use these control panels, you need to pay for licenses, which can quickly become costly if the number of users you need isn’t very large. However, there are some open-source control panels that can help fulfill this role. Among them, CyberPanel is a free, open-source, and next-generation web hosting control panel powered by OpenLiteSpeed.

With CyberPanel, you can add new domains/virtual hosts and manage SSL certificates for them. It also provides a one-click installer for WordPress, Prestashop and Joomla.
CyperPanel offers a rich set of features, including a Web Based Terminal, a Git Manager, Auto SSL, PowerDNS, FTP, a Firewall, a File Manager, a PHP Manager, Backup and Restore, and lots more. Let’s get started.
Table of Contents
Prerequisites
To install and configure CyberPanel, we’re going to need to cover a few requirements:
- A CentOS 8 VPS (ideally a minimal install) with root access enabled (comes included on our servers) or a user with sudo privileges. We’ll be using our SSD 2 VPS for this.
- Minimum of 1 GB RAM (2 GB RAM is recommended)
- Minimum 10 GB free disk space.
Step 1: Connect via SSH and Update the OS
Log in to our CentOS server using SSH as the root user (or as a user with sudo privileges). You can do that by entering this command:
ssh root@Server_IP_Address -p Port_Number
Remember to replace ‘root’ with your username if you are not using the root user. Also, replace Server_IP_Address and Port_Number with your actual server IP address and SSH port number. The default SSH port number is 22, however your VPS may be using a different one.
Once you are logged in, you should update all of your OS packages to their latest available version.
dnf update -y
Step 2: Disable SELinux
To start, it’s necessary to disable SELinux on your server. You can disable it by editing the file located at /etc/selinux/config:
nano /etc/selinux/config
Modify the following line so that it looks like this:
SELINUX=disabled
Save and close the file then restart your server to apply the changes.
Step 3: Install CyberPanel
Now that our SELinux is configured, we can download the CyberPanel installation script using the wget command, as shown below:
wget https://cyberpanel.net/install.sh
Once the script is downloaded, we can start installing and configuring CyberPanel by using the following command:
bash install.sh
During the installation, you will be prompted for several questions, as shown below:
Detecting Centos 8...


Initializing...

Valid IP detected...

Checking server...

Checking OS...

Detecting CentOS 8.X...

Checking virtualization type...

Checking root privileges...


You are runing as root...

		CyberPanel Installer v2.01

  1. Install CyberPanel.

  2. Addons and Miscellaneous

  3. Exit.


  Please enter the number[1-3]: 1
We want to install CyberPanel, so enter the number 1 and then hit [Enter] to install CyberPanel:
		CyberPanel Installer v2.01

  RAM check : 119/1989MB (5.98%)

  Disk check : 2/80GB (3%) (Minimal 10GB free space)

  1. Install CyberPanel with OpenLiteSpeed.

  2. Install Cyberpanel with LiteSpeed Enterprise.

  3. Exit.


  Please enter the number[1-3]: 1
The CyberPanel installer will now show you your server’s resource availability, along with a choice of how to install CyberPanel. We want to use OpenLiteSpeed, so press 1 and hit [Enter] to Install CyberPanel with OpenLiteSpeed:
Install Full service for CyberPanel? This will include PowerDNS, Postfix and Pure-FTPd.

Full installation [Y/n]: Y
Full service is very useful to have for managing your storage, along with your web and mail servers. Let’s install them by pressing Y and hitting [Enter] to install full service for CyberPanel. Moving onto the next step:
Full installation selected...

Press Enter key to continue with latest version or Enter specific version such as: 1.9.4 , 1.9.5 ...etc


Branch name set to v2.0.1

Please choose to use default admin password 1234567, randomly generate one (recommended) or specify the admin password?
Choose [d]fault, [r]andom or [s]et password: [d/r/s] s
We should enter a custom password to maximize our security. Press s and hit [Enter]. You will now be prompted to provide your password manually:
Please enter your password:
your-secure-password

Please confirm  your password:
your-secure-password
Provide your desired password and hit [Enter] to continue:
Do you wish to install Memcached extension and backend?
Please select [Y/n]: Y

Do you wish to install Redis extension and backend?
Please select [Y/n]: Y
Using Memcached and Redis can help speed up your website. Press Y and hit [Enter] to install the Memcached and Redis extensions:
Would you like to set up a WatchDog (beta) for Web service and Database service ?
The watchdog script will be automatically started up after installation and server reboot
If you want to kill the watchdog , run watchdog kill
Please type Yes or no (with capital Y, default Yes):
Yes
This can help monitor our web and database services and keep them online. Enter the word Yes and Hit [Enter] to finish configuring and start installing CyberPanel. Once we have installed and configured CyberPanel, we will then see the following output:
###################################################################
                CyberPanel Successfully Installed

                Current Disk usage : 8/80GB (11%)

                Current RAM  usage : 355/1989MB (17.85%)

                Installation time  : 0 hrs 23 min 5 sec

                Visit: https:// your-server-ip :8090
                Panel username: admin
                Panel password: your-secure-password
                WebAdmin console username: admin
                WebAdmin console password: tzhe39q9O8UBz38l

             Run cyberpanel help to get FAQ info
             Run cyberpanel upgrade to upgrade it to latest version.
             Run cyberpanel utility to access some handy tools .

              Website : https://www.cyberpanel.net
              Forums  : https://forums.cyberpanel.net
              Wikipage: https://docs.cyberpanel.net

            Enjoy your accelerated Internet by
                CyberPanel & OpenLiteSpeed
###################################################################
If your provider has a network-level firewall
Please make sure you have opened following port for both in/out:
TCP: 8090 for CyberPanel
TCP: 80, TCP: 443 and UDP: 443 for webserver
TCP: 21 and TCP: 40110-40210 for FTP
TCP: 25, TCP: 587, TCP: 465, TCP: 110, TCP: 143 and TCP: 993 for mail service
TCP: 53 and UDP: 53 for DNS service
Would you like to restart your server now? [y/N]: y
Next, type y and hit [Enter] to configure the Firewall and restart your server.
Note: Please remember the CyberPanel and WebAdmin panel username and password from the above output.
Next, you can verify the status of your CyberPanel installation using the following command:
systemctl status lscpd
You should get the following output:
● lscpd.service - LSCPD Daemon
   Loaded: loaded (/etc/systemd/system/lscpd.service; enabled; vendor preset: disabled)
   Active: active (running) since Sun 2020-06-28 01:30:34 EDT; 32min ago
  Process: 705 ExecStart=/usr/local/lscp/bin/lscpdctrl start (code=exited, status=0/SUCCESS)
 Main PID: 809 (lscpd)
   CGroup: /system.slice/lscpd.service
           ├─ 809 lscpd (lscpd - main)
           ├─ 812 lscpd (lscgid)
           ├─ 813 lscpd (lscpd - #01)
           ├─ 815 /usr/local/CyberCP/bin/lswsgi -m /usr/local/CyberCP/CyberCP/wsgi.py
           ├─1445 /usr/local/CyberCP/bin/lswsgi -m /usr/local/CyberCP/CyberCP/wsgi.py
           └─1447 /usr/local/CyberCP/bin/lswsgi -m /usr/local/CyberCP/CyberCP/wsgi.py
If you were having issues during the installation, you can try to find errors in the install logs – they are located at /var/log/installLogs.txt.
Step 4: Access the CyberPanel Web UI
At this point, we have installed and configured CyberPanel and it’s now listening on port 8090. You can access it using the URL https://your-server-ip:8090. You will be redirected to the CyberPanel login page:
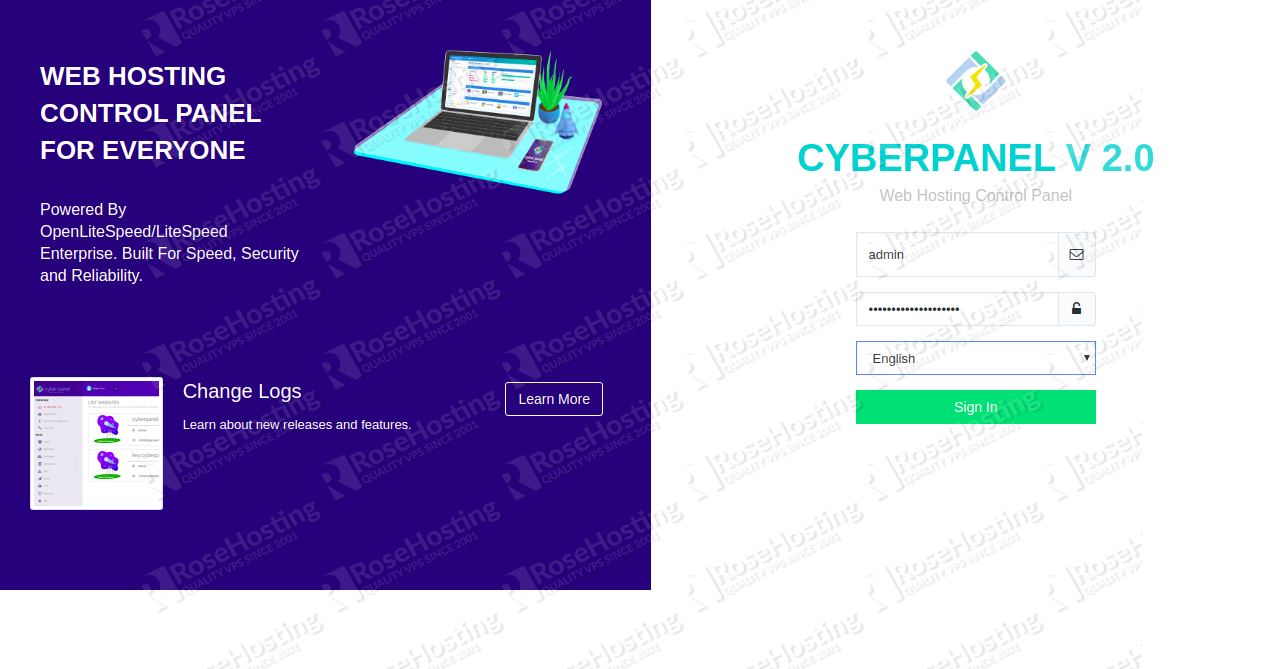
Provide your admin username, password and click on the Sign in button. You should see the CyberPanel dashboard in the following screen:

To create a new website, click on the Websites button in the left pane. You should see the following screen:

Now, click on the Create Website button. You should then see the following screen:
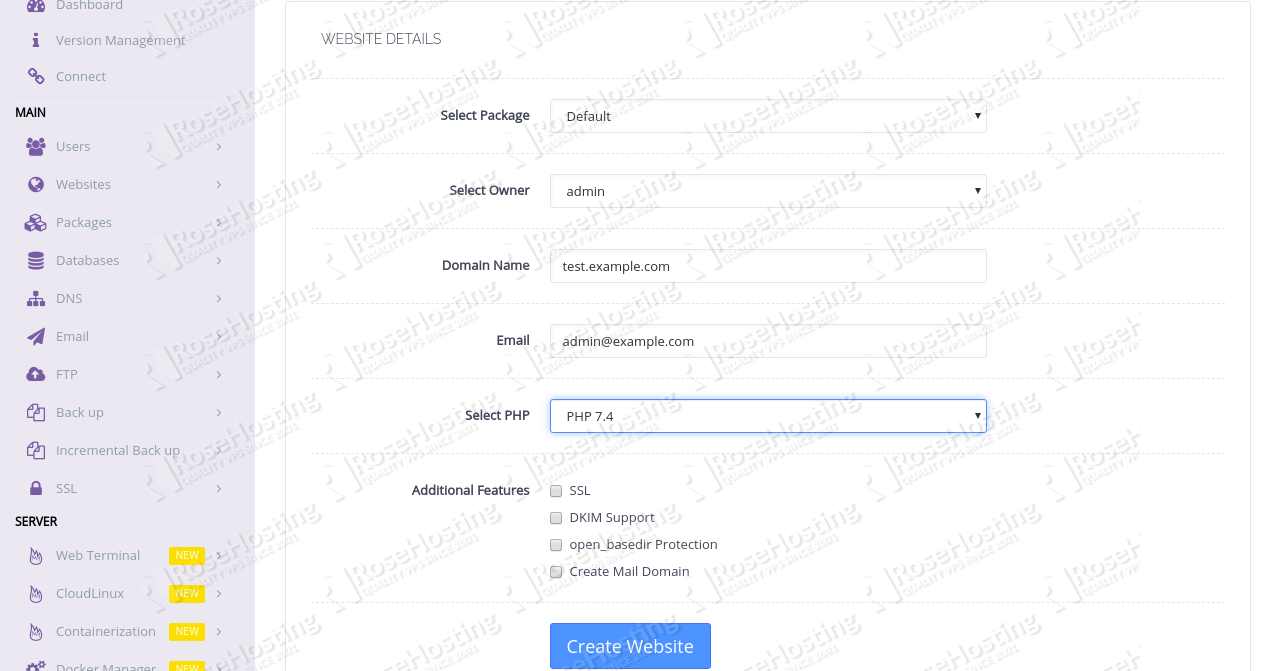
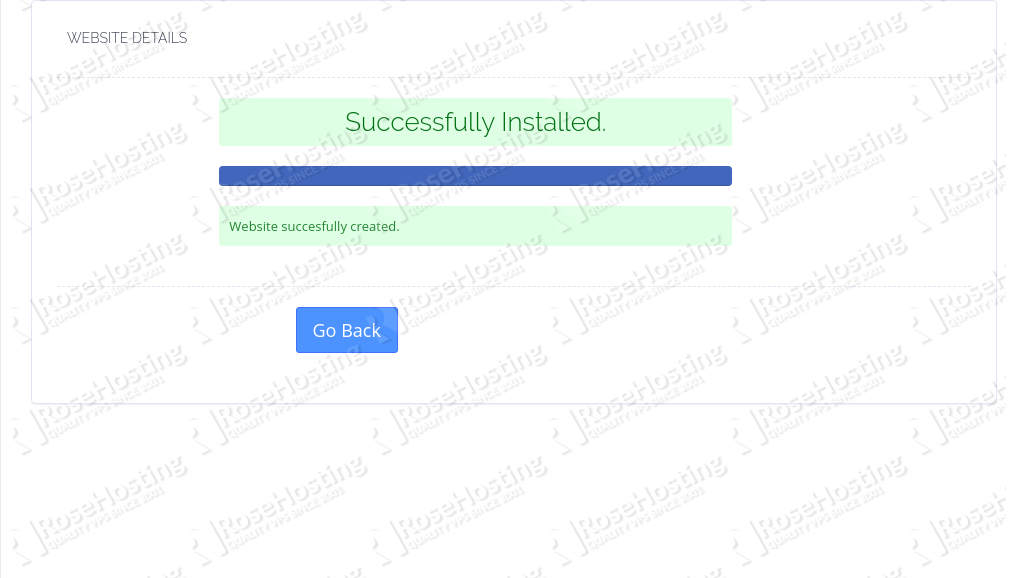
Provide your website details and click on the Create Website button. Once the website is created successfully, you will see the following screen:
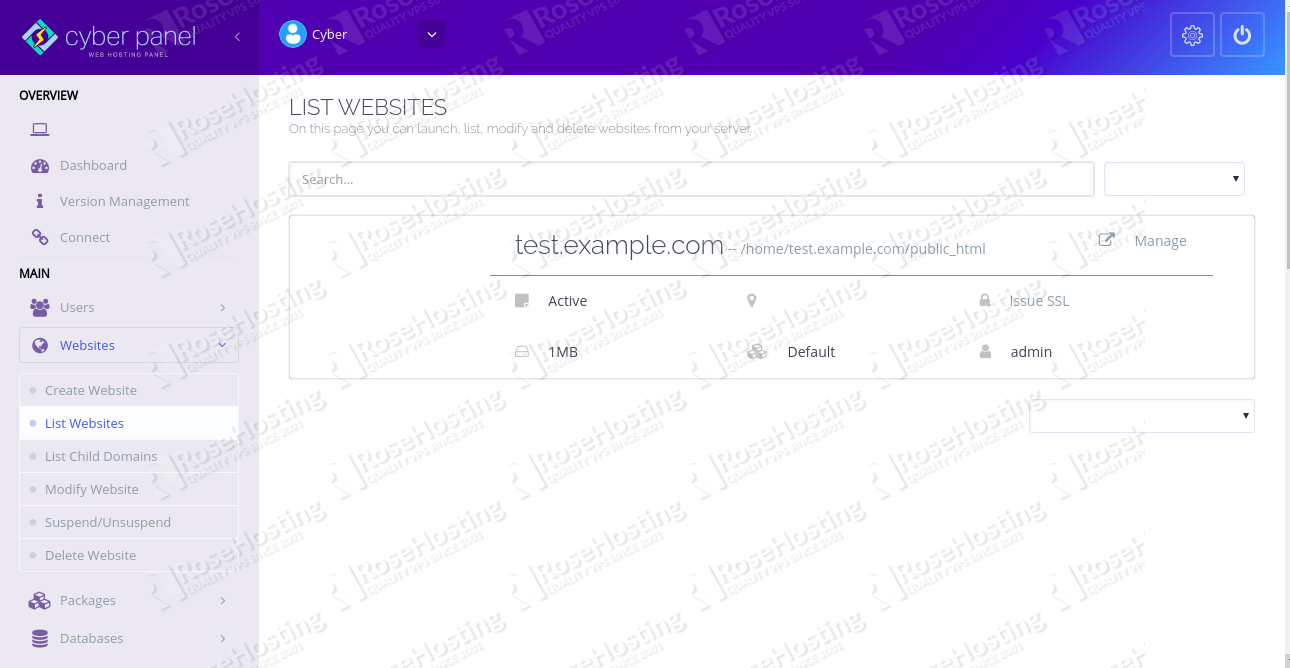
Now, click on the Websites => List Websites button to list your newly created website:
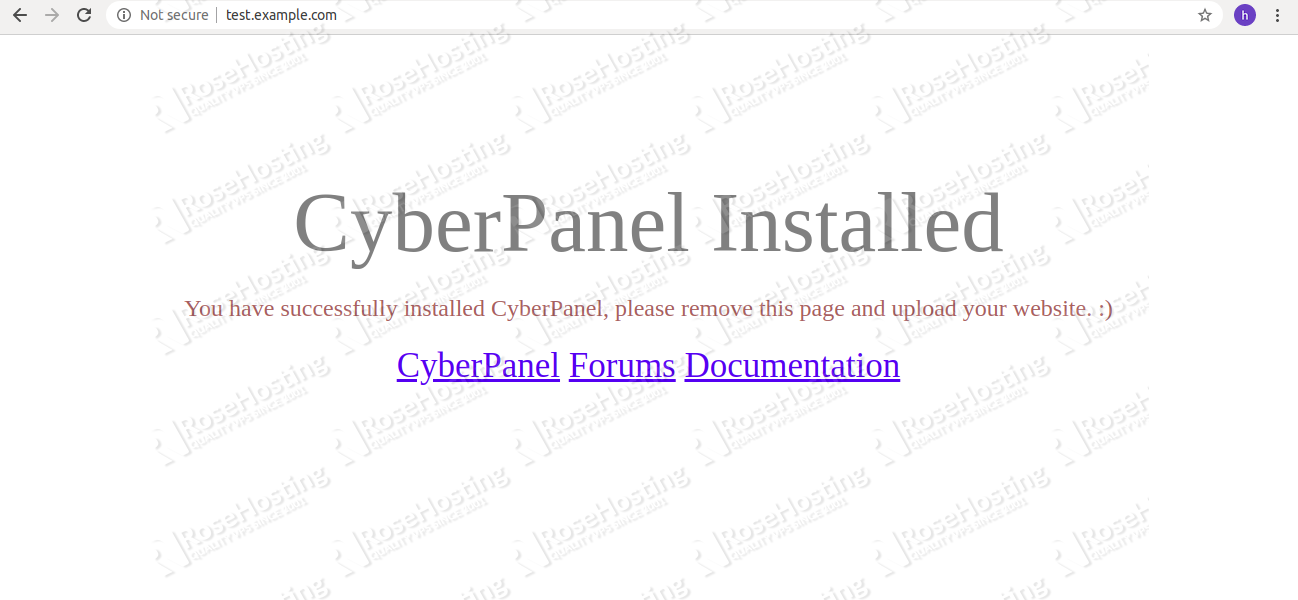
Next, access your website using the URL http://test.example.com. Of course, you’ll need to replace example.com with your own registered domain name. You should see the following screen:
Step 5: Access OpenLiteSpeed Web Admin
By default, our OpenLiteSpeed admin panel is listening on port 7080 and is accessible only from the local system. In order to access this panel from a public network, you will need to allow port 7080 for public addresses. You can do this by setting up firewall from the CyberPanel dashboard.
On the CyberPanel dashboard, click on Security => Firewall in the left pane. You should see the following screen:
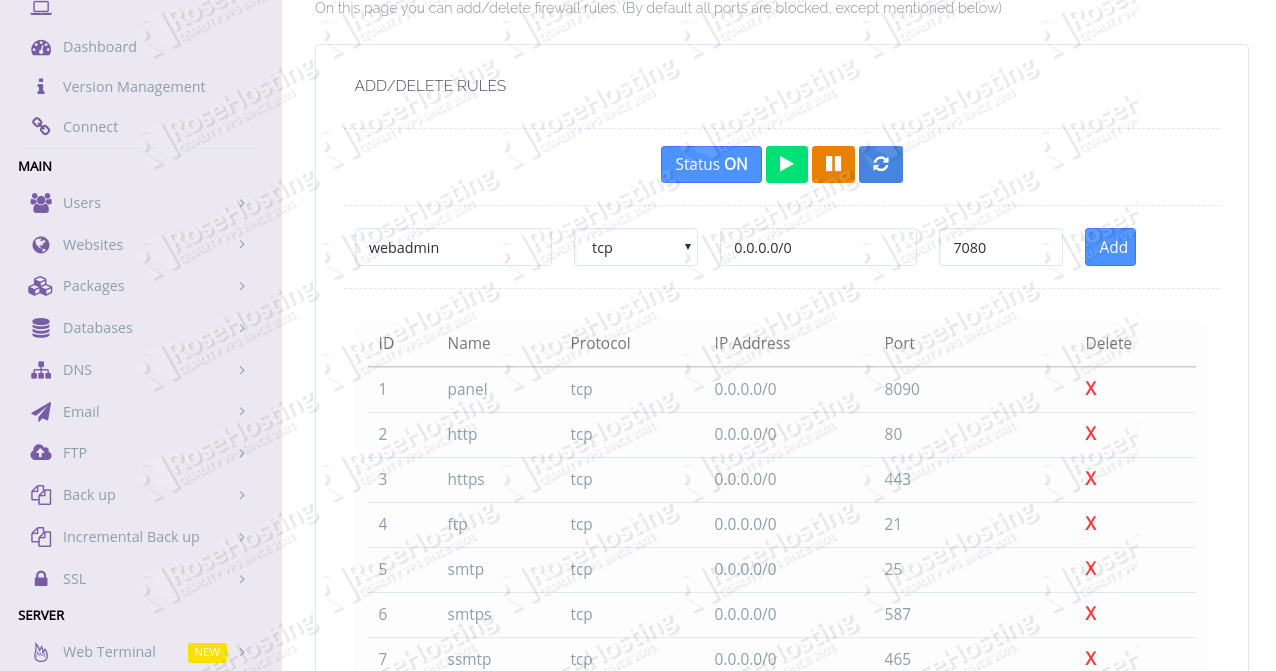
Now, add a new rule for the port 7080 and click on the Add button.
Now, access the OpenLiteSpeed web admin panel using the URL https://your-server-ip:7080. You should see the following screen:
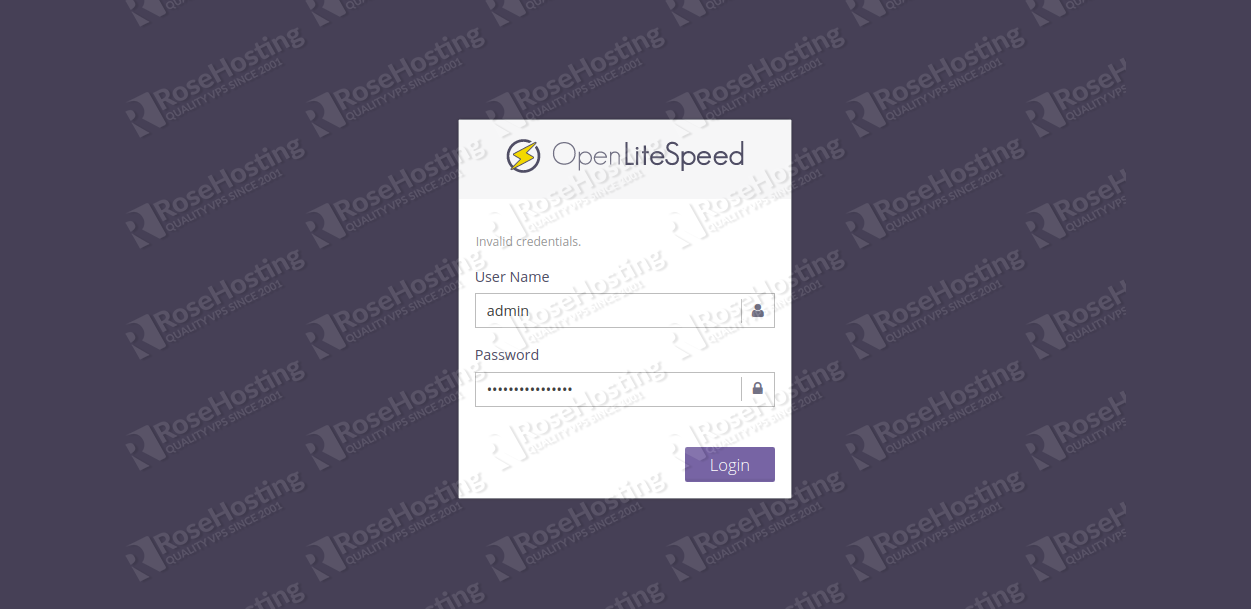
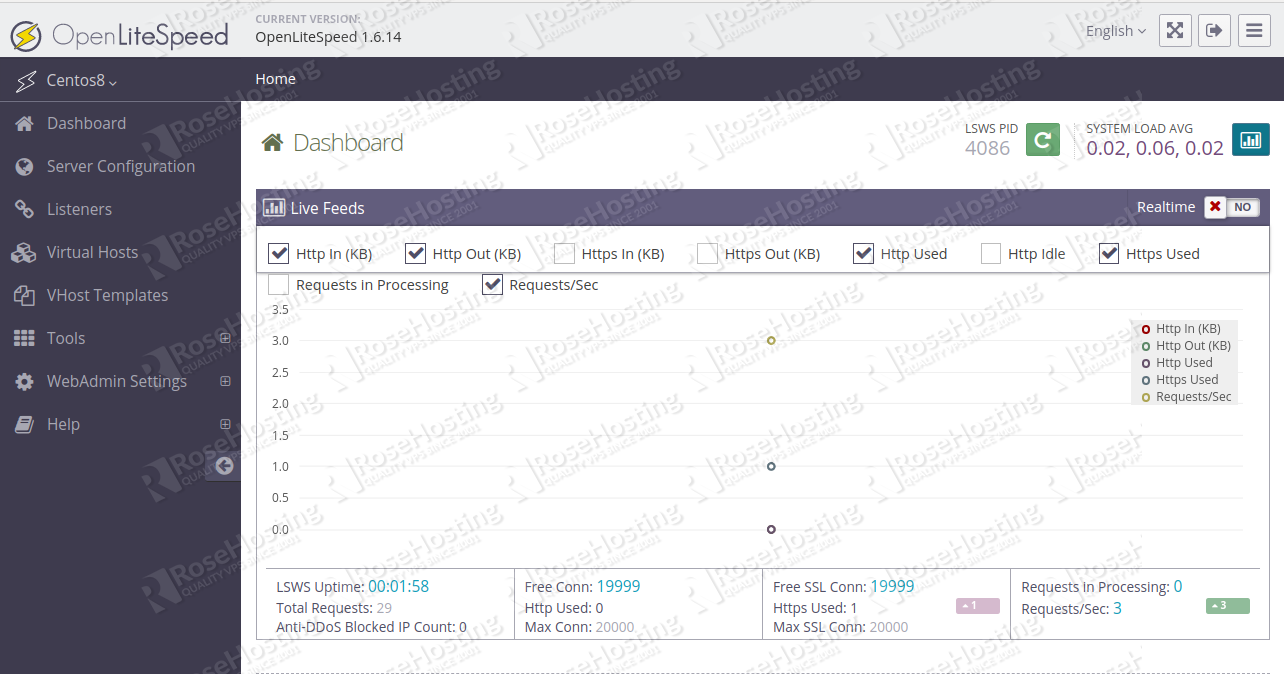
Provide your admin username and password and click on the Login button. You should see the OpenLiteSpeed dashboard on the following screen:
Congratulations! you have successfully installed and configured CyberPanel on your CentOS 8 VPS. You now have access to powerful control panels that will let you create your websites and manage your server more easily.

Using a control panel can help you manage your server, but using our fully managed support team (that’s included for free and for life when you order any of our VPSes) is even easier than using a control panel. Simply start a live chat or submit a ticket, and our admins will immediately do anything that you need them to. They can also maintain your server and keep it running at its best.
If our tutorial on installing CyberPanel helped you get it up and running on your CentOS 8 VPS, feel free to share it on social media by using our share shortcuts. You can also let us know how your install experience went or if you have any questions by writing a comment down below.
Hey,
Great Article. Have some questions. I did my cyberpanel Install without disabling SELinux. What kind of effect it will have on my server. Why is it mandatory to disable it?
Also, Which one do you prefer Centos 7 or Centos 8 for your Cyberpanel install? Is there any performance difference between them?
SELinux sometimes has issues with Cyberpanel which is why we recommend disabling it to avoid conflict. Centos 8 is nearing its end of life so we recommend sticking with Linux Distros that have long-time support.