In this tutorial, we are going to provide you with step-by-step instructions on how to install Vesta control panel on an Ubuntu 16.04 VPS and help you getting started with it. Vesta control panel (VestaCP) is an open source hosting control panel, which can be used to manage multiple websites, creat and manage email accounts, FTP accounts, and MySQL databases, manage DNS records and more.
Table of Contents
1. Update the system
Make sure your package list and the OS packages are up to date by running the following commands:
sudo apt-get update
sudo apt-get upgrade
You can also configure automatic updates.
2. Install VestaCP
It is recommended to have a minimal install base OS packages, so stop and uninstall Apache, MySQL etc. and delete their configuration files e.g.:
systemctl stop apache2
systemctl stop mysql
apt-get purge apache2* libapache2* mysql-client* mysql-common* mysql-server*
apt autoremove
Install the curl package:
apt-get install curl
Installation of VestaCP is quite simple:
Log in to your server via SSH as root user, download the installation script and run it:
curl -O http://vestacp.com/pub/vst-install.sh
bash vst-install.sh
Also, you can customize the installation using the advanced install settings at https://vestacp.com/install/ and generate install command to install nginx, php-fpm, proftpd, exim, dovecot, spamassassin, named, iptables, MySQL and use file system quota:
bash vst-install.sh --nginx yes --phpfpm yes --apache no --named yes --remi no --vsftpd no --proftpd yes --iptables yes --fail2ban no --quota yes --exim yes --dovecot yes --spamassassin yes --clamav no --mysql yes --postgresql no --hostname your-domain.com --email admin@your-domain.com --password Y0ur_Pa55w0rD
Do not forget to change ‘your-domain.com’ with your actual domain name and use a strong password for your VestaCP Admin user.
If everything is OK, you should receive an output like this:
Vesta Control Panel

Following software will be installed on your system:
   - Nginx Web Server
   - PHP-FPM Application Server
   - Bind DNS Server
   - Exim mail server + Antispam
   - Dovecot POP3/IMAP Server
   - MySQL Database Server
   - ProFTPD FTP Server
   - Iptables Firewall

Would you like to continue [y/n]:
Enter ‘y’ and wait a couple of minutes for the installation to complete.
Once the VestaCP installation is complete, you should receive an email with the VestaCP URL, username and password:
Congratulations, you have just successfully installed Vesta Control Panel

    https://your_server_IP:8083
    username: admin
    password: Y0ur_Pa55w0rD
Open https://your_server_IP:8083 , enter the username and password and click ‘Log in’. From this page you can add domains, create email accounts, databases, FTP accounts, add/modify DNS records etc.
3. Add new domains
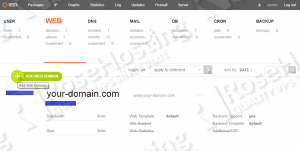
To add a new domain, click on ‘WEB’ >> ‘ADD WEB DOMAIN’ >> enter your new domain name and click ‘Add’.
4. Add new email accounts
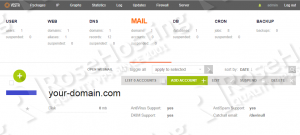
To create a new email account, click on ‘MAIL’ >> hover over the domain name >> click ‘ADD ACCOUNT’ >> enter your new email address (without the domain name), click generate to generate a password for your email account and click ‘Add’.
5. Add new domains and create email accounts
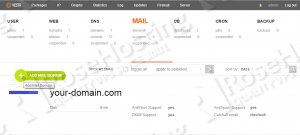
To add a new domain name for a new email account, click on ‘MAIL’ >> ‘ADD MAIL DOMAIN’ >> enter your domain name, select ‘AntiSpam Support’, ‘AntiVirus Support’, ‘DKIM Support’ and click ‘Add’.
6. Create a new database
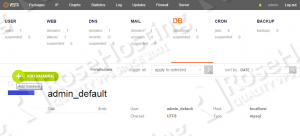
To create a database, click on ‘DB’ >> ‘ADD DATABASE’ >> enter your new database name, database username, click generate to generate a password for your MySQL user, and click ‘Add’.
Of course, you don’t have to do any of this if you use one of our Managed Hosting services, in which case you can simply ask our expert Linux admins to install VestaCP for you. They will also help you getting started with Vesta Control Panel. They are available 24×7 and will take care of your request immediately.
PS. If you liked this post please share it with your friends on the social networks using the buttons below or simply leave a reply in the comments section. Thanks.


Hi, the tutorial is pretty cool! Keep it up and give us the resourceful tutorial more and more. Thanks for the share!
Vesta has been problematic to be installed in some linux distributions in wsl and virtualbox such as debian, centos and ubuntu 20. I have managed to install in ubuntu 18. After executing the bash command vst-install.sh we have vesta working. But when we turn off the pc, when we turn it on again, vesta no longer works correctly. / The control panel opens, but it cannot be accessed by ftp or the domain url or domain ip, which when installing if it worked
This is most probably due to some services that are not configured to auto-start on server reboot. To enable them you can use the command “systemctl enable service-name”