
Nginx is a free, open-source and high-performance HTTP server. It is widely used for load balancing, mail proxy server, generic TCP/UDP proxy server, it provides reverse proxy configuration, media streaming and much more. It is designed to efficiently serve both low and high traffic websites and it is a very popular alternative to the Apache web server. Nginx is powering a lot of heavily loaded websites like Yandex, DropBox, NetFlix, WordPress.
In this tutorial, we will show you how to install and configure Nginx on Debian. Installing Nginx on a Debian server is a very easy task, and if you carefully follow all the instructions provided below, you should have your Nginx server up and running in less than 10 minutes. This tutorial has been written for and tested on Debian 9 VPS.
1. Login via SSH and update the system
Before we begin, you will need to login to your server via SSH as user root:

ssh root@IP_ADDRESS -p PORT_NUMBER
and replace “IP_ADDRESS” and “PORT_NUMBER” with your actual server IP address and SSH port number.
Let’s also make sure that your Debian server is up-to-date by running the following command:
apt-get update && sudo apt-get upgrade
Here is a sample of the output you should get:
Reading package lists... Done
Building dependency tree
Reading state information... Done
Calculating upgrade... Done
The following packages will be upgraded:
libperl5.24 perl perl-base perl-modules-5.24
4 upgraded, 0 newly installed, 0 to remove and 0 not upgraded.
Need to get 7813 kB of archives.
After this operation, 9216 B of additional disk space will be used.
Do you want to continue? [Y/n] Y
Get:1 http://security.debian.org stretch/updates/main amd64 libperl5.24 amd64 5.24.1-3+deb9u3 [3527 kB]
Get:2 http://security.debian.org stretch/updates/main amd64 perl amd64 5.24.1-3+deb9u3 [219 kB]
Get:3 http://security.debian.org stretch/updates/main amd64 perl-base amd64 5.24.1-3+deb9u3 [1344 kB]
Get:4 http://security.debian.org stretch/updates/main amd64 perl-modules-5.24 all 5.24.1-3+deb9u3 [2723 kB]
Fetched 7813 kB in 0s (12.0 MB/s)
(Reading database ... 36668 files and directories currently installed.)
Preparing to unpack .../libperl5.24_5.24.1-3+deb9u3_amd64.deb ...
Unpacking libperl5.24:amd64 (5.24.1-3+deb9u3) over (5.24.1-3+deb9u2) ...
Preparing to unpack .../perl_5.24.1-3+deb9u3_amd64.deb ...
Unpacking perl (5.24.1-3+deb9u3) over (5.24.1-3+deb9u2) ...
Preparing to unpack .../perl-base_5.24.1-3+deb9u3_amd64.deb ...
Unpacking perl-base (5.24.1-3+deb9u3) over (5.24.1-3+deb9u2) ...
Setting up perl-base (5.24.1-3+deb9u3) ...
(Reading database ... 36668 files and directories currently installed.)
Preparing to unpack .../perl-modules-5.24_5.24.1-3+deb9u3_all.deb ...
Unpacking perl-modules-5.24 (5.24.1-3+deb9u3) over (5.24.1-3+deb9u2) ...
Setting up perl-modules-5.24 (5.24.1-3+deb9u3) ...
Setting up libperl5.24:amd64 (5.24.1-3+deb9u3) ...
Setting up perl (5.24.1-3+deb9u3) ...
Processing triggers for libc-bin (2.24-11+deb9u3) ...
Processing triggers for man-db (2.7.6.1-2) ...
2. Install Nginx on Debian 9
You can install Nginx from Debian package repository. Simply, run the following command to install Nginx on your server:
apt-get install nginx
You will get the following output:
Reading package lists... Done
Building dependency tree
Reading state information... Done
The following additional packages will be installed:
libnginx-mod-http-auth-pam libnginx-mod-http-dav-ext libnginx-mod-http-echo libnginx-mod-http-geoip libnginx-mod-http-image-filter libnginx-mod-http-subs-filter
libnginx-mod-http-upstream-fair libnginx-mod-http-xslt-filter libnginx-mod-mail libnginx-mod-stream nginx-common nginx-full
Suggested packages:
fcgiwrap nginx-doc
The following NEW packages will be installed:
libnginx-mod-http-auth-pam libnginx-mod-http-dav-ext libnginx-mod-http-echo libnginx-mod-http-geoip libnginx-mod-http-image-filter libnginx-mod-http-subs-filter
libnginx-mod-http-upstream-fair libnginx-mod-http-xslt-filter libnginx-mod-mail libnginx-mod-stream nginx nginx-common nginx-full
0 upgraded, 13 newly installed, 0 to remove and 0 not upgraded.
Need to get 0 B/1585 kB of archives.
After this operation, 2865 kB of additional disk space will be used.
Do you want to continue? [Y/n] y
After the installation is completed Nginx will be started automatically.
To verify that Nginx is really running on your server, you can also use the following command:
systemctl status nginx
● nginx.service - A high performance web server and a reverse proxy server
Loaded: loaded (/lib/systemd/system/nginx.service; enabled; vendor preset: enabled)
Active: active (running) since Sat 2018-04-14 11:44:12 CDT; 4min 10s ago
Docs: man:nginx(8)
Process: 6412 ExecStart=/usr/sbin/nginx -g daemon on; master_process on; (code=exited, status=0/SUCCESS)
Process: 6409 ExecStartPre=/usr/sbin/nginx -t -q -g daemon on; master_process on; (code=exited, status=0/SUCCESS)
Main PID: 6413 (nginx)
CGroup: /system.slice/nginx.service
├─6413 nginx: master process /usr/sbin/nginx -g daemon on; master_process on;
├─6414 nginx: worker process
└─6415 nginx: worker process
3. Managing your Nginx server
There are a couple of useful commands that you can use to manage your Nginx service.
First, let’s make sure that your Nginx server is started automatically upon a server reboot:
systemctl enable nginx
Synchronizing state of nginx.service with SysV service script with /lib/systemd/systemd-sysv-install.
Executing: /lib/systemd/systemd-sysv-install enable nginx
In case you want to disable the automatic startup upon server reboot, you can use the following command:
systemctl disable nginx
To check the status of the Nginx service, run the following command:
systemctl status nginx
To start the Nginx service, you can use:
systemctl start nginx
To stop the Nginx service, you can use:
systemctl stop nginx
You can restart the nginx service with:
systemctl restart nginx
4. Configuring your Nginx web server
By default, the Nginx installation creates the web server root directory at the following location /var/www/html/.
The default configuration file for this is located at the following location: /etc/nginx/sites-enabled/default/.
The main configuration file for Nginx is located at /etc/nginx/nginx.conf
In this tutorial, we will show you how to create a new server block for a new domain mydomain.com and set its document root to /var/www/mydomain.com
First, we will need to create the document root directory with the following command:
mkdir -p /var/www/mydomain.com
Next, create an index.html file inside this directory and add the following content:
nano /var/www/mydomain.com/index.html
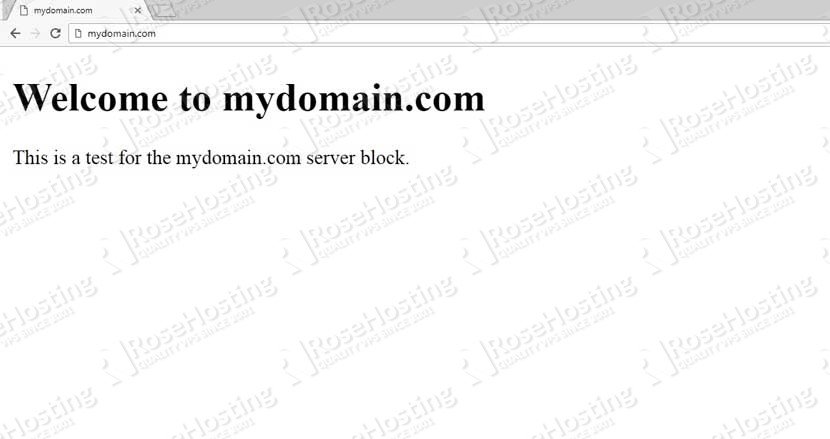
<!DOCTYPE html>
<html>
<head>
 <title>mydomain.com</title>
</head>
<body>
 <h1>Welcome to mydomain.com</h1>
 <p>This is a test for the mydomain.com server block.</p>
</body>
</html>
Next, let’s create a new server block at the following location with:
nano /etc/nginx/sites-available/mydomain.com.conf
And add the following content:
server {
       listen 80;
       listen [::]:80;

       server_name mydomain.com www.mydomain.com;

       root /var/www/mydomain.com;
       index index.html;

       location / {
               try_files $uri $uri/ =404;
       }
}
Save the file. To activate the server block you must create a soft link with the following command:
ln -s /etc/nginx/sites-available/mydomain.com.conf /etc/nginx/sites-enabled/mydomain.com.conf
5. Verify the Nginx Installation
Test the nginx configuration and restart your nginx with:
nginx -t
systemctl restart nginx
If everything is set up properly as instructed, you should now be able to open mydomain.com in your browser and see the mydomain.com server block you have created before.
That is all. Nginx has been successfully installed and configured on your Debian 9 server.
 Of course, you don’t have to install and configure Nginx on Debian 9, if you use one of our Optimized Nginx Web Hosting Solutions, in which case you can simply ask our expert Linux admins to install and configure Nginx on Debian 9 for you. They are available 24×7 and will take care of your request immediately.
PS. If you liked this post on how to install and configure Nginx on Debian 9, please share it with your friends on the social networks using the buttons on the left or simply leave a reply below. Thanks.