
In this blog post we will show you how to install Bitwarden on Ubuntu 22.04.
Bitwarden is an open-source password manager used by many companies, developers, and regular users. It stores sensitive data information such as website credentials in an encrypted vault. Bitwarden offers a variety of client applications including a web interface, desktop application, browser extensions, etc. In this case, we will use a Docker container for our Bitwarden installation.
It’s straightforward to install Bitwarden on Ubuntu, so this process should only take up to 15 minutes. Let’s get started!
Table of Contents
Prerequisites
- An Ubuntu 22.04 VPS or server
- A server with at least 2GB of RAM (Our NVMe 2 VPS plan works great for this)
- User privileges: root or non-root user with sudo privileges
Step 1. Update the System
We assume you have a fresh installation of Ubuntu 22.04. We will update the packages to the latest version available. To do that execute the following command:
sudo apt-get update -y && sudo apt-get upgrade -y
Step 2. Install Docker CE
First, we will add the Docker GPG key and the official Docker repository:
curl -fsSL https://download.docker.com/linux/ubuntu/gpg | apt-key add -

add-apt-repository "deb [arch=amd64] https://download.docker.com/linux/ubuntu jammy stable"
Once the key and repo are added, update the system’s repositories:
sudo apt-get update -y
Then we can install Docker:
apt install docker-ce -y
Once installed, start and enable the Docker service:
sudo systemctl start docker && sudo systemctl enable docker
To check the status of the Docker service, execute the command below:
sudo systemctl status docker
You should receive an output similar to this:
root@host:~# sudo systemctl status docker
● docker.service - Docker Application Container Engine
     Loaded: loaded (/lib/systemd/system/docker.service; enabled; vendor preset: enabled)
     Active: active (running) since Sat 2024-01-06 02:57:17 CST; 47s ago
TriggeredBy: ● docker.socket
       Docs: https://docs.docker.com
   Main PID: 9539 (dockerd)
      Tasks: 10
     Memory: 27.3M
        CPU: 1.071s
     CGroup: /system.slice/docker.service
             └─9539 /usr/bin/dockerd -H fd:// --containerd=/run/containerd/containerd.sock
Step 3. Install Docker Compose
After successful installation of the Docker service, we need to install the Docker compose feature, so we can install Bitwarden later. To do that execute the following command:
sudo apt install docker-compose -y
To verify the installation, execute the command below:
docker-compose --version
You should receive the following output:
root@host:~# docker-compose --version
docker-compose version 1.29.2, build unknown
Step 4. Install Bitwarden on Ubuntu
Finally, we are ready to install Bitwarden. We have all prerequisites installed and we can get to installing. First, we will create a Bitwarden user and will add it to the Docker group since we will use a Docker container for our Bitwarden installation:
useradd -G docker,sudo -s /bin/bash -m -d /opt/bitwarden bitwarden
Once, the user is added, we will set a strong password:
passwd bitwarden
You will have to enter your password twice. On Linux it is normal & expected for the password to not be visible as you type it:
root@host:~# passwd bitwarden
New password:YourStrongPasswordHere
Retype new password:YourStrongPasswordHere
passwd: password updated successfully
Next is to obtain a Bitwarden installation key and ID from the official Bitwarden website at https://bitwarden.com/host/ – you should see this:
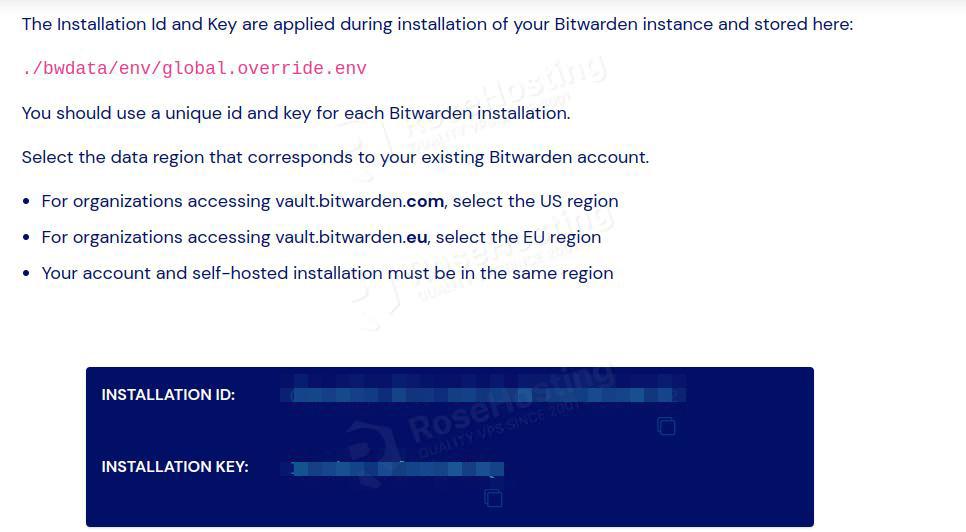
Save the installation key and ID, and proceed with the installation:
su - bitwarden

curl -Lso bitwarden.sh https://go.btwrdn.co/bw-sh

chmod +x bitwarden.sh

sudo ./bitwarden.sh install
During the installation process you will be asked for a couple of information:
(!) Enter the domain name for your Bitwarden instance (ex. bitwarden.example.com): YourDomain.com

(!) Do you want to use Let's Encrypt to generate a free SSL certificate? (y/n): y

(!) Enter your email address (Let's Encrypt will send you certificate expiration reminders): admin@yourdomain.com

Using default tag: latest
latest: Pulling from certbot/certbot
91d30c5bc195: Pull complete
5d0bb5b9b8b7: Pull complete
9369f9a4ffc3: Pull complete
d7106b6bd561: Pull complete

(!) Enter the database name for your Bitwarden instance (ex. vault): bitwarden

Digest: sha256:55c97c8ef10d8b0dc2cb35ab24596f537e947af8493acdbe1b493f586e8fc813
Status: Downloaded newer image for bitwarden/setup:2023.12.0
docker.io/bitwarden/setup:2023.12.0

(!) Enter your installation id (get at https://bitwarden.com/host): Your-Installation-ID-Goes-Here

(!) Enter your installation key: YourInstallationKeyGoesHere

(!) Enter your region (US/EU) [US]: US

Building nginx config.
Building docker environment files.
Building docker environment override files.
Building FIDO U2F app id.
Building docker-compose.yml.

Installation complete

If you need to make additional configuration changes, you can modify
the settings in `./bwdata/config.yml` and then run:
`./bitwarden.sh rebuild` or `./bitwarden.sh update`

Next steps, run:
`./bitwarden.sh start`
Once the installation is complete, we can run the following command to pull the Bitwarden docker containers and start them:
./bitwarden.sh start
After this you will see the following output:
Status: Image is up to date for bitwarden/setup:2023.12.0
docker.io/bitwarden/setup:2023.12.0


Bitwarden is up and running!
===================================================

visit https://YourDomain.com
to update, run `./bitwarden.sh updateself` and then `./bitwarden.sh update`
Step 5. Finish Bitwarden Installation
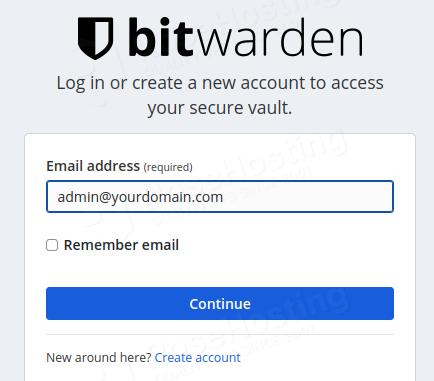
Now, you can access https://YourDomain.com to finish the installation and set administrator login credentials:
Enter your email address and click on the create account button:
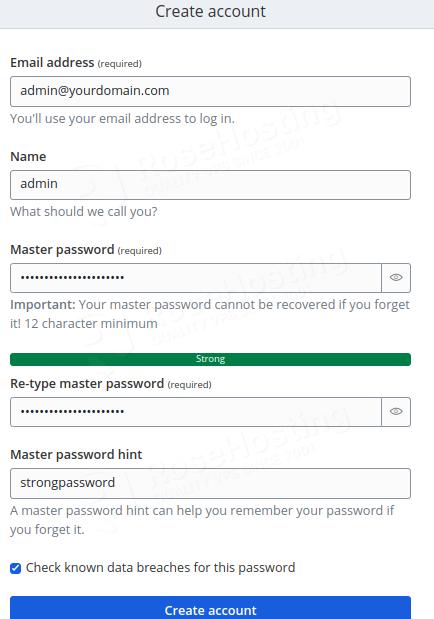
Then enter your master password twice, along with the password hint and username:
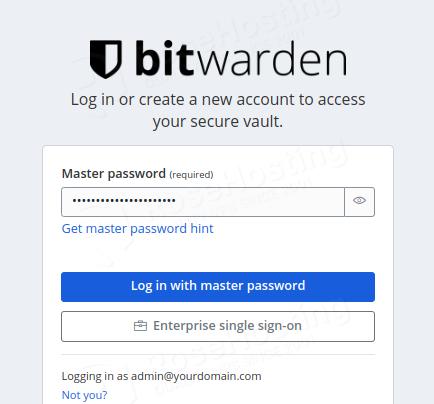
Use your master password to log in to your Bitwarden website:
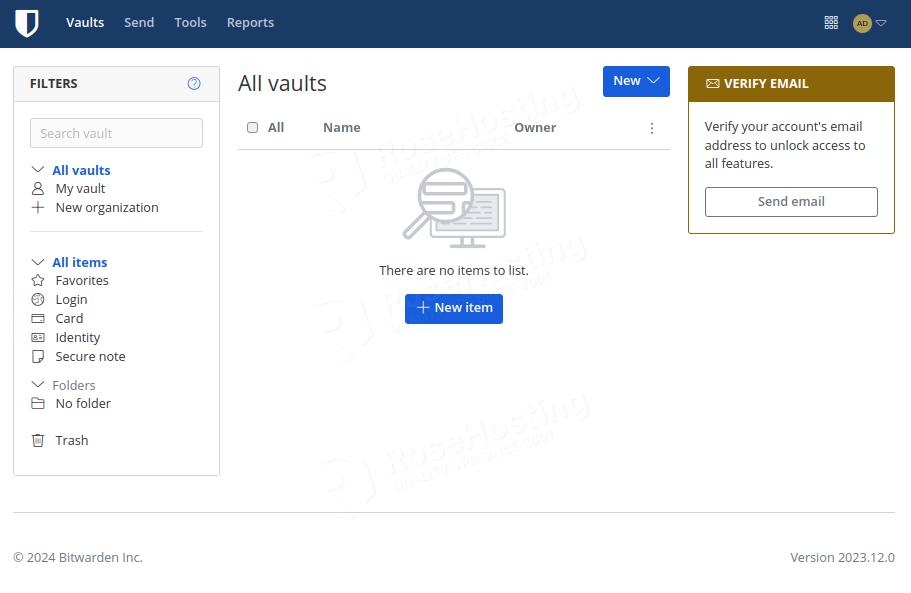
Once logged in, you will get the following screen:
Congratulations! You successfully were able to install Bitwarden on Ubuntu 22.04 using their Docker containers.
If you have managed Bitwarden hosting with us, you can simply ask our support team to install Bitwarden on Ubuntu 22.04 for you. Our team is available 24/7 and will be able to help you with the installation of Bitwarden as well as any additional requirements or software that you may need.
Thanks Jeff! We learn a lot from you.
I had to run following command before install ./bitwarden install
Following command fixed some python related errors which looks like bitwarden is depends on.
sudo apt-get install python3-pip