
In this blog post, we are going to explain in step-by-step detail on how to install Bugzilla on Ubuntu 20.04.
Bugzilla is an open-source web-based bug tracking system written in Perl. This testing tool is developed and maintained by the Mozilla project, and the team of developers is still developing and expanding its features. The main purpose of this detect-tracking software is to track the bugs, issues, and other change requests. The compatibility of the software on multiple operating systems like Windows, macOS, and Linux makes it more popular than any other.
Installing Bugzilla on Ubuntu 20.04 is a very easy process and may take up to 10 minutes. Let’s get started!
Table of Contents
Prerequisites
-
- A server with Ubuntu 20.04 OS
- A VPS with at least 4 GB of RAM available
- User privileges: root or non-root user with sudo privileges
Step 1. Update the System
Since we have a fresh installation of Ubuntu 20.04, we need to update the packages to the latest versions available:
sudo apt update -y && sudo apt upgrade -y
Step 2. Install Apache2
We are going to use Apache as a web server in this tutorial. To install it execute the command below:
sudo apt install apache2
After successfull installation, start and enable the service
sudo systemctl start apache2 && sudo systemctl enable apache2
To check if everything is OK, execute the following command for the status of the Apache2 service:
sudo systemctl status apache2
You should receive the following output:
root@vps:~# sudo systemctl status apache2
● apache2.service - The Apache HTTP Server
     Loaded: loaded (/lib/systemd/system/apache2.service; enabled; vendor preset: enabled)
     Active: active (running) since Sat 2022-04-02 12:35:15 UTC; 36min ago
       Docs: https://httpd.apache.org/docs/2.4/
   Main PID: 44676 (apache2)
      Tasks: 7 (limit: 4617)
     Memory: 15.5M
     CGroup: /system.slice/apache2.service
Step 3. Install Perl and Dependencies
Since Bugzilla is written in Perl programming language, we need to install it along with the dependencies.
sudo apt install build-essential libappconfig-perl libdate-calc-perl libtemplate-perl libmime-tools-perl build-essential libdatetime-timezone-perl libdatetime-perl libemail-sender-perl libemail-mime-perl libemail-mime-perl libdbi-perl libdbd-mysql-perl libcgi-pm-perl libmath-random-isaac-perl libmath-random-isaac-xs-perl libapache2-mod-perl2 libapache2-mod-perl2-dev libchart-perl libxml-perl libxml-twig-perl perlmagick libgd-graph-perl libtemplate-plugin-gd-perl libsoap-lite-perl libhtml-scrubber-perl libjson-rpc-perl libdaemon-generic-perl libtheschwartz-perl libtest-taint-perl libauthen-radius-perl libfile-slurp-perl libencode-detect-perl libmodule-build-perl libnet-ldap-perl libfile-which-perl libauthen-sasl-perl libfile-mimeinfo-perl libhtml-formattext-withlinks-perl libgd-dev libmysqlclient-dev graphviz sphinx-common rst2pdf libemail-address-perl libemail-reply-perl
Step 4. Install MariaDB database server
To install the MariaDB database server, execute the command below.
sudo apt install mariadb-server
Start and enable the mariadb.service with the following commands:
sudo systemctl start mariadb && sudo systemctl enable mariadb
Check the status of the mariadb.service
sudo systemctl status mariadb
You should receive the following output:
root@vps:~# sudo systemctl status mariadb
● mariadb.service - MariaDB 10.3.34 database server
     Loaded: loaded (/lib/systemd/system/mariadb.service; enabled; vendor preset: enabled)
     Active: active (running) since Sat 2022-04-02 13:30:06 UTC; 7min ago
       Docs: man:mysqld(8)
             https://mariadb.com/kb/en/library/systemd/
   Main PID: 70881 (mysqld)
     Status: "Taking your SQL requests now..."
      Tasks: 30 (limit: 4617)
     Memory: 65.3M
     CGroup: /system.slice/mariadb.service
             └─70881 /usr/sbin/mysqld
Step 5. Create Bugzilla database and user
Next, we need to create a Bugzilla database, the Bugzilla user, and grant the permissions for that user to the database.
 CREATE USER 'bugzilla'@'localhost' IDENTIFIED BY 'YourStrongPasswordHere';
 CREATE DATABASE bugzilla;
 GRANT ALL PRIVILEGES ON bugzilla.* TO 'bugzilla'@'localhost';
 FLUSH PRIVILEGES;
 EXIT;
Step 6. Install Bugzilla
Before we can install Bugzilla we need to download the latest stable version.
 cd /var/www/html

wget https://ftp.mozilla.org/pub/mozilla.org/webtools/bugzilla-5.0.6.tar.gz
Once downloaded, extract the bugzilla file.
tar -xvf bugzilla-5.0.6.tar.gz -C /var/www/html/

 mv bugzilla-5.0.6 bugzilla
Once, this is done go into the “bugzilla” directory and check the setup.
cd /var/www/html/bugzilla/

./checksetup.pl
If the setup, fails due to some missing Perl modules, you should receive the following output:
COMMANDS TO INSTALL REQUIRED MODULES (You *must* run all these commands
and then re-run checksetup.pl):

    /usr/bin/perl install-module.pl DateTime
    /usr/bin/perl install-module.pl DateTime::TimeZone
    /usr/bin/perl install-module.pl Template
    /usr/bin/perl install-module.pl Email::Sender
    /usr/bin/perl install-module.pl Email::MIME
    /usr/bin/perl install-module.pl List::MoreUtils
    /usr/bin/perl install-module.pl Math::Random::ISAAC
    /usr/bin/perl install-module.pl JSON::XS

To attempt an automatic install of every required and optional module
with one command, do:

  /usr/bin/perl install-module.pl --all

*** Installation aborted. Read the messages above. ***
Execute the commands below to install the required modules:
/usr/bin/perl install-module.pl DateTime
/usr/bin/perl install-module.pl DateTime::TimeZone
/usr/bin/perl install-module.pl Template
/usr/bin/perl install-module.pl Email::Sender
/usr/bin/perl install-module.pl Email::MIME
/usr/bin/perl install-module.pl List::MoreUtils
/usr/bin/perl install-module.pl Math::Random::ISAAC
/usr/bin/perl install-module.pl JSON::XS
/usr/bin/perl install-module.pl ExtUtils::PkgConfig module
Once, the required modules are installed you need to check the setup again:
./checksetup.pl
Now, when the modules are installed, the next message that you should receive is that there is an error with the database connection:
There was an error connecting to MySQL:

    Access denied for user 'bugs'@'localhost'

This might have several reasons:

* MySQL is not running.
* MySQL is running, but there is a problem either in the
  server configuration or the database access rights. Read the Bugzilla
  Guide in the doc directory. The section about database configuration
  should help.
* Your password for the 'bugs' user, specified in $db_pass, is
  incorrect, in './localconfig'.
* There is a subtle problem with Perl, DBI, or MySQL. Make
  sure all settings in './localconfig' are correct. If all else fails, set
  '$db_check' to 0.
To solve this, you need to open the “/var/www/html/bugzilla/localconfig” file with your favorite editor and make the following changes:
sudo nano /var/www/html/bugzilla/localconfig
Enter the name of the database, user, and the password you set in step 5.
$webservergroup = 'www-data';
$db_driver = 'mysql';
$db_host = 'localhost';
$db_name = 'bugzilla';
$db_user = 'bugzilla';
$db_pass = 'YourStrongPasswordHere';
$db_port = 0;
After these settings are done run the ./checksetup.pl again.
./checksetup.pl
You should define your administrator’s email, username and password once the database connection is successful.
Checking for            DBD-mysql (v4.001)    ok: found v4.050
Checking for                MySQL (v5.0.15)   ok: found v5.5.5-10.3.34-MariaDB-0ubuntu0.20.04.1

Removing existing compiled templates...
Precompiling templates...done.
Fixing file permissions...
Initializing "Product/Component Changes" email_setting ...
Initializing "Dependency Tree Changes" email_setting ...
Marking closed bug statuses as such...
Creating default classification 'Unclassified'...
Setting up foreign keys...
Setting up the default status workflow...
Creating default groups...
Setting up user preferences...

Looks like we don't have an administrator set up yet. Either this is
your first time using Bugzilla, or your administrator's privileges
might have accidentally been deleted.

Enter the e-mail address of the administrator: admin@yourdomain.com
Enter the real name of the administrator: admin
Enter a password for the administrator account:
Please retype the password to verify:
admin@yourdomain.com is now set up as an administrator.
Creating initial dummy product 'TestProduct'...

Now that you have installed Bugzilla, you should visit the 'Parameters'
page (linked in the footer of the Administrator account) to ensure it
is set up as you wish - this includes setting the 'urlbase' option to
the correct URL.
checksetup.pl complete.
Step 7. Create a Virtual Host configuration file
In order can access the Bugzilla Web interface we need to create a virtual host configuration file where we can define our domain, document root, and some script parameters.
First, create the configuration file with the following command:
touch /etc/apache2/sites-available/bugzilla.conf
Open the file, and paste the following lines of code:
<VirtualHost *:80>
ServerName yourdomain.com
DocumentRoot /var/www/html/bugzilla/

<Directory /var/www/html/bugzilla/>
AddHandler cgi-script .cgi
Options +Indexes +ExecCGI
DirectoryIndex index.cgi
AllowOverride Limit FileInfo Indexes Options AuthConfig
</Directory>

ErrorLog /var/log/apache2/yourdomain.com.error_log
CustomLog /var/log/apache2/yourdomain.com.access_log common
</VirtualHost>
Enable the Apache2 confguration file and other modules:
sudo a2ensite bugzilla.conf

sudo a2enmod headers env rewrite expires cgi
Check the syntax of the Apache2 configuration.
apachectl -t
You should receive the following output:
root@host:~# apachectl -t
Syntax OK
If you receive this output you can safely restart the Apache service.
sudo systemctl restart apache2
Now, you can access the Bugzilla Web interface at http://YourDomain.com
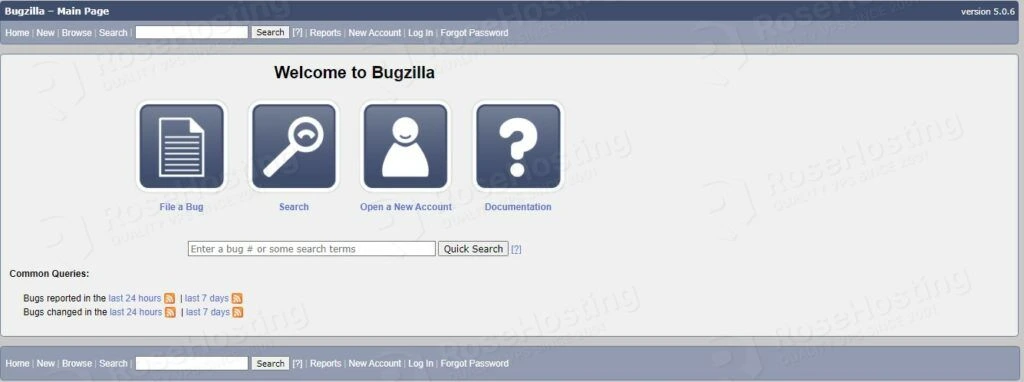
Congratulations! You successfully installed and configured Bugzilla tracking software on Ubuntu 20.04. If you find it difficult to install, you can always contact our technical support and they will do the rest for you. We are available 24/7.
If you liked this post on how to install Bugzilla on Ubuntu 20.04, please share it with your friends on social networks or simply leave a reply below. Thanks.