
In this tutorial, we are going to show you how to install Discourse on Ubuntu 22.04 OS.
Discourse is open-source forum software written in Ruby as the backend and Javascript as frontend languages, respectively. Discourse offers a variety of features, such as threading, tagging, categorization, and many customizable plugins.
The data is stored in the PostgreSQL database, and the client uses Ember JS. The software is available in more than 20 international languages. This tutorial will install the Discourse forum software in the Docker CE engine.
Instaling Discourse is a straightforward process and may take up to 20 minutes. Let’s get things done!
Table of Contents
Prerequisites
- A server with Ubuntu 22.04 as OS
- Valid domain pointed to the servers IP address
- User privileges: root or non-root user with sudo privileges
Step 1. Update the System
Update the packages to their latest versions available after a fresh install of Ubuntu 22.04
sudo apt-get update -y && sudo apt-get upgrade -y
Step 2. Install Docker
First, we will add the GPG keys and Docker repository since it is not added by default in the Ubuntu 22.04 official repository.
curl -fsSL https://download.docker.com/linux/ubuntu/gpg | sudo apt-key add -

sudo add-apt-repository "deb [arch=amd64] https://download.docker.com/linux/ubuntu focal stable"
Once the keys and repo are added, install Docker with the following command:
sudo apt install docker-ce docker-ce-cli containerd.io -y
After successful installation, start and enable the Docker service.
sudo systemctl start docker && sudo systemctl enable docker
To check the status of the Docker service, execute the following command:
sudo systemctl status docker
You should receive the following output:
root@host:~# systemctl status docker
● docker.service - Docker Application Container Engine
     Loaded: loaded (/lib/systemd/system/docker.service; enabled; vendor preset: enabled)
     Active: active (running) since Thu 2023-03-02 16:28:53 CST; 21s ago
TriggeredBy: ● docker.socket
       Docs: https://docs.docker.com
   Main PID: 96031 (dockerd)
      Tasks: 9
     Memory: 24.8M
        CPU: 525ms
     CGroup: /system.slice/docker.service
             └─96031 /usr/bin/dockerd -H fd:// --containerd=/run/containerd/containerd.sock
Step 3. Install Discourse
First, we need to download the Discourse repo from GitHub.
sudo mkdir -p /home/discourse

cd /home/discourse/

sudo git clone https://github.com/discourse/discourse_docker.git .
Now, once the Discourse is downloaded, we can execute the following command for the script to start installing the software.
sudo bash ./discourse-setup
The installation will start, and you will be asked for a couple of inputs, explained in bold below:
Checking your domain name . . .
Connection to yourdomain.com succeeded.
Email address for admin account(s)? [me@example.com,you@example.com]: admin@yourdomain.com
SMTP server address? [smtp.example.com]: smtp.yourdomain.com
SMTP port? [587]:
SMTP user name? [user@example.com]: user@yourdomain.com
SMTP password? [pa$word]: YourStrongPasswordHere
notification email address? [noreply@yourdomain.com]:
Optional email address for Let's Encrypt warnings? (ENTER to skip) [me@example.com]:
Optional Maxmind License key (ENTER to continue without MAXMIND GeoLite2 geolocation database) [1234567890123456]:

Does this look right?

Hostname          : yourdomain.com
Email             : admin@yourdomain.com
SMTP address      : smtp.yourdomain.com
SMTP port         : 587
SMTP username     : user@yourdomain.com
SMTP password     : YourStrongPasswordHere
Notification email: noreply@yourdomain.com
Maxmind license: (unset)

ENTER to continue, 'n' to try again, Ctrl+C to exit:
letsencrypt.ssl.template.yml enabled


Configuration file at containers/app.yml updated successfully!
The installation script will proceed with downloading the Discourse base image for Docker and building it. After successful installation will be displayed the following output:
DISCOURSE_HOSTNAME=yourdomain.com -e DISCOURSE_DEVELOPER_EMAILS=admin@yourdomain.com -e DISCOURSE_SMTP_ADDRESS=smtp.yourdomain.com -e DISCOURSE_SMTP_PORT=587 -e DISCOURSE_SMTP_USER_NAME=user@yourdomain.com -e DISCOURSE_SMTP_PASSWORD=YourStrongPasswordHere -e DISCOURSE_SMTP_DOMAIN=yourdomain.com -e DISCOURSE_NOTIFICATION_EMAIL=noreply@yourdomain.com -e LETSENCRYPT_ACCOUNT_EMAIL=me@example.com -h host-app -e DOCKER_HOST_IP=172.17.0.1 --name app -t -p 80:80 -p 443:443 -v /var/discourse/shared/standalone:/shared -v /var/discourse/shared/standalone/log/var-log:/var/log --mac-address 02:a7:ac:92:6f:88 local_discourse/app /sbin/boot
48d8ab41804db85677cc197fd19e7d5510faec248d99ce16d5a31082956f3463
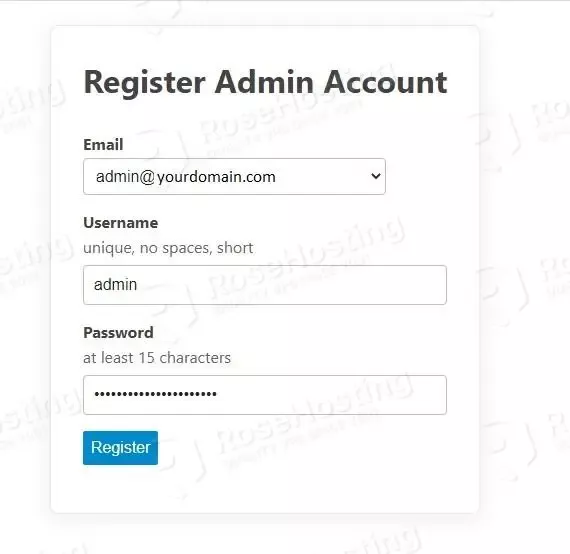
Now, you can access the Web interface at https://yourdomain.com/ and register an account.

Congratulations! You successfully installed Discourse software using the Docker image. If you find this setup difficult, feel free to contact our technical support, and they will help you with this immediately. We are available 24/7. All you need to do is to sign up for one of our NVMe VPS plans and submit a support ticket.
If you liked this about installing Discourse on Ubuntu 22.04, please share it with your friends on social networks or simply leave a reply below.