
In this blog post, we will show you how to install Drupal on Ubuntu 26.04 OS. Drupal is a popular open-source platform used for building websites and digital applications. It is primarily written in PHP and uses databases such as MySQL and PostgreSQL to manage content. Drupal is widely used because it is flexible, secure, and scalable, making it a good choice for everything from small business websites to large enterprise and government platforms. Some of its main features include customizable themes, modular functionality, multilingual support, user role management, and strong security tools. Developers also value Drupal for its ability to handle complex content structures, integrations, and modern web development requirements.
In this post, we will install Drupal with the LAMP stack, and the whole installation process will take around 15 minutes. Let’s get started!
Table of Contents
Prerequisites
- A server running Ubuntu 26.04 OS
- User privileges: root or non-root user with sudo privileges
- A valid domain with a pointed A record to the server IP address
Step 1. Update your system
Before installing anything on the server, it is recommended to update all system packages to the latest available versions. Run the following command in your Ubuntu 26.04 terminal:
apt update -y && apt upgrade -y
Step 2. Install Apache Web Server
The first step in setting up the LAMP stack is installing the Apache web server. Run the following command to install Apache:
apt install apache2 -y
After the installation is complete, start the Apache service and enable it to launch automatically whenever the system boots:
systemctl start apache2 && systemctl enable apache2
To confirm that the Apache service is running correctly, check its current status with the command below:
systemctl status apache2
If everything is working properly, you should see output similar to the following:
root@host:~# systemctl status apache2
● apache2.service - The Apache HTTP Server
     Loaded: loaded (/usr/lib/systemd/system/apache2.service; enabled; preset: enabled)
     Active: active (running) since Fri 2026-05-08 06:02:10 CDT; 10s ago
 Invocation: 58458739d2c649caa1eebd1b7544754d
       Docs: https://httpd.apache.org/docs/2.4/
   Main PID: 4143 (apache2)
     Status: "Total requests: 0; Idle/Busy workers 100/0;Requests/sec: 0; Bytes served/sec:   0 B/sec"
      Tasks: 55 (limit: 3770)
     Memory: 5.7M (peak: 5.7M)
        CPU: 177ms
     CGroup: /system.slice/apache2.service
Step 3. Install PHP along with the Extensions
Next to the LAMP stack is PHP8.3 with its extensions. To install it execute the following command:
apt install php php-cli php-fpm php-curl php-mysqlnd php-gd php-readline php-mbstring php-apcu php-xml php-dom php-zip php-intl php-common php-bcmath php-json -y
This will install PHP8.3, and to check the installed version, you can execute the command below:
php -v
The output should look like this:
[root@test.vps ~]# php -v
PHP 8.3.29 (cli) (built: Dec 16 2025 14:32:42) (NTS gcc x86_64)
Copyright (c) The PHP Group
Zend Engine v4.3.29, Copyright (c) Zend Technologies
    with Zend OPcache v8.3.29, Copyright (c), by Zend Technologies
Step 4. Install MariaDB database service
To install the MariaDB database server, run the following command:
apt install mariadb-server -y
After the installation is complete, start the MariaDB service and enable it to start automatically during system boot:
systemctl start mariadb && systemctl enable mariadb
To verify that the MariaDB service is running correctly, check its status with the command below:
systemctl status mariadb
If the service is running properly, you should see output similar to the following:
root@test.vps ~]# systemctl status mariadb
● mariadb.service - MariaDB 10.11 database server
     Loaded: loaded (/usr/lib/systemd/system/mariadb.service; enabled; preset: disabled)
     Active: active (running) since Fri 2026-05-08 06:13:58 CDT; 13s ago
 Invocation: 7b6dc4a57abf453da5078d43460240ae
       Docs: man:mariadbd(8)
             https://mariadb.com/kb/en/library/systemd/
   Main PID: 73569 (mariadbd)
     Status: "Taking your SQL requests now..."
      Tasks: 10 (limit: 10705)
     Memory: 111M (peak: 137.6M)
        CPU: 800ms
     CGroup: /system.slice/mariadb.service
             └─73569 /usr/libexec/mariadbd --basedir=/usr
Step 5. Create a Drupal Database and User
To create a Drupal database and user, you should execute the following commands one by one in the MariaDB terminal:
CREATE DATABASE drupaldb;
CREATE USER 'drupaluser'@'localhost' IDENTIFIED BY 'YourStrongPasswordHere';
GRANT ALL ON drupaldb.* TO 'drupaluser'@'localhost' WITH GRANT OPTION;
FLUSH PRIVILEGES;
EXIT;
Step 6. Download and Install Drupal
Since the LAMP stack is installed and the database is created, we can download and install Drupal. To do that, execute the following command:
cd /var/www/html

wget https://ftp.drupal.org/files/projects/drupal-10.6.7.zip

unzip drupal-10.6.7.zip

mv drupal-10.6.7/ drupal/

rm drupal-10.6.7.zip
Set the correct permissions on files and folders:
chown -R www-data:www-data /var/www/html/drupal/

cd /var/www/html/drupal/

cp sites/default/default.settings.php sites/default/settings.php

find . -type d -exec chmod 755 {} \;

find . -type f -exec chmod 644 {} \;
Step 7. Create an Apache configuration file
For Drupal to be accessible through your domain name, you need to configure the Apache web server. Start by creating a new Apache configuration file:
To create the Apache configuration file, execute the following command:
sudo touch /etc/apache2/sites-available/drupal.conf
Open the file and paste the following lines of code
<VirtualHost *:80>
ServerName yourdomain.com
DocumentRoot /var/www/html/drupal

<Directory /var/www/html/drupal>
AllowOverride All
</Directory>

ErrorLog ${APACHE_LOG_DIR}/error.log
CustomLog ${APACHE_LOG_DIR}/access.log combined

</VirtualHost>
Save the file and close it.
Enable the Apache configuration files for Drupal along with the rewrite module.
sudo a2enmod rewrite

sudo a2ensite drupal.conf
Check the Apache2 syntax:
apachectl -t
You should receive the following output:
root@host:/var/www/html/drupal# apachectl -t
Syntax OK
If the syntax is OK, restart the Apache service.
systemctl restart apache2
You can now access your Drupal website securely through your domain at http://yourdomainhere.com
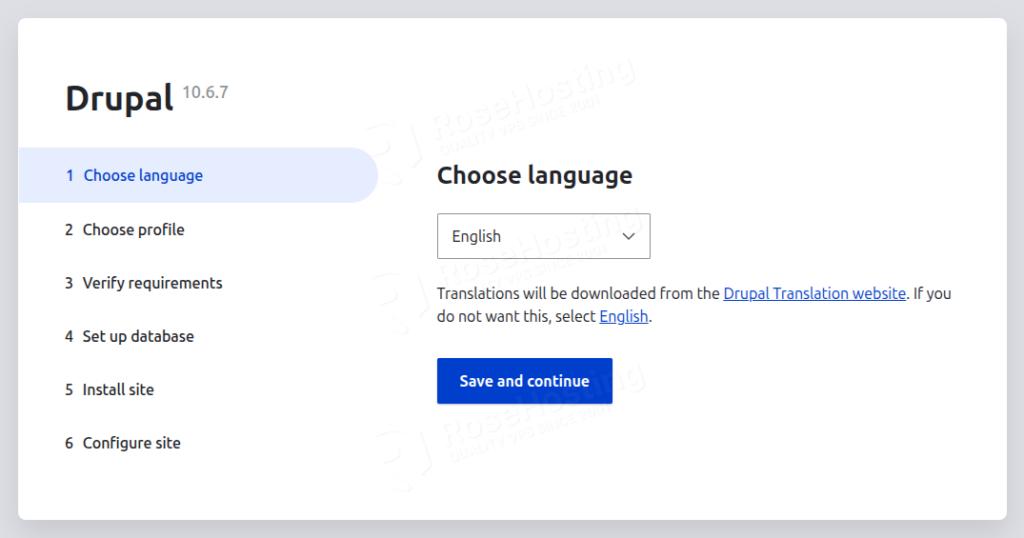
Step 8. Finish the Drupal Installation
On the first screen after accessing the domain, you should choose the language and hit Save and Continue:
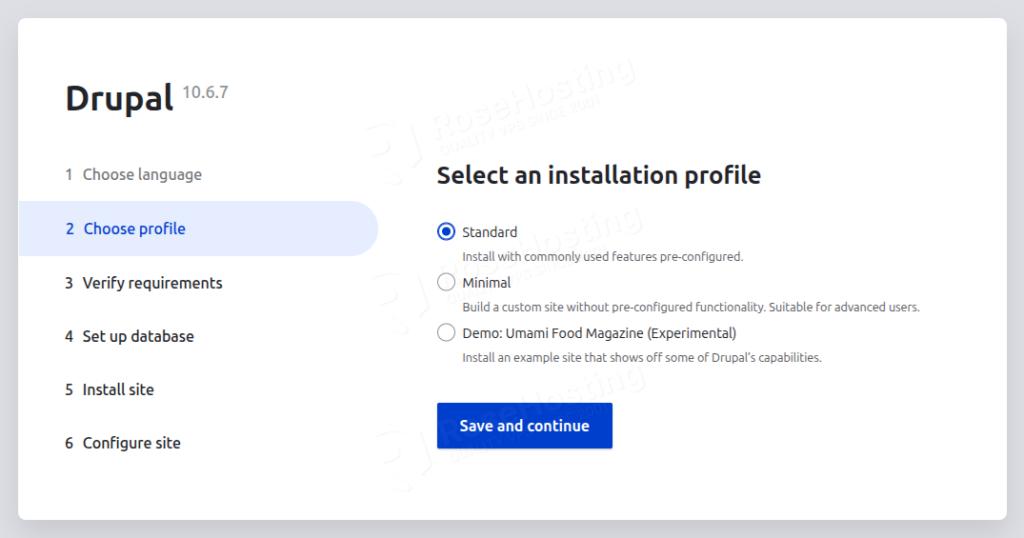
On the second window, you can choose the installation profile. We will choose Standard.
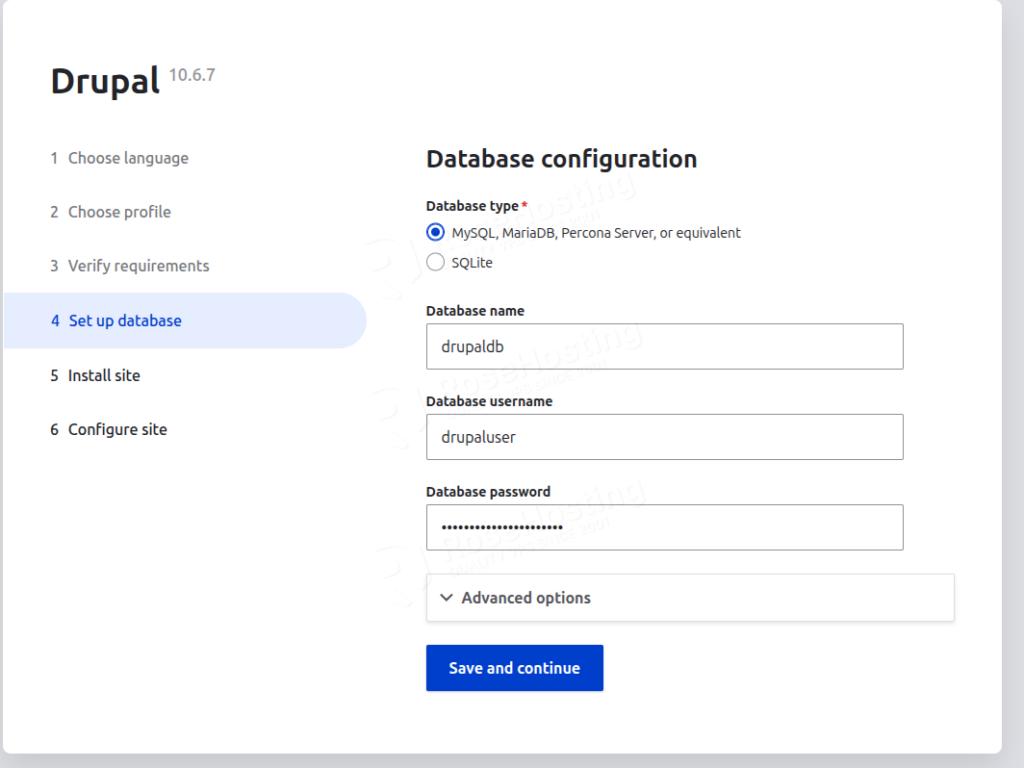
Once you choose the installation profile, if everything is Ok with the requirements, you will be redirected to the database setup window where you need to fill in the inputs with the database credentials created in Step 5 above:
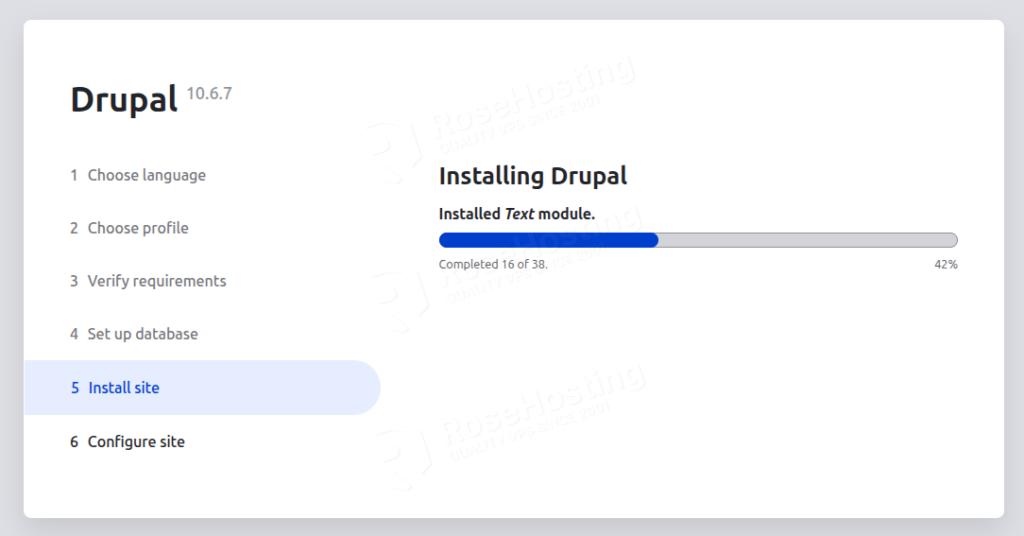
After you fill in the database information, the installation will start:
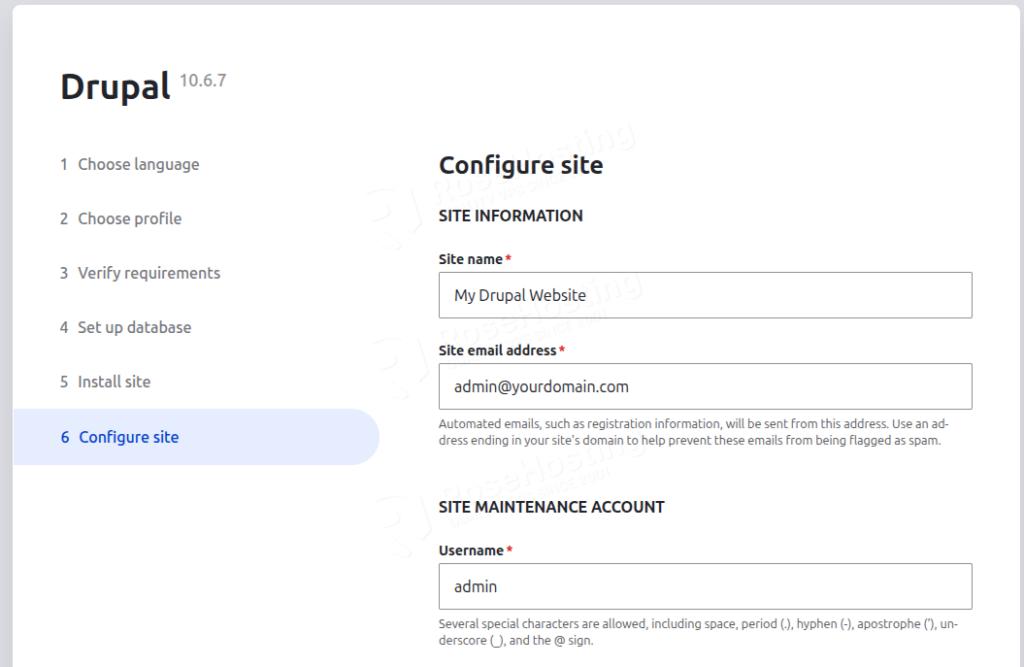
When the installation is complete, you will have to set your login credentials:
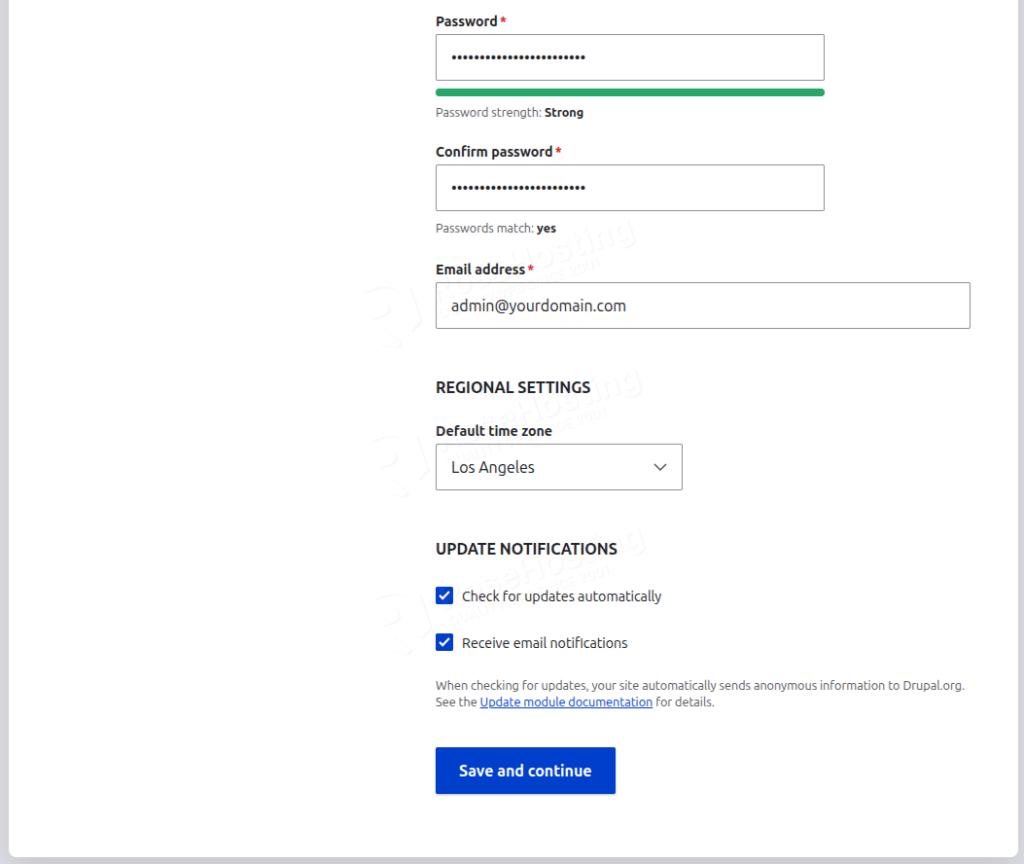
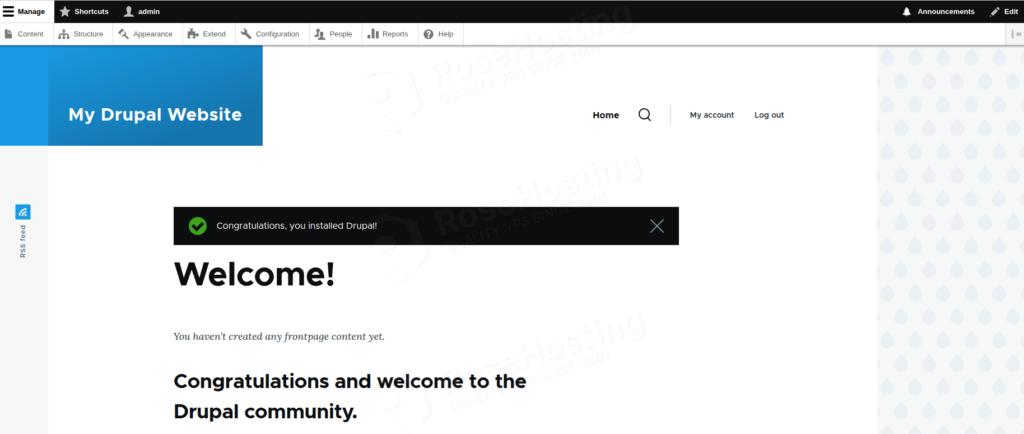
Click on Save and Continue, and you will be redirected to the Drupal Admin dashboard:
Wrapping Everything Up
That’s it. You successfully installed Drupal on Ubuntu 26.04 OS.
Of course, you do not have to install it yourself if you have difficulty and are not familiar with Linux. All you have to do is sign up for one of our Drupal VPS hosting plans and submit a support ticket. Our admins are available 24/7 and will help you with any aspect of installing Drupal.
If you liked this post on how to install Drupal on Ubuntu 26.04, please share it with your friends on social networks or leave a comment below.