 This step by step tutorial will show you how to install Jamroom on a Debian 8 VPS with Apache, PHP and MySQL installed on it.
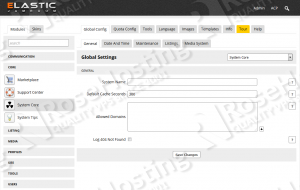
Jamroom is an open source CMS system written in PHP, mainly used by website developers for creating community websites. Jamroom is very easy to get started with and it has good documentation.
This tutorial was tested and written for a Debian 8 VPS, but it should work on any Linux distribution.
Let’s start with the installation. Download the latest version of Jamroom available at https://www.jamroom.net/download to the server and extract it using the following commands:
cd /opt
wget https://www.jamroom.net/networkmarket/core_download/jamroom-core-5.2.41.zip
unzip jamroom-core-5.2.41.zip
mv jamroom-core-5.2.41/ /var/www/html/html/jamroom/
Jamroom requires:
- PHP 5.3 or higher with GD Library, FreeType, MySQLi and Multibyte string extension (mbstring) compiled in.
- Apache Web Server >= 2.0 compiled with mod_rewrite module and with the following directives allowed: RewriteEngine, RewriteBase, RewriteCond and RewriteRule.;
- MySQL 5.1 or higher installed on your virtual server.
- ImageMagick image library
Make sure that all OS packages on your virtual server are up to date:
sudo apt-get update
sudo apt-get upgrade
This install guide assumes that Apache and MySQL are already installed and configured on your virtual server, so run the following command to install PHP and PHP modules required by Jamroom:
sudo apt-get install php5 php5-cli php5-mysql php5-mcrypt php5-gd
Then, install the ImageMagick image library:
sudo apt-get install imagemagick
Create a new Apache configuration file:
cd /etc/apache2/sites-available/
vi jamroom.conf
Add the following virtual host directive for your domain name:
<VirtualHost *:80>
ServerAdmin webmaster@your-domain.com
DocumentRoot “/var/www/html/jamroom”
ServerName your-domain.com
ServerAlias www.your-domain.com
ErrorLog “/var/log/apache2/your-domain.com-error_log”
CustomLog “/var/log/apache2/your-domain.com-access_log” combined
<Directory “/var/www/html/jamroom/”>
DirectoryIndex index.php
Options FollowSymLinks
AllowOverride All
</Directory>
</VirtualHost>
Do not forget to replace your-domain.com with your actual domain name. Then, run the following command:
ln -s /etc/apache2/sites-available/jamroom.conf /etc/apache2/sites-enabled/jamroom.conf
Or, use the a2ensite to enable the ‘jamroom.conf’ configuration in Apache:
sudo a2ensite jamroom.conf
Set the proper file permissions for the Apache web server to write to files and directories inside the /var/www/html/jamroom directory:
sudo chown www-data:www-data -R /var/www/html/jamroom/
In order to to allow larger uploads, edit the php.ini configuration file:
vi /etc/php5/apache2/php.ini
Add/modify the following lines to increase post_max_size and upload_max_filesize values:
post_max_size = 20M
upload_max_filesize = 20M
Enable the Apache2 rewrite module if it is not already done so:
sudo a2enmod rewrite
Restart the Apache web server to activate changes in configuration:
service apache2 restart
Create a new MySQL database for Jamroom to use and assign a user to it with full permissions:
mysql -u root -p
mysql> create database jamroomdb;
mysql> GRANT ALL PRIVILEGES ON jamroomdb.* TO 'jamroomuser'@'localhost' IDENTIFIED BY 'Y0UR-PASSW0RD';
mysql> flush privileges;
mysql> quit
Do not forget to replace ‘Y0UR-PASSW0RD’ with a strong password.
Open http://your-domain.com/install.php using a web browser and follow the easy instructions. Once installed, open http://your-domain.com/user/signup or click the ‘Create Account’ button to go to the create account page and the first user you create will be the Admin user.
That is it. The Jamroom installation is now complete.
Of course you don’t have to do any of this if you use one of our Debian Hosting services, in which case you can simply ask our expert Linux admins to install Jamroom for you. They are available 24×7 and will take care of your request immediately.
PS. If you liked this post please share it with your friends on the social networks using the buttons on the left or simply leave a reply below. Thanks.