
This tutorial explains how to install Jellyfin on AlmaLinux 10. Jellyfin is a free, open-source media server that lets you organize, manage, and stream your personal media collection across devices. It supports movies, TV shows, music, photos, and other media files stored on a computer or Linux server. You can access your content through a web browser, smartphone, smart TV, or compatible media player. Jellyfin automatically organizes your library and displays movie posters, descriptions, episode details, and subtitles.
Unlike commercial streaming services, Jellyfin requires no subscription fees. It supports Linux, Windows, and Docker Compose, making it an excellent solution for building your own personal media streaming platform.
This post covers installing Jellyfin with Docker and takes about 15 minutes. Let’s get started!

Table of Contents
Prerequisites
- A server running AlmaLinux 10 OS
- User privileges: root or a non-root user with sudo privileges
Step 1. Update the System
Before installing any software, update the system packages to their latest versions. To do that, execute the following command:
dnf update -y && dnf upgrade -y
Step 2. Install Docker
Installing Jellyfin with Docker makes deployment easier, keeps its dependencies isolated from the host system, simplifies updates and backups, and ensures consistent operation across Linux distributions.
To install Docker, first add the repo:
dnf config-manager --add-repo https://download.docker.com/linux/rhel/docker-ce.repo
Once the repo is added, install Docker Engine and the Compose plugin:
dnf install -y docker-ce docker-ce-cli containerd.io docker-buildx-plugin docker-compose-plugin dnf-plugins-core
Once the installation is complete, start and enable the Docker service:
systemctl start docker && systemctl enable docker
To check the status of the Docker service, execute the command below:
systemctl status docker
You should get the following output:
[root@test ~]# systemctl status docker
● docker.service - Docker Application Container Engine
     Loaded: loaded (/usr/lib/systemd/system/docker.service; enabled; preset: disabled)
     Active: active (running) since Thu 2026-10-15 06:28:08 CEST; 6s ago
 Invocation: ea6e391bdec14ff488b2bbf6f2b41c77
TriggeredBy: ● docker.socket
       Docs: https://docs.docker.com
   Main PID: 7305 (dockerd)
      Tasks: 10
     Memory: 32.5M (peak: 33M)
        CPU: 240ms
     CGroup: /system.slice/docker.service
             └─7305 /usr/bin/dockerd -H fd:// --containerd=/run/containerd/containerd.sock
Step 3. Create the Jellyfin directories
We will store the configuration, cache, and media files in separate directories. This keeps your media files independent of the container lifecycle.
To create those directories, execute the following commands one by one:
mkdir -p /opt/jellyfin/config
mkdir -p /opt/jellyfin/cache
mkdir -p /srv/media/movies
mkdir -p /srv/media/tv
Step 4. Configure Jellyfin with Docker Compose
Create the Docker Compose file:
cd /opt/jellyfin && nano /opt/jellyfin/docker-compose.yml
Paste the following lines of code:
services:
  jellyfin:
    image: jellyfin/jellyfin:latest
    container_name: jellyfin
    restart: unless-stopped

    ports:
      - "8096:8096"

    volumes:
      - /opt/jellyfin/config:/config
      - /opt/jellyfin/cache:/cache
      - /srv/media:/media:ro

    environment:
      - TZ=America/New_York
Save the file, close it, and start the service:
docker compose up -d
Once the containers are pulled and built, you should see the following output:
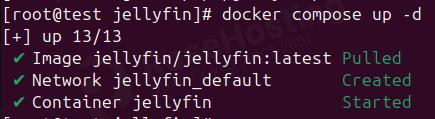
To check the status of the containers with formatted output:
docker ps -a --format "table {{.Names}}\t{{.Image}}\t{{.Status}}\t{{.Ports}}"

Step 5. Finish Jellyfin Installation
As you can see, Jellyfin is accessible on port 8096, and to access it in your browser, you can use the following URL:
http://YourServerIPAddress:8096
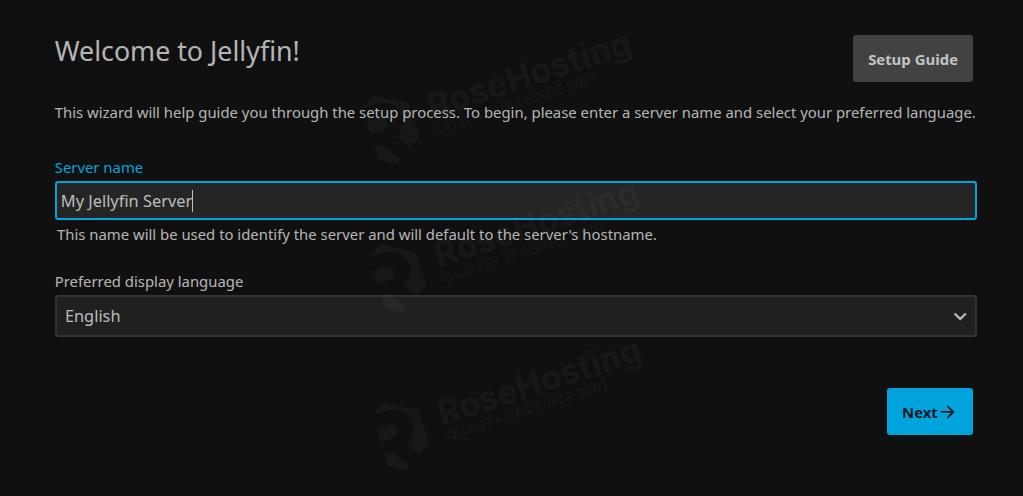
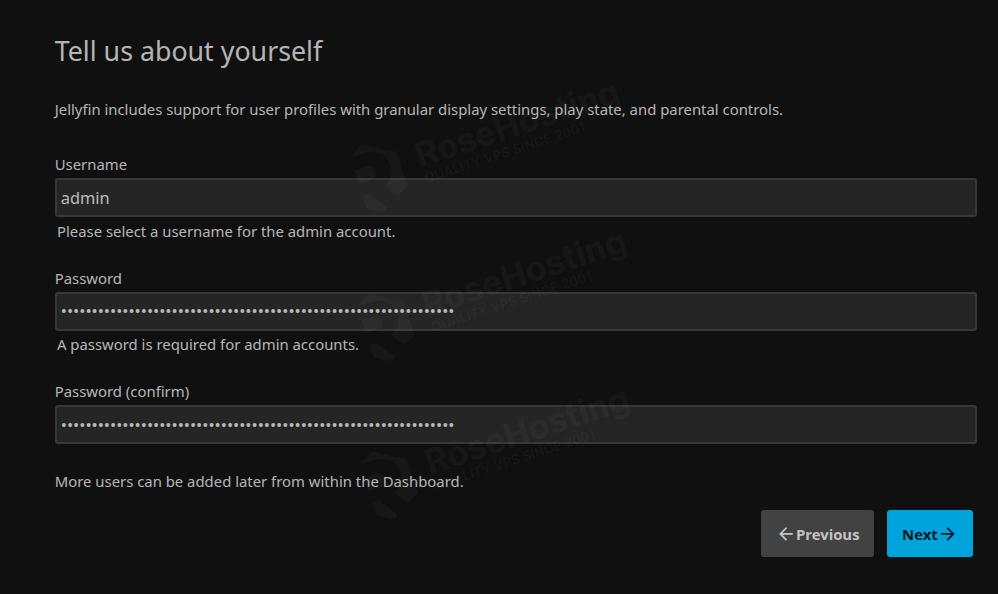
After you enter your server name, the next step is to set the credentials:
After that, you can set up your media library or skip this step by clicking on Next:
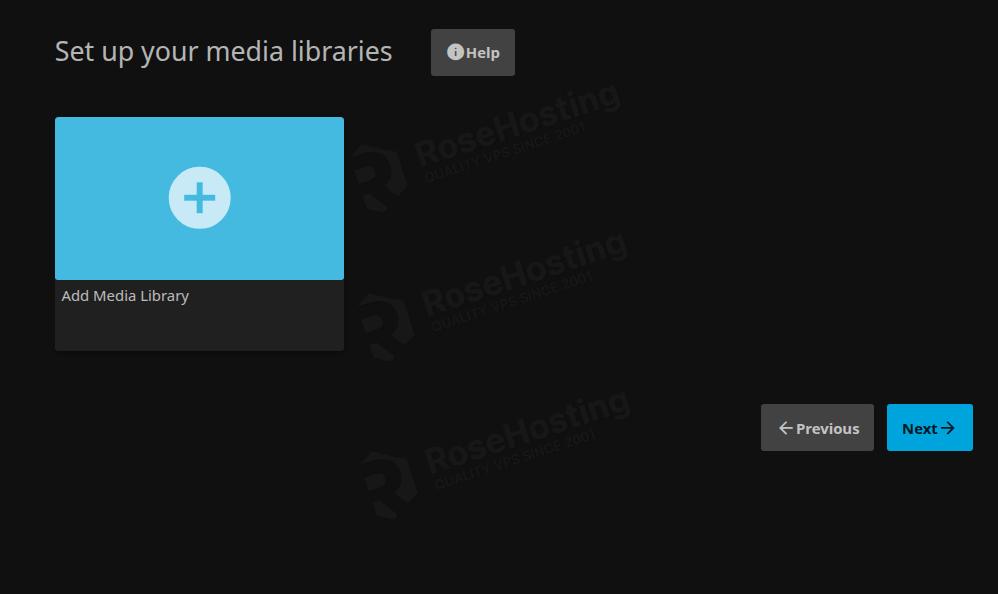
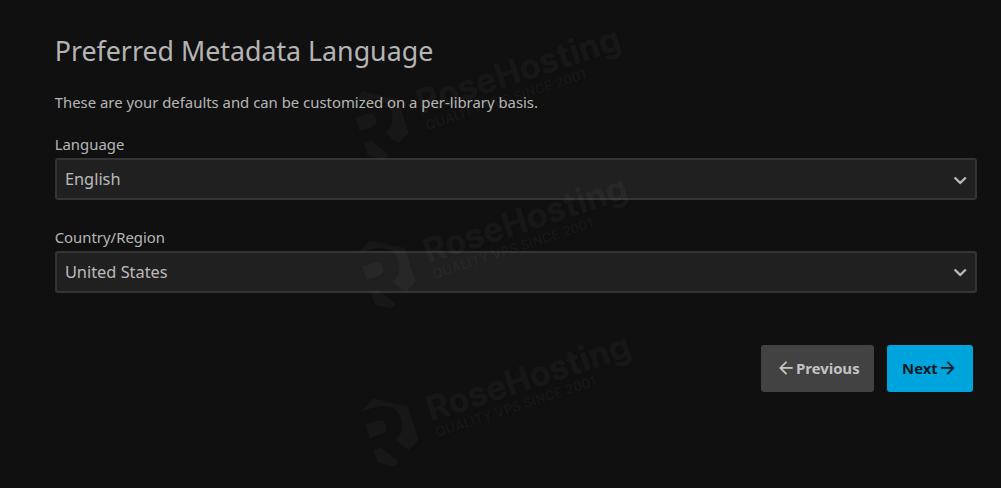
The next screen is for Language:
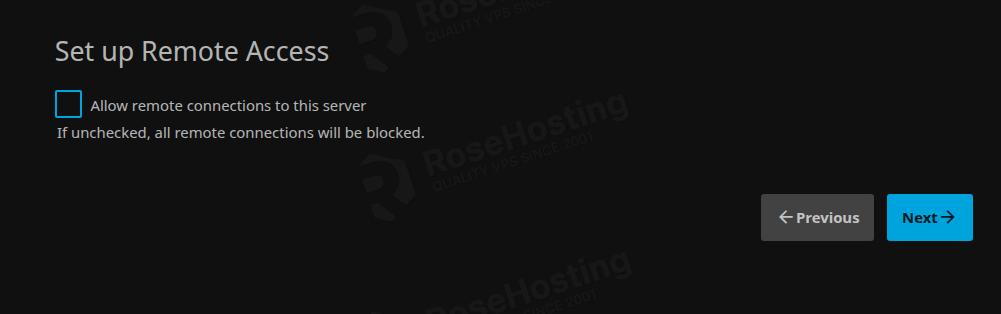
After that, set up remote access. Leave this unchecked so there are no remote connections.
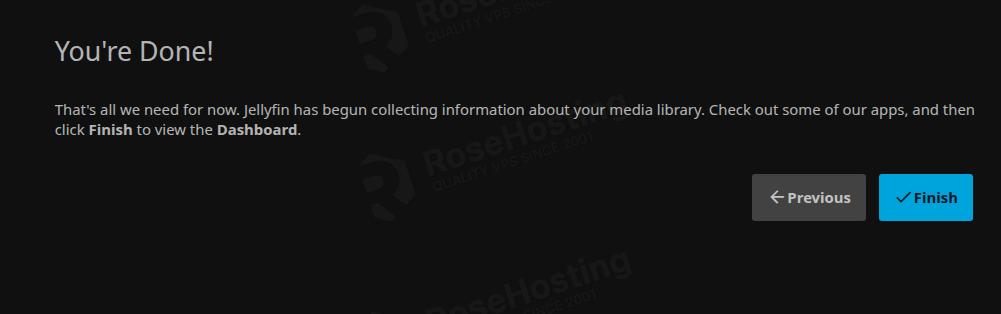
After this, if everything is OK, you should see the following screen:
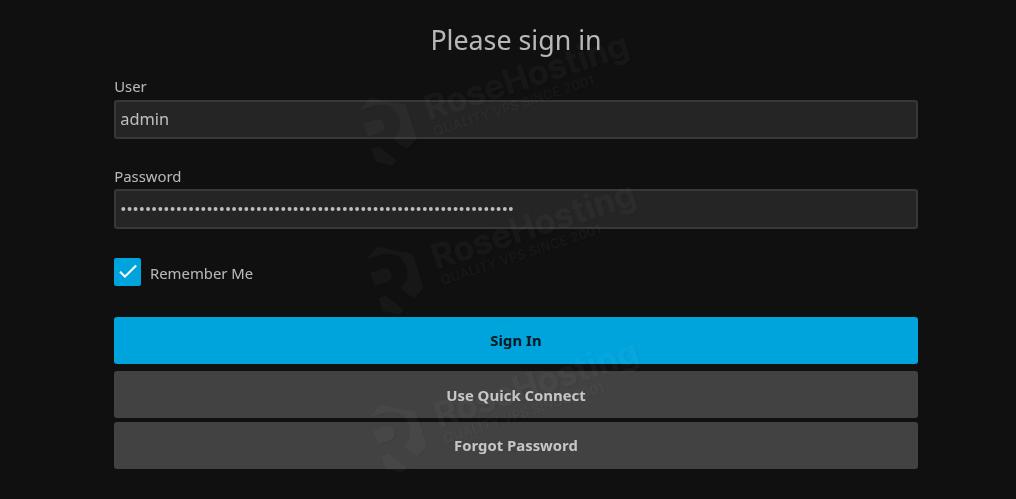
Then you can use the credentials you set above to log in:
Once logged in, you will be redirected to the Jellyfin admin dashboard:

That’s it. You’ve successfully installed Jellyfin on AlmaLinux 10.
Of course, you don’t have to install it yourself if you’re having trouble and aren’t familiar with Linux. You can always contact our technical support. Just sign up for one of our monthly management plans and submit a support ticket. We are available 24/7 and will handle your request right away.
If you liked this post about how to install Jellyfin on AlmaLinux 10, please share it with your friends or leave a comment below.