
 The Jupyter Notebook is popular and widely used open-source web-based software that allows users to create and share documents that contain live code, equations, visualizations, and narrative text. Uses include data cleaning and transformation, numerical simulation, statistical modeling, data visualization, machine learning, and much more. In this tutorial, we will show you how to install Jupyter Notebook on Debian 9, start and access the web application.
Some of the main features of the Jupyter Notebook web application are:
- In-browser code editing with automatic syntax highlighting, indentation, and tab completion/introspection.
- Easily execute code from your favorite web browser
- Displaying the result of computation using rich media representations, such as HTML, LaTeX, PNG, SVG, etc. For example, publication-quality figures rendered by the matplotlib library can be included inline.
- In-browser editing for rich text using the Markdown markup language, which can provide commentary for the code, is not limited to plain text.
- The ability to easily include mathematical notation within markdown cells using LaTeX, and rendered natively by MathJax.
Table of Contents
1. Prerequisites
– Debian 9 VPS with 2 GB of memory
– SSH access with root privileges
– Python version 3.3 or newer, or Python 2.7
2. Login via SSH and update the system
Login to your Debian 9 VPS via SSH as user root
ssh root@IP_Address
and run the following command to make sure that all installed packages on the server are updated to the latest available version
apt update && apt upgrade
3. Install Python 3 and Pip
We will install the latest Python version available in the official Debian 9 repository, which is version 3.5. Run the following command to start the installation
apt -y install python3 python3-pip python3-dev
Once the installation is completed you can check the version of Python installed on your server
python3 --version
output
Python 3.5.3
and check the version of pip using the following command
pip3 --version
output
pip 9.0.1 from /usr/lib/python3/dist-packages (python 3.5)
4. Install IPython and Jupyter Notebook
Next, we will install IPython. IPython or Interactive Python is a command shell for interactive computing in multiple programming languages. It is available in the Debian repository and it can be easily installed using the apt package manager. To install IPython and all its dependencies execute the following command
apt -y install ipython
Check the installed version of IPython
ipython --version
output
5.1.0
Next, we can move on to installing Jupyter Notebook using the pip Python package manager.
pip3 install jupyter
The installation may take some time. After it is completed Jupyter Notebook is ready to use. Before we start the application we will create a new user for Jupyter Notebook because it is not recommended to run the application as user root
useradd -M jupyter
5. Start Jupyter Notebook in the background
And finally, start Jupyter Notebook in the background as the newly created ‘jupyter’ using the following command
su - jupyter -c 'jupyter notebook --ip IP_Address --no-browser' &
If you still want to start Jupyter Notebook as user root you can use the –allow-root option.
where IP_Address is the actual IP address of your Debian 9 VPS. And you will receive an output similar to the following
Copy/paste this URL into your browser when you connect for the first time,
to login with a token:
    http://IP_Address:8888/?token=7f928e48351e58492d1c9c71ff846fd87b980d690b1171f6
Jupyter Notebook server by default is listening on port 8888. If this port is not available you can specify another port using the ‘–port’ flag. Jupyter Notebook provides help messages for all available command line arguments. If you need help run the following command
jupyter notebook --help
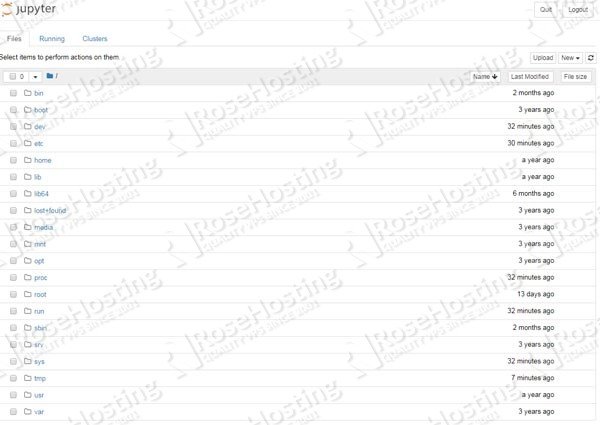
Open your favorite web browser and navigate to the URL shown above. Once the application is opened, the Notebook Dashboard will be displayed and it will show a list of the notebooks, files, and subdirectories in the directory where you executed the command and the notebook server was started
For detailed information on how to configure and use Jupyter Notebook, please check their documentation.
 Of course, you don’t have to Install Jupyter Notetbook on Debian 9, if you use one of our Optimized Python VPS Hosting services, in which case you can simply ask our expert Linux admins to install Jupyter Notebook for you. They are available 24×7 and will take care of your request immediately.
PS. If you liked this post, on How to Install Jupyter on a Debian 9, please share it with your friends on the social networks using the buttons below or simply leave a reply. Thanks.