
In this tutorial, we will demonstrate how to install and deploy Lighttpd on a Debian 9 VPS with FPM/FastCGI support.
 Lighttpd is a free, open-source and high-performance web server developed by Jan Kneschke. It has a low memory footprint when compared to other web servers and is specially designed for speed-critical environments. It is secure, fast, and can handle up to 10,000 connections in parallel on a single server. It is used by many websites, including YouTube, Bloglines, WikiMedia, and many more. Lighttpd comes with a rich set of features, such as FastCGI, SCGI, Auth, URL-Rewriting, Output-Compression, event mechanism, and more. These features combined make for a compelling and high-performance web server solution.
Let’s get started with the installation.
Table of Contents
Prerequisites
- For the purpose of this tutorial, we will use a Debian 9 VPS.
- Full SSH root access, or a user with sudo privileges is also required.
- A valid domain name is pointed with your server IP address. In this tutorial we will use
test.example.com.
Step 1: Log in via SSH and Update the System
First, we’re going to need to log into our server using SSH. You can do that by entering this command:
ssh root@IP_Address -p Port_Number
Remember to replace “root” with your username if you are not using the root user. Change “IP_Address” and “Port_Number” according to your server’s IP address and SSH port number.
Once you are logged in, you should update all of your packages to their latest available versions.
apt-get update -y
apt-get upgrade -y
Once the updates are completed, we can proceed to the next step.
Step 2: Install MariaDB Server
First, we will install the MariaDB database server by running the following command:
apt-get install mariadb-server mariadb-client
Once the installation has been completed, start the MariaDB service and enable it to start after system reboot:
systemctl start mariadb
systemctl enable mariadb
Next, log in to MariaDB shell with the following command:
mysql
If everything is fine, you should see the following output:
Welcome to the MariaDB monitor. Commands end with ; or \g.
Your MariaDB connection id is 4
Server version: 10.1.38-MariaDB-0+deb9u1 Debian 9.8

Copyright (c) 2000, 2018, Oracle, MariaDB Corporation Ab and others.

Type 'help;' or '\h' for help. Type '\c' to clear the current input statement.
MariaDB [(none)]>
Next, secure your MariaDB installation by using the mysql_secure_installation script. This script will remove anonymous users, disallow root login remotely, and remove the test database.
mysql_secure_installation
Answer all the questions as shown below:
Enter current password for root (enter for none): press [Enter]
Set root password? [Y/n]: N
Remove anonymous users? [Y/n]: Y
Disallow root login remotely? [Y/n]: Y
Remove test database and access to it? [Y/n]: Y
Reload privilege tables now? [Y/n]: Y
Once MariaDB is secured, you can proceed to the next step.
Step 3: Install Lighttpd
By default, the latest version of Lighttpd is available in the Debian 9 default repository. You can install it by just running the following command:
apt-get install lighttpd
Once installed, start the Lighttpd service and enable it to start after system reboot using the following command:
systemctl start lighttpd
systemctl enable lighttpd
You can verify the Lighttpd status with the following command:
systemctl status lighttpd
If everything is fine you should get the following output:
● lighttpd.service - Lighttpd Daemon
Loaded: loaded (/lib/systemd/system/lighttpd.service; enabled; vendor preset: enabled)
Active: active (running) since Mon 2019-08-12 14:48:35 UTC; 29s ago
Main PID: 2354 (lighttpd)
CGroup: /system.slice/lighttpd.service
└─2354 /usr/sbin/lighttpd -D -f /etc/lighttpd/lighttpd.conf

Aug 12 14:48:35 debian9 systemd[1]: Starting Lighttpd Daemon...
Aug 12 14:48:35 debian9 systemd[1]: Started Lighttpd Daemon.
Now, open a web browser and visit the following URL http://test.example.com. You should get the Lighttpd default page as shown below:
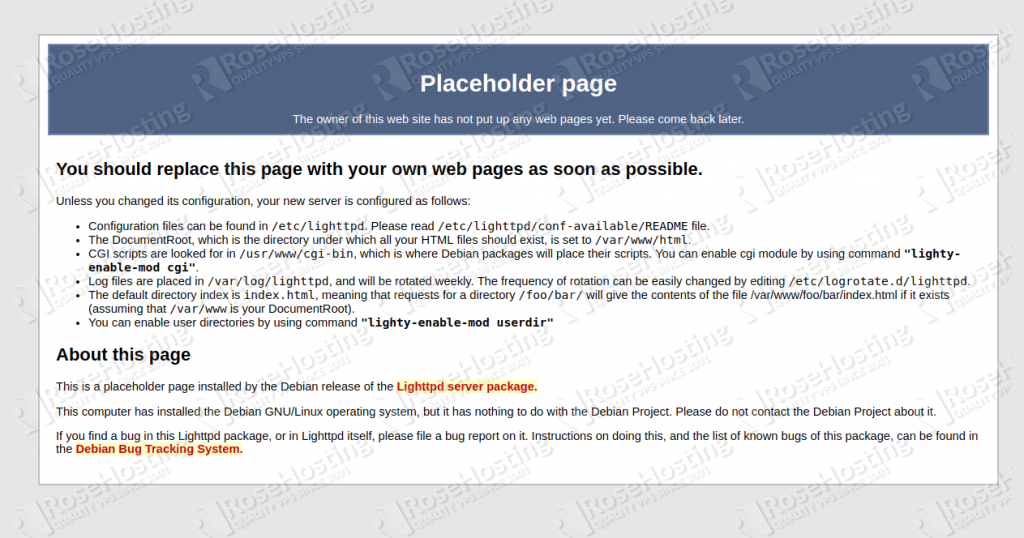
Lighttpd’s default document root is /var/ww/html on Debian 9, the main configuration file is
/etc/lighttpd/lighttpd.conf and other configuration files are located at /etc/lighttpd/conf-available directory.
Step 4: Install PHP and PHP-FPM
Next, we will install PHP and PHP-FPM, and enable them to work with Lighttpd. You can install PHP along with all of its necessary extensions with the following command:
apt-get install php php-cli php-common php-fpm php-mysql
Once installed, we need to modify the php.ini file to enable PHP support for Lighttpd.
nano /etc/php/7.0/fpm/php.ini
Change cgi.fix_pathinfo value to 1:
cgi.fix_pathinfo=1
Save and close the file.
By default, PHP-FPM listens on the UNIX socket /var/run/php7-fpm.sock. So, we will need to modify the file /etc/php/7.0/fpm/pool.d/www.conf and set PHP-FPM to listens on TCP socket.
nano /etc/php/7.0/fpm/pool.d/www.conf
Find the line:
listen = /run/php/php7.0-fpm.sock
Replace it with the following line:
listen = 127.0.0.1:9000
Save and close the file. Next, open the file 15-fastcg-php.conf to enable FastCGI support in Lighttpd:
nano /etc/lighttpd/conf-available/15-fastcgi-php.conf
Find the following lines:
"bin-path" => "/usr/bin/php-cgi",
"socket" => "/var/run/lighttpd/php.socket",
Replace them with the following:
"host" => "127.0.0.1",
"port" => "9000",
Save and close the file. Then, enable FastCGI and FastCGI-PHP modules with the following command:
lighty-enable-mod fastcgi
lighty-enable-mod fastcgi-php
Finally, restart Lighttpd and PHP-FPM service to apply all the configuration changes:
systemctl restart php7.0-fpm
systemctl restart lighttpd
You can verify the PHP-FPM with the following command:
systemctl status php7.0-fpm
If everything is fine you should get the following output:
● php7.0-fpm.service - The PHP 7.0 FastCGI Process Manager
Loaded: loaded (/lib/systemd/system/php7.0-fpm.service; enabled; vendor preset: enabled)
Active: active (running) since Mon 2019-08-12 14:55:36 UTC; 1min 56s ago
Docs: man:php-fpm7.0(8)
Main PID: 12288 (php-fpm7.0)
Status: "Processes active: 0, idle: 2, Requests: 0, slow: 0, Traffic: 0req/sec"
Tasks: 3 (limit: 7372)
CGroup: /system.slice/php7.0-fpm.service
├─12288 php-fpm: master process (/etc/php/7.0/fpm/php-fpm.conf)
├─12289 php-fpm: pool www
└─12290 php-fpm: pool www

Aug 12 14:55:36 debian9 systemd[1]: Stopped The PHP 7.0 FastCGI Process Manager.
Aug 12 14:55:36 debian9 systemd[1]: Starting The PHP 7.0 FastCGI Process Manager...
Aug 12 14:55:36 debian9 systemd[1]: Started The PHP 7.0 FastCGI Process Manager.
Step 5: Test PHP-FPM Support on Lighttpd
Lighttpd is now installed and configured to work with FPM/FastCGI. Next, we will need to create a virtual host configuration file for Lighttpd to test PHP-FPM support.
First, create a virtual host directory with the following command:
mkdir /var/www/html/testsite
Next, create a virtual host configuration file with the following command:
nano /etc/lighttpd/conf-available/lighttpd.conf
Add the following lines:
$HTTP["host"] =="test.example.com" {
server.document-root = "/var/www/html/testsite"
index-file.names = ( "info.php" )
}
Save and close the file. Then, enable the virtual host with the following command:
ln -s /etc/lighttpd/conf-available/lighttpd.conf /etc/lighttpd/conf-enabled/
Next, create a info.php file inside /var/www/html/testsite directory to test PHP-FPM support:
nano /var/www/html/testsite/info.php
Add the following lines:
<?php phpinfo(); ?>
Next, set correct permission on /var/www/html/testsite with the following command:
chown -R www-data:www-data /var/www/html/testsite
Finally, restart the Lighttpd service with the following command:
systemctl restart lighttpd
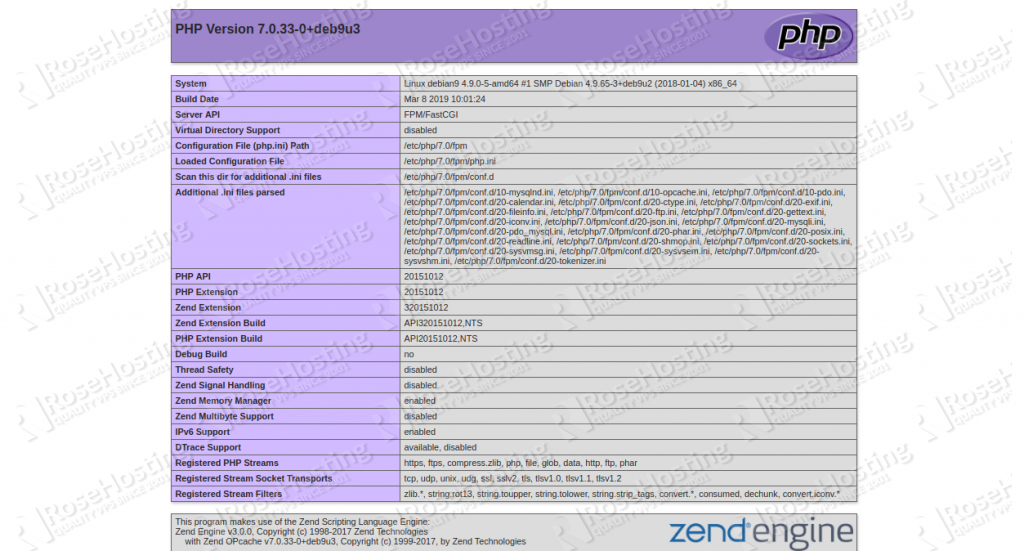
Now, open your web browser and type the URL http://test.example.com. You should see that PHP is working through FPM/FastCGI in the following page:
In this tutorial, we learned how to install Lighttpd on a Debian 9 VPS. We also learned how to enable MariaDB, PHP and PHP-FPM with FastCGI in Lighttpd. For more information, you can visit the Lighttpd official documentation.
 Of course, you don’t have to install Lighttpd on a Debian 9 VPS if you use one of our Managed Debian Hosting solutions, in which case you can simply ask our expert Linux admins to setup Lighttpd on a Debian 9 VPS for you. They are available 24×7 and will take care of your request immediately.
PS. If you liked this post on how to install Lighttpd on a Debian 9 VPS, please share it with your friends on the social networks using the share shortcuts below, or simply leave a comment in the comments section. Thanks.