
Logaholic is a web analytics software which provides reliable information about the traffic, content, keywords etc. of the web sites installed on your CentOS VPS.
This install guide assumes that Apache, MySQL and PHP are already installed and configured on your server. At the time of writing this tutorial, the latest stable version of Logaholic is 6.0 and it requires:
- PHP 5 or higher with cURL and Zip extensions enabled. The output_buffering setting should be disabled and allow_url_fopen and display_errors settings should be enabled in php.ini
- Apache or Nginx Web Server
- MySQL 5.0 or higher installed on your Linux VPS.
Let’s start with the installation of Logaholic SHE (self hosted edition). Download the latest version of Logaholic available at ‘http://www.logaholic.com/download/’ to the server and extract it using the following commands:
cd /opt/
wget -O logaholic.tar.gz http://www.logaholic.com/download.php?file=logaholic_she_600.tar.gz
tar -xvzf logaholic.tar.gz
mkdir -p /var/www/html/logaholic
mv logaholic_she_600/logaholic /var/www/html
Download GeoLite Legacy Database at http://www.maxmind.com/download/geoip/database/GeoLiteCity.dat.gz , then extract and copy this file to the ‘/var/www/html/logaholic/components/geoip/’ directory on your server:
wget http://www.maxmind.com/download/geoip/database/GeoLiteCity.dat.gz
gunzip GeoLiteCity.dat.gz
mv GeoLiteCity.dat /var/www/html/logaholic/components/geoip/
Change the file permissions so your web server can write to the ‘/var/www/html/logaholic’ directory and sub directories:
chown apache:apache -R /var/www/html/logaholic/
Edit the Apache configuration file (by default ‘/etc/httpd/conf/httpd.conf’) and define the Apache log file in the following format:
CustomLog /your_path/access_log "%h %l %u %t \"%r\" %s %b \"%{Referer}i\"
\"%{User-Agent}i\""
In general, this seems to be enough:
CustomLog /your_path/access_log "combined"
Please note that each Apache virtual host should have it’s own log file.
Locate the php configuration file using the following command:
#php -i | grep php.ini
Configuration File (php.ini) Path => /etc
Loaded Configuration File => /etc/php.ini
Edit the ‘php.ini’ file and add/modify the following lines:
allow_url_fopen = On
display_errors = On
output_buffering = off
Create a new virtual host directive in Apache. For example, edit your Apache configuration file (‘/etc/httpd/conf/httpd.conf’ by default) and un-comment the following line:
#NameVirtualHost *:80
Then, add the following lines at the end:
<VirtualHost *:80>
ServerAdmin admin@yourdomain.com
DocumentRoot /var/www/html/logaholic/
ServerName yourdomain.com
ServerAlias www.yourdomain.com
<Directory /var/www/html/logaholic/>
    Options FollowSymLinks
    AllowOverride All
</Directory>
    ErrorLog logs/yourdomain.com-error_log
    CustomLog logs/yourdomain.com-access_log combined
</VirtualHost>
Restart the Apache web server for the changes to take effect:
service httpd restart
Create a new MySQL database for Logaholic on your server:
mysql -u root -p
mysql> CREATE DATABASE logaholicdb;
mysql> GRANT ALL PRIVILEGES ON logaholicdb.* TO 'logaholicuser'@'localhost' IDENTIFIED BY 'your-password' WITH GRANT OPTION;
mysql> FLUSH PRIVILEGES;
mysql> quit
Do not forget to replace ‘your-password’ with a strong password.
Set the MySQL server time zone:
mysql -u root -p
mysql> SET GLOBAL time_zone = '-06:00';
mysql> FLUSH PRIVILEGES;
mysql> quit
Populate the time zone tables using the following command:
mysql_tzinfo_to_sql /usr/share/zoneinfo | mysql -u root mysql
Open http://yourdomain.com/install.php in your popular web browser and follow the easy instructions: enter the database settings and admin login credentials, then click ‘Save’. If all settings in ‘Database Settings , ‘Mysql Settings’ , ‘File Access Check’ and ‘PHP Settings’ sections are green, click ‘Continue’.
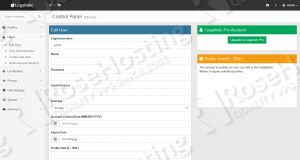
That is it. The Logaholic installation is now complete. Log in to the Admin area at http://yourdomain.com/login.php and click the ‘Global Settings’ tab for more post-installation tasks like adding a password etc.
Of course you don’t have to do any of this if you use one of our Blazing-Fast CentOS Hosting services, in which case you can simply ask our expert Linux admins to install Logaholic for you. They are available 24×7 and will take care of your request immediately.
PS. If you liked this post please share it with your friends on the social networks using the buttons on the left or simply leave a reply below. Thanks.