In this tutorial we will show you how to install Sitemagic CMS with Nginx on a CentOS 7 VPS. Sitemagic is an open-source CMS application written in PHP. It allows web developers to create professional and great looking websites in no time. This tutorial was tested and written for a CentOS 7 VPS, but it should work on any RPM based Linux distribution.
In order to install Sitemagic on your server, you need to make sure it meets the following requirements:
- PHP 5.2 or higher with the following PHP extensions enabled: GD, mbstring and SimpleXML;
- Apache or Nginx web server installed on your virtual server;
- MySQL or MariaDB – optional.
So, let’s start with the installation. Make sure that all OS packages are up to date by running the following commands:
yum clean all
yum update
Stop and remove Apache if it is installed and running on your server:
systemctl stop httpd
systemctl disable httpd
yum remove httpd
Install required packages:
yum install nginx mariadb mariadb-server php php-fpm php-cli php-curl php-gd php-mbstring php-mysql php-xml
Edit the /etc/php-fpm.d/www.conf configuration file and change:
user = apache
group = apache
to:
user = nginx
group = nginx
Run the following command:
chown nginx: -R /var/lib/php/session
Start the PHP-FPM, Nginx and MariaDB services and enable them to start on boot:
systemctl start php-fpm
systemctl start nginx
systemctl start mariadb
systemctl enable php-fpm
systemctl enable nginx
systemctl enable mariadb
Download the latest stable version of Sitemagic at http://sitemagic.org/Download.html to the ‘/opt’ directory on the server. Then, extract it and move the Sitemagic files and directories to the ‘/var/www/html/sitemagic’ directory. At the time of writing this tutorial, the latest stable version of Sitemagic is 4.1.2.
cd /opt/
unzip -d /var/www/html/ SitemagicCMS412.zip
mv /var/www/html/Sitemagic/ /var/www/html/sitemagic/
Create a new Nginx configuration file for your website:
vi /etc/nginx/conf.d/yourdomain.com.conf
Add the following content:
server {
    server_name www.yourdomain.com yourdomain.com;
    listen 80;
    root /var/www/html/sitemagic;
    access_log /var/log/nginx/yourdomain.com-access.log;
    error_log /var/log/nginx/yourdomain.com-error.log;
    index index.php;

    location / {
        try_files  $uri $uri/ /index.php?$args;
    }

    location ~* \.(jpg|jpeg|gif|css|png|js|ico|html)$ {
        access_log off;
        expires max;
    }

    location ~ \.php$ {
        try_files $uri = 404;
        fastcgi_split_path_info ^(.+\.php)(/.+)$;
        fastcgi_pass 127.0.0.1:9000;
        fastcgi_index index.php;
        include /etc/nginx/fastcgi_params;
        fastcgi_param SCRIPT_FILENAME $document_root$fastcgi_script_name;
    }

    location ~ /\.ht {
        deny all;
    }

}
Replace all instances of ‘yourdomain.com’ with your own domain name. Also, the web server user (nginx) needs to be able to write to ‘data’, ‘files’ and ‘templates’ directories and config.xml.php file. It can easily be accomplished by executing the following command:
chown -R nginx:nginx /var/www/html/sitemagic/
Test the Nginx configuration:
nginx -t
It the test is successful, restart the Nginx service:
systemctl restart nginx
Sitemagic CMS stores data as XML files in the ‘/var/www/html/sitemagic/data’ directory on the server by default, so there is no need to create and use a database.
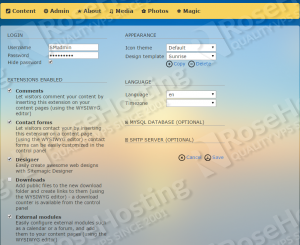
Open http://yourdomain.com with your favorite web browser and log in using ‘admin’ as username and ‘admin’ as password. Then, go to the administrator menu and click ‘Settings’, change the administrator username and password and click ‘Save’.
That is it. The Sitemagic CMS installation is complete.
Of course you don’t have to Install Sitemagic CMS on CentOS 7, if you use one of our CMS VPS Hosting services, in which case you can simply ask our expert Linux admins to install Sitemagic CMS with Nginx for you. They are available 24×7 and will take care of your request immediately.
PS. If you liked this post, on How to Install Sitemagic CMS on CentOS 7, please share it with your friends on the social networks using the buttons on the left or simply leave a reply below. Thanks.