
Matomo (formerly known as Piwik) is a free and open-source web analytics application developed in PHP to be the ultimate alternative to Google Analytics. Matomo can be used to track online visits to one or more websites and displays reports on these visits for analysis.
In this tutorial, we will show you how to install Matomo Web Analytics on your Ubuntu 20.04 VPS.Table of Contents
Prerequisites
- Ubuntu 20.04 VPS
- SSH root access or a regular system user with sudo privileges
Step 1. Log in via SSH and update the system
Log in to your Ubuntu 20.04 VPS with SSH as a root user:
ssh root@IP_Address -p Port_number
Replace “IP_Address” and “Port_Number” with your server’s IP address and SSH port.

Now, run the following command to update all installed packages to the latest available version.
apt update && sudo apt upgrade
Step 2: Install Apache Webserver
Execute the following command to install the Apache web server:
apt install apache2
To start Apache and to enable it to auto-start on server boot, run these commands:
systemctl start apache2
systemctl enable apache2
Step 3: Install PHP with required extensions
To install PHP and the required PHP extensions, run the following command:
apt install php php-cli libapache2-mod-php php-common php-curl php-gd php-mbstring php-mysql php-xml php-intl php-zip
Step 4: Install MariaDB and create a database for Matomo
Matomo needs a database server, and it can be installed by running the following command:
apt install mariadb-server
Once the MariaDB server has been installed, log in to the MariaDB shell as the root user and create a database and user for Matomo:
mysql -u root -p
MariaDB [(none)]> CREATE DATABASE matomodb;
MariaDB [(none)]> GRANT ALL PRIVILEGES ON matomodb.* TO 'matomouser'@'localhost' IDENTIFIED BY 'Passw0rd';
MariaDB [(none)]> FLUSH PRIVILEGES;
MariaDB [(none)]> EXIT;
Don’t forget to replace ‘Passw0rd’ with an actual strong password.
Step 5: Download Matomo on Ubuntu 20.04
Download the latest version of Matomo from the official website on your server:
wget https://builds.matomo.org/matomo.zip
Once downloaded, unzip the downloaded file with the following command:
unzip matomo.zip -d /var/www/html/
Then change the ownership of Matomo to www-data:
chown -R www-data:www-data /var/www/html/matomo/
Step 6: Create an Apache configuration file
To create a new configuration file for Matomo, we can create a new Apache configuration file:
nano /etc/apache2/sites-available/matomo.conf
A basic Apache configuration file looks similar to this:
 <VirtualHost *:80>
    ServerAdmin admin@your_domain.com
     DocumentRoot /var/www/html/matomo
     ServerName your_domain.com
     ServerAlias www.your_domain.com

     <Directory /var/www/html/matomo/>
          Options FollowSymlinks
          AllowOverride All
          Require all granted
     </Directory>

     ErrorLog ${APACHE_LOG_DIR}/matomo_error.log
     CustomLog ${APACHE_LOG_DIR}/matomo_access.log combined
</VirtualHost>
Don’t forget to change the domain name next to ServerAdmin and ServerName (your_domain.com) in order to make it work with your unique registered domain name.
Save and close the file, then activate the Matomo virtual host with the following command:
a2ensite matomo.conf
Restart the Apache service, and you are ready:
systemctl restart apache2
Step 7. Install an SSL certificate
In this step, we will enable SSL for Matomo by using a free Let’s Encrypt SSL certificate.
apt install python3-certbot-apache -y
Once Certbot is installed, we are ready to install the certificate for the domain:
certbot --apache
After the successful installation, the following similar message will be received:
- Congratulations! Your certificate and chain have been saved at:
/etc/letsencrypt/live/your_domain.com/fullchain.pem
Your key file has been saved at:
/etc/letsencrypt/live/your_domain.com/privkey.pem
Step 8: Installing Matomo Using the Web Interface
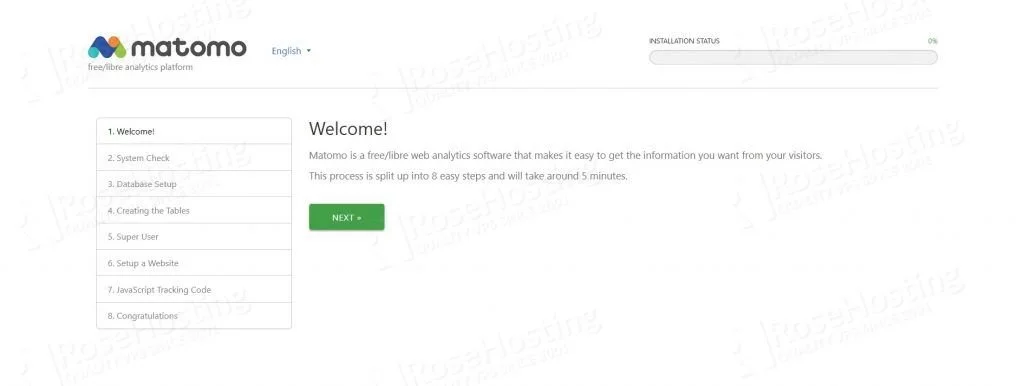
To run the web installation wizard, go to https://your_domain.com and you will be redirected to the Matomo welcome page. Click on the “Next” button:
You will see a “System Check” page. If everything is marked with a green checkmark, click on the “Next” button to proceed to the next step:

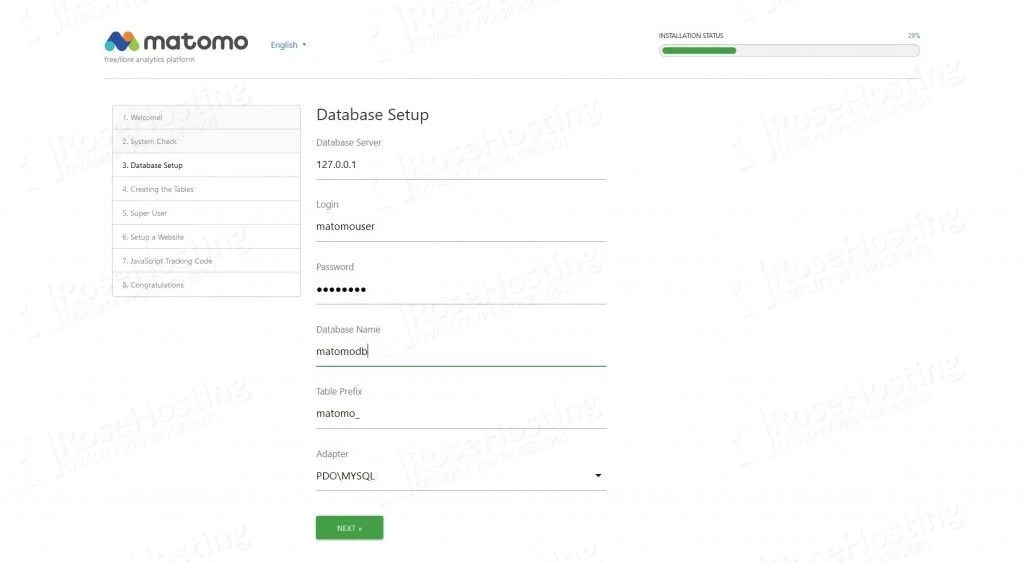
You should get to the Database Setup page. Use database credentials configured earlier:
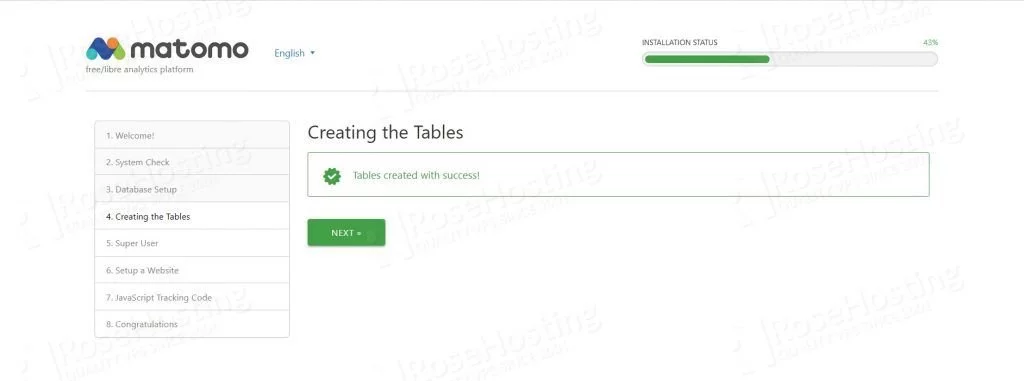
The creation of the Tables should return the “Tables created with success!” message:
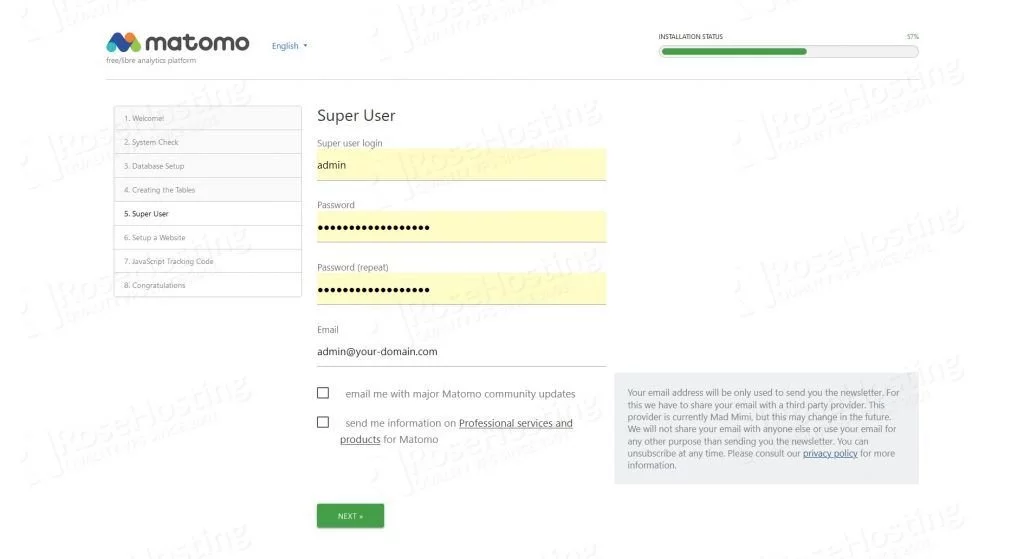
Next, you have to create a Super User. Provide username, password, and email address.
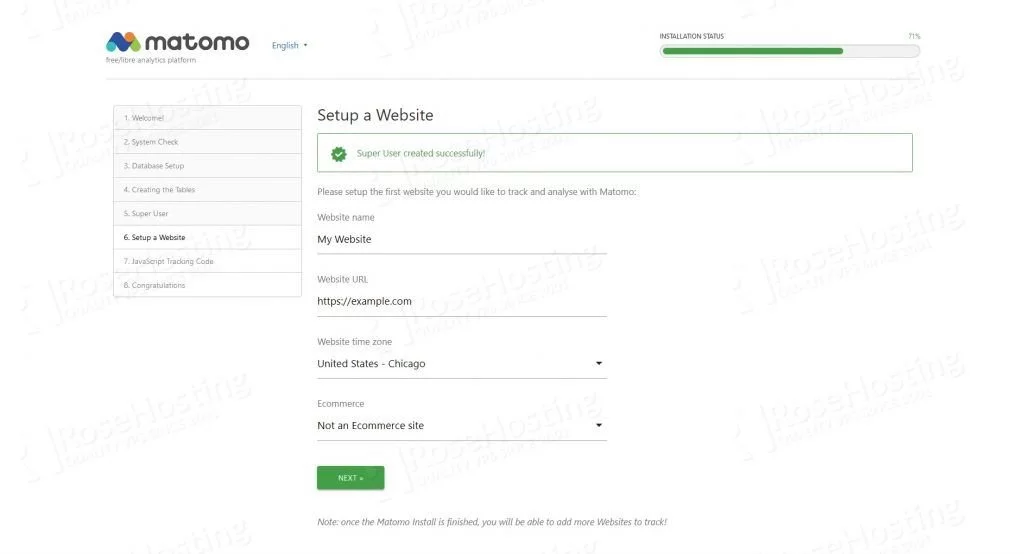
Now, provide the site name, website URL, and then click on the Next button.
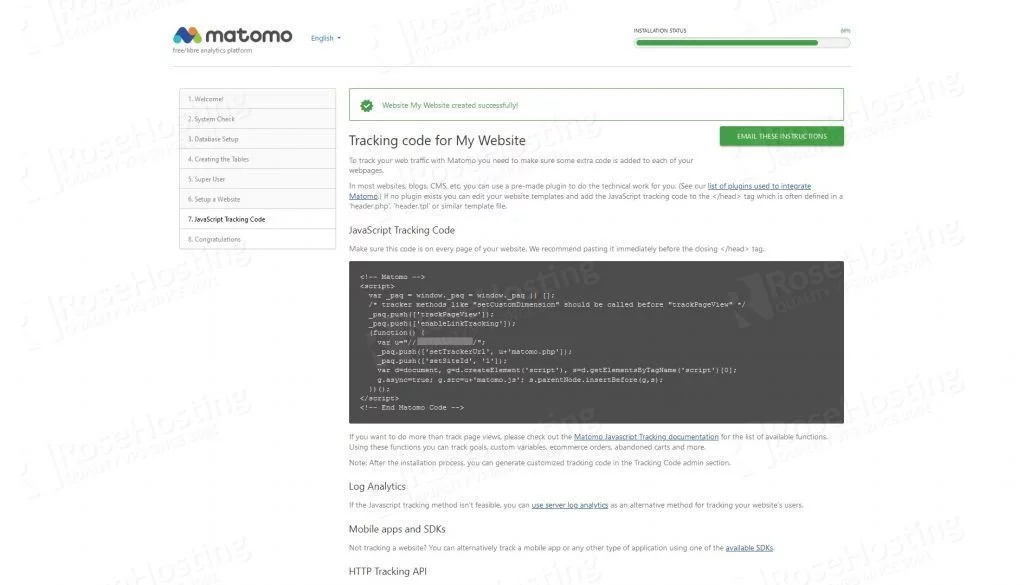
You should see the Tracking code for the Matomo site on the following page:
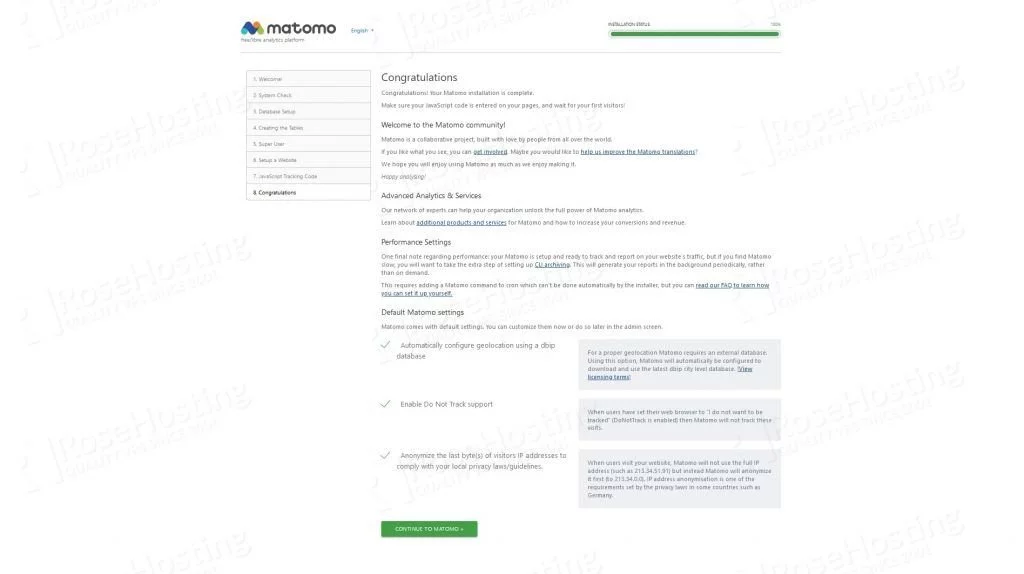
Next, you should see that the Matomo installation has been completed. Click on the CONTINUE TO MATOMO button.
Now, you can log in to the Matomo administration back-end:

You should see the Matomo Dashboard, and you can add more websites, check the stats, etc.

That is it. The Matomo installation is now complete. Of course, you don’t have to do any of this if you use one of our Matomo Analytics Hosting services, in which case you can simply ask our expert Linux admins to install Matomo for you. They are available 24×7 and will take care of your request immediately.
If you liked this post on how to install Matomo Web Analytics on Ubuntu 20.04, please share it with your friends or leave a comment below.