
Mattermost is a self-hosted and open-source online chat service designed to be used as an internal chat platform for companies and organizations. It is one of the main alternatives to the Slack Chat and Microsoft Teams platforms.

Mattermost provides several app integrations and allows internal file sharing, search, and various other features to help increase staff productivity and work efficiency.
In this tutorial, we will show you how to install Mattermost with an Apache web server on a Debian 11 VPS.
Table of Contents
Requirements
- For the purposes of this tutorial, we will be using a Debian 11 VPS.
- Full SSH root access or a user with sudo privileges is also required.
Step 1. Log in via SSH and update the system
Log in to your Debian 11 VPS with SSH as a root user:
ssh root@IP_Address -p Port_number
You can check whether you have the proper Debian version installed on your server with the following command:
# lsb_release -a
You should get this output:
Distributor ID: Debian
Description: Debian GNU/Linux 11 (bullseye)
Release: 11
Codename: bullseye
Once you are logged in, run the following command to update all installed packages to the latest available version.
apt update && apt upgrade
Step 2: Install MariaDB
Mattermost uses MariaDB/MySQL as a database backend. The default version available to install is MariaDB 10.5.
We can install it with the following command:
apt install mariadb-server
Secure your MariaDB installation by using the mysql_secure_installation script. This script will remove anonymous users, disallow root login remotely, and remove the test database.
mysql_secure_installation
You should answer all the questions as shown below:
Enter current password for root (enter for none): Press [Enter] since no password is set by default
Set root password? [Y/n]: N (Optional)
Remove anonymous users? [Y/n]: Y
Disallow root login remotely? [Y/n]: Y
Remove test database and access to it? [Y/n]: Y
Reload privilege tables now? [Y/n]: Y
Step 3: Create a Mattermost Database
Once MariaDB is secured, log in to MariaDB shell:
mysql -u root -p
Provide your MariaDB root password when prompted (if you set one), then create a database and user for Mattermost:
MariaDB [(none)]> CREATE DATABASE mattermost;
MariaDB [(none)]> CREATE USER 'mmuser'@'%';
MariaDB [(none)]> SET PASSWORD FOR 'mmuser'@'%' = PASSWORD('Str0ngPa$$worD');
Make sure to use a unique password for the database user.
Next, grant all the privileges to Mattermost database with the following command:
MariaDB [(none)]> GRANT ALL ON mattermost.* TO 'mmuser'@'%' IDENTIFIED BY 'Str0ngPa$$worD' WITH GRANT OPTION;
Next, flush the privileges and exit from the MariaDB shell with the following command:
MariaDB [(none)]> FLUSH PRIVILEGES;
MariaDB [(none)]> EXIT;
Once you have done it, you can proceed to the next step.
Step 4: Download and Install Mattermost Server
First, create a new user and group that will run our Mattermost server.
sudo useradd --system --user-group mattermost
At the time of writing this article, the latest version of Mattermost is 6.0.2. You can download it from the Mattermost download page using the following command:
wget wget https://releases.mattermost.com/6.0.2/mattermost-6.0.2-linux-amd64.tar.gz
Now you have successfully downloaded the Mattermost file and now you will extract it to the /opt directory using the tar command:
tar xvzf mattermost-6.0.2-linux-amd64.tar.gz -C /opt/
Next, we need to make the directory where we’ll store the files:
sudo mkdir /opt/mattermost/data
Next, change the ownership and permissions of the Mattermost:
chown -R mattermost:mattermost /opt/mattermost
chmod -R g+w /opt/mattermost
Next, edit the Mattermost configuration file and define your site URL and database settings:
nano /opt/mattermost/config/config.json
Change the following lines with your site domain name and database settings:
"SiteURL": "http://mattermost.example.com",
"DriverName": "MySQL",
"DataSource": "mmuser:Str0ngPa$$worD@tcp(localhost:3306)/mattermost?charset=utf8mb4,utf8&readTimeout=30s&writeTimeout=30s",
Save and close the file when you are done.
Step 5: Create a Systemd Service File for Mattermost
Next, create a systemd service file to start and stop the Mattermost service.
nano /lib/systemd/system/mattermost.service
Add the following lines:
[Unit]
Description=Mattermost
After=network.target
After=mysql.service
Requires=mysql.service

[Service]
Type=notify
User=mattermost
Group=mattermost
ExecStart=/opt/mattermost/bin/mattermost
TimeoutStartSec=3600
Restart=always
RestartSec=10
WorkingDirectory=/opt/mattermost
LimitNOFILE=49152

[Install]
WantedBy=mariadb.service
Save and close the file then reload the systemd daemon to apply the configuration changes:
systemctl daemon-reload
Next, start the Mattermost service and enable it to start at system reboot:
systemctl start mattermost
systemctl enable mattermost
To check and verify the status of your Mattermost service, run the following command:
systemctl status mattermost
Output :
● mattermost.service - Mattermost
Loaded: loaded (/etc/systemd/system/mattermost.service; disabled; vendor preset: enabled)
Active: active (running)
Main PID: 831 (mattermost)
Tasks: 46 (limit: 2303)
Memory: 331.0M
CPU: 36.628s
CGroup: /system.slice/mattermost.service
├─831 /opt/mattermost/bin/mattermost
├─861 plugins/com.mattermost.plugin-channel-export/server/dist/plugin-linux-amd64
├─868 plugins/com.mattermost.nps/server/dist/plugin-linux-amd64
├─875 plugins/playbooks/server/dist/plugin-linux-amd64
└─882 plugins/focalboard/server/dist/plugin-linux-amd64
By default, Mattermost runs on port 8065. You can check it using the following command:
ss -tunlp | grep 8065
Output:
tcp LISTEN 0 4096 *:8065 *:* users:(("mattermost",pid=1049,fd=28))
Step 6: Configure Apache as a Reverse Proxy
Next, you will need to configure the Apache webserver as a reverse proxy for Mattermost. First, we need to install the Apache server with the following command:
apt install apache2
Enable the mod_rewrite , mod_proxy, mod_proxy_http, and mod_proxy_wstunnel modules in Apache using the following commands:
a2enmod rewrite
a2enmod proxy
a2enmod proxy_http
a2enmod proxy_wstunnel
Once installed, create an Apache virtual host configuration file:
nano /etc/apache2/sites-available/mattermost.conf
Add the following lines:
<VirtualHost *:80>

ServerAdmin webmaster@example.com
ServerName mattermost.example.com

ProxyPreserveHost On

RewriteEngine On
RewriteCond %{REQUEST_URI} /api/v[0-9]+/(users/)?websocket [NC]
RewriteCond %{HTTP:UPGRADE} ^WebSocket$ [NC]
RewriteCond %{HTTP:CONNECTION} \bUpgrade\b [NC]
RewriteRule .* ws://127.0.0.1:8065%{REQUEST_URI} [P,QSA,L]

<Location />
Require all granted
ProxyPass http://127.0.0.1:8065/
ProxyPassReverse http://127.0.0.1:8065/
ProxyPassReverseCookieDomain 127.0.0.1 mattermost.example.com
</Location>

</VirtualHost>
Save and close the file then activate the Apache virtual host file:
ln -s /etc/apache2/sites-available/mattermost.conf /etc/apache2/sites-enabled/mattermost.conf
Finally, restart the Apache service to apply the changes:
systemctl restart apache2
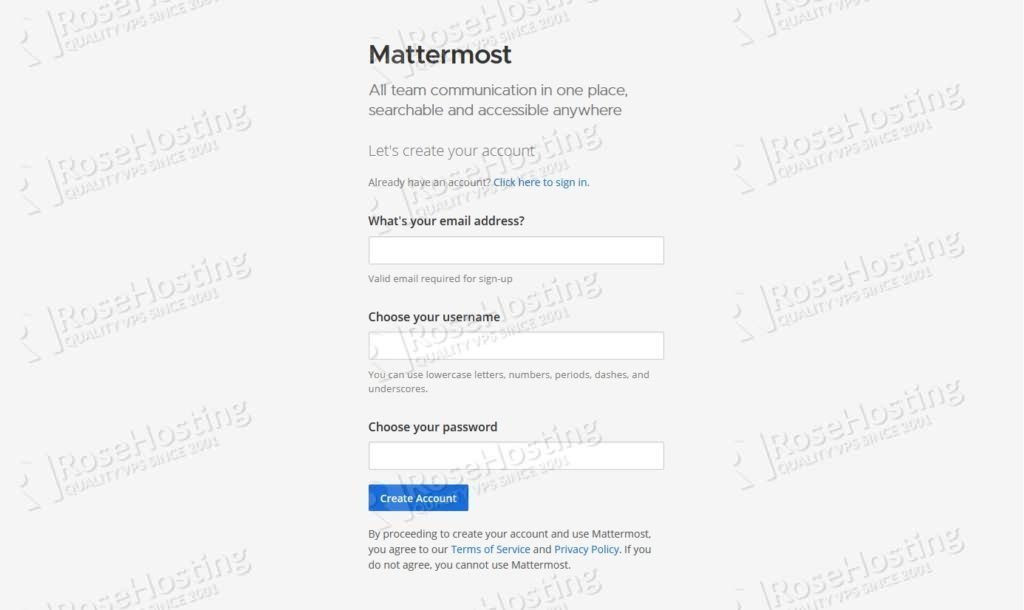
Step 7: Access Mattermost
You can now connect to your Mattermost server at http://mattermost.example.com and follow the prompts to configure your first Mattermost user, which will be granted administrator privileges, and do some initial configuration and setup.
That’s it. Mattermost has been successfully installed in your Debian 11 server.
Of course, you don’t need to install Mattermost on Debian 11 yourself if you use one of our fully managed VPS Hosting services, in which case you can simply ask our expert Linux admins to install your Mattermost server for you. They are available 24×7 and will take care of your request immediately.
P.S. If you liked this post on how to install Mattermost on Debian 11 please share it with your friends on the social networks by using the share shortcuts below, or simply leave a comment in the comments section. Thanks.
Why Apache HTTPD and not Nginx, as documented in the Mattermost docs?
Nginx can be configured as a reverse proxy as well. It is a personal choice. It will work with both web servers.