
Moodle is a learning platform written in PHP and distributed under the GNU General Public License. It is known as Learning Management System (LMS), or a Virtual Learning Environment (VLE). Moodle is mostly used for blended learning, online education, and flipped classrooms. It is used by numerous schools, universities, and all other organizations. This tutorial will show you how to install Moodle on Debian 11.
Table of Contents
Prerequisites
- A Debian 11 VPS
- SSH access with sudo privileges or root access
Step 1. Log in to VPS and Update the System
First of all, we need to log in to our Debian 11 VPS through SSH:
ssh root@IP_Address -p Port_number
Replace “root” with a user with sudo privileges or root if necessary. Additionally, replace “IP_Address” and “Port_Number” with your server’s respective IP address and SSH port number.

We will use ‘root’ in this article when running the shell commands. If you want to use your regular user with sudo privileges to run the commands, make sure to append ‘sudo’ in front of the commands. Next, let’s make sure that we’re on Debian 11.
# lsb_release -a
You should get this as the output:
Distributor ID: Debian
Description: Debian GNU/Linux 11 (bulleseye)
Release: 11
Codename: bullseye
Then, run the following command to make sure that all installed packages on the server are updated to their latest available versions:
# apt update && apt upgrade
Step 2. Install and Configure Apache
According to Moodle’s documentation about the server requirements, it supports Apache, Nginx, and IIS as the webserver. In this article, we will use Apache and we can install it directly from the default Debian repository.
# apt install apache2 php
On Debian 11, apache will start running upon installation. Now, let’s create an apache virtual host for our Moodle website.
# nano /etc/apache/site-available/moodle.yourdomain.com.conf
Then insert the following into the file.
<VirtualHost *:80>
ServerAdmin admin@moodle.yourdomain.com
DocumentRoot /var/www/html/moodle/
ServerName moodle.yourdomain.com

<Directory /var/www/html/moodle/>
Options +FollowSymlinks
AllowOverride All
Require all granted
</Directory>

ErrorLog ${APACHE_LOG_DIR}/moodle.error.log
CustomLog ${APACHE_LOG_DIR}/moodle.access.log combined

</VirtualHost>
Save the file then exit.
Next, we need to enable the rewrite module and the new virtual host we created just now.
# a2enmod rewrite
# a2ensite moodle.yourdomain.com
We also need to edit the max_input_vars value.
# nano /etc/php/7.4/apache2/php.ini
Find max_input_vars string then modify the value to 7000 or higher then uncomment it.
max_input_vars = 7000
Let’s restart apache for the changes to take effect.
# systemctl restart apache2
Step 3. Install MariaDB
Moodle requires a database server to store its data. It supports MySQL/MariaDB, PostgreSQL, MSSQL, and Oracle; the latter is not recommended. In this step, we are going to install the MariaDB server from the default Debian repository. To install the MariaDB server, invoke this command:
# apt install mariadb-server
After the installation is completed, the MariaDB server will be automatically running. Now, we can proceed with creating a new database and database user.
# mysql
Once logged in to the MySQL shell, we can run the following commands. You can replace m0d1fyth15 with a stronger password.
mysql> CREATE DATABASE moodle_db DEFAULT CHARACTER SET utf8mb4 COLLATE utf8mb4_unicode_ci;;
mysql> CREATE USER moodle_user@'localhost' IDENTIFIED BY 'm0d1fyth15';
mysql> GRANT ALL on moodle_db.* to moodle_user@localhost;
mysql> FLUSH PRIVILEGES;
mysql> \q
Step 4. Install Additional Packages and Download Moodle
There are some additional software packages to install, and since we are going to use git to complete Moodle installation, we also need to install git first.
# apt install git graphviz aspell ghostscript php7.4-{pspell,curl,gd,intl,mysql,xml,xmlrpc,ldap,zip,soap,mbstring}
Now, we will set up a local repository and we can copy the moodle core files to our Moodle website’s document root later.
With the local repository stored in /opt (you may choose another directory outside the website’s document root), we will be able to prepare and stage any upgrades efficiently. For example, if we want to make changes or add some plug-ins, we can download the plugin and copy it to the local moodle repository we have. After adding the plugin and making any other changes, we would want to edit the file located in /opt/moodle/.git/info/exclude, to tell git which files or directories to exclude when it pulls down the updates when we run the next “git pull” command.
Let’s create a local repository in /opt.
# cd /opt
# git clone git://git.moodle.org/moodle.git
Now, let’s check the list to see the branches.
# cd moodle
# git branch -a
We are going to use the latest stable Moodle, so run this command below.
# git branch --track MOODLE_400_STABLE origin/MOODLE_400_STABLE
Do not forget to checkout the Moodle version.
# git checkout MOODLE_400_STABLE
Next, we can copy the local repository to the domain’s document root we specified earlier when creating the apache virtual host.
# cp -R /opt/moodle/ /var/www/html/moodle/
We would also need to create a Moodle data directory to store the data, make sure it’s created outside of the website’s document root then give the correct permission.
# mkdir /var/www/moodledata
# chmod -R 777 /var/www/moodledata/
# chown -R www-data. /var/www/moodledata/ /var/www/html/moodle/
Step 5. Install Moodle
We can now open a web browser and navigate to http://moodle.yourdomain.com to perform the installation.
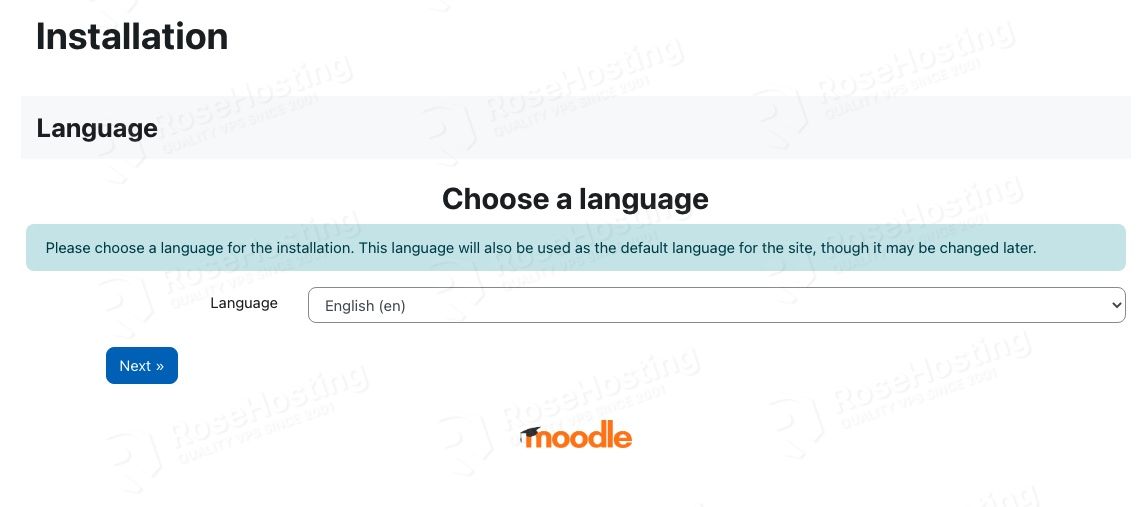
Click Next to continue
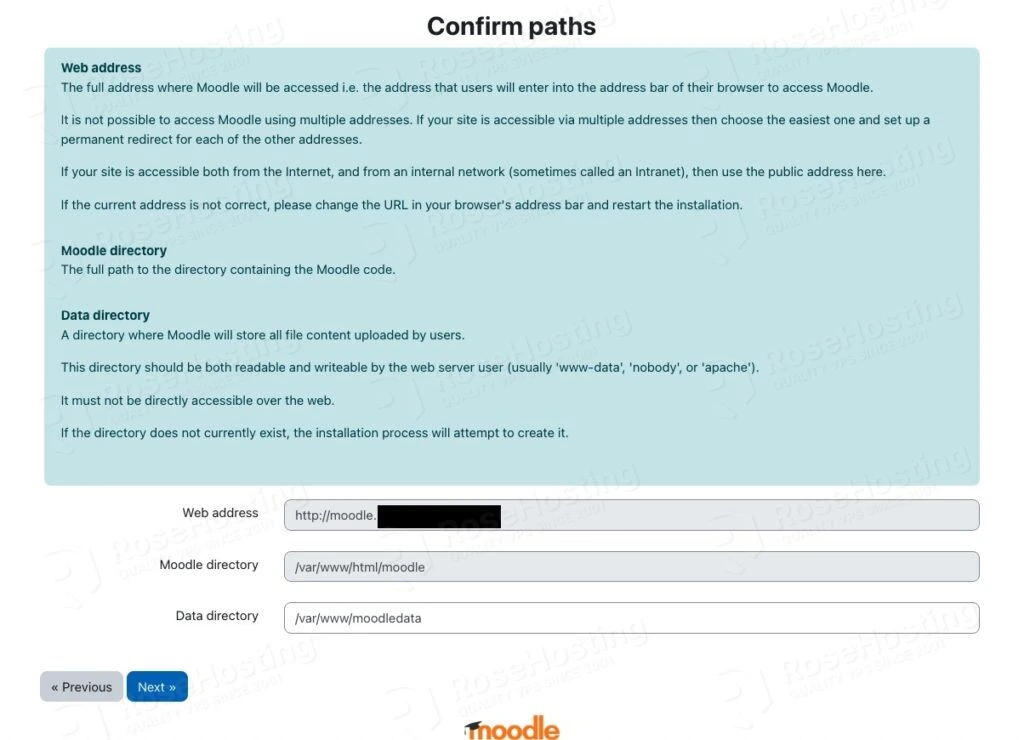
Modify the data directory path, point it to /var/www/moodledata/, then click Next button to continue.
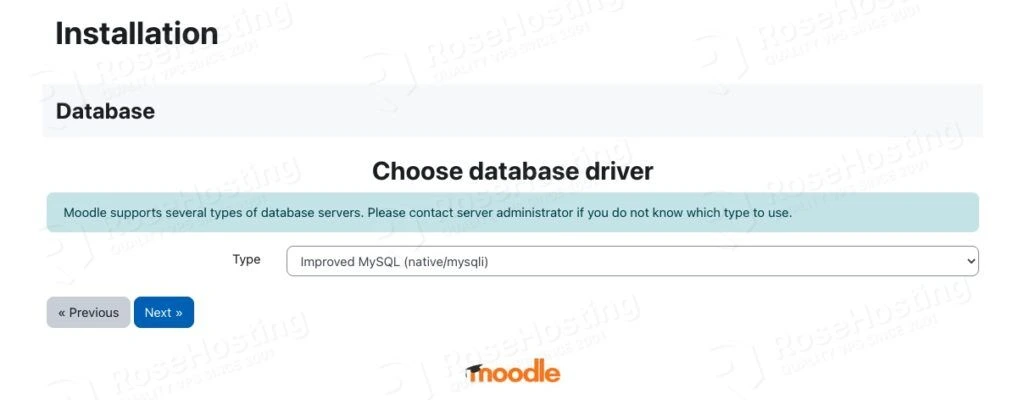
In this step, click on the dropdown menu, then choose MariaDB and click Next to continue
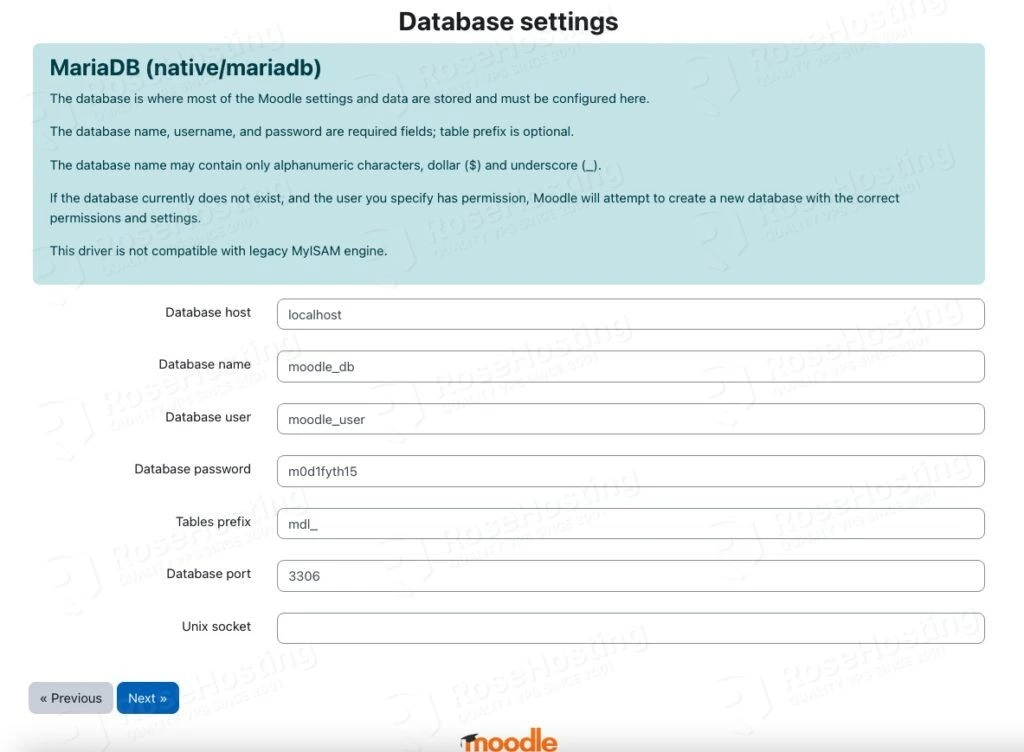
In this step, fill the database details using the information we created earlier. Leave the unix socket field blank, then click Next.
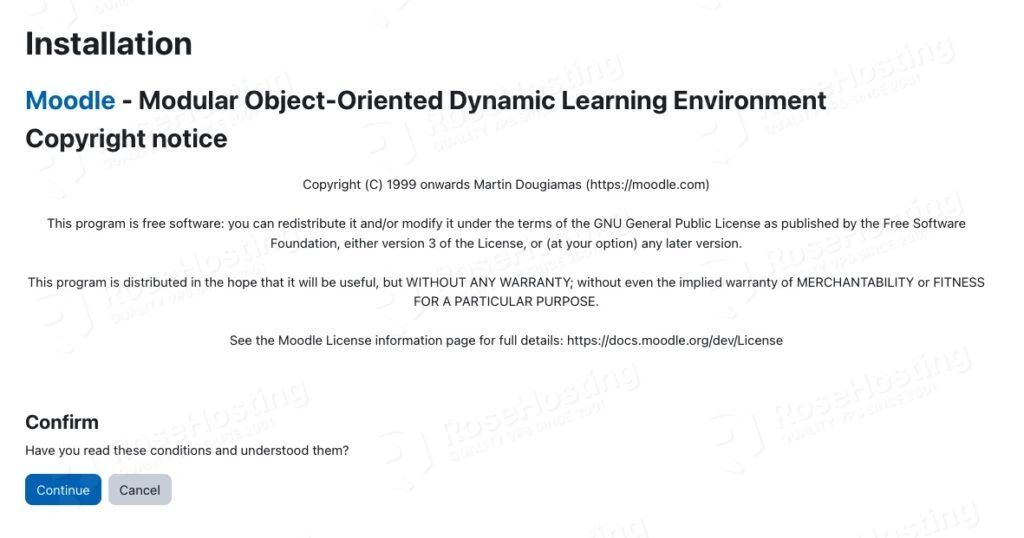
Click continue
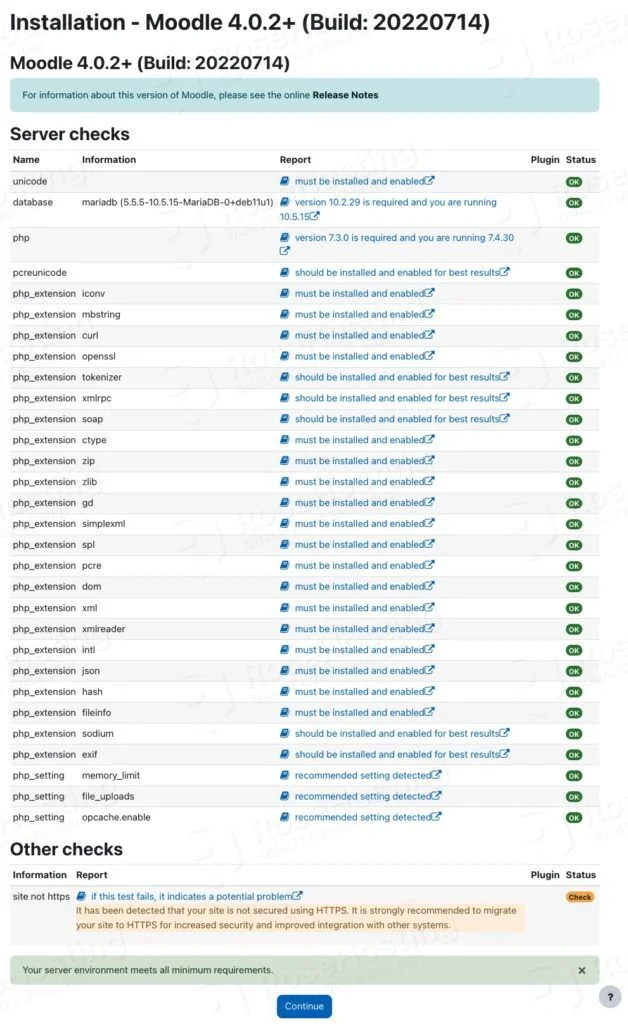
Check if every requirements are met and they show status OK then click Continue button.
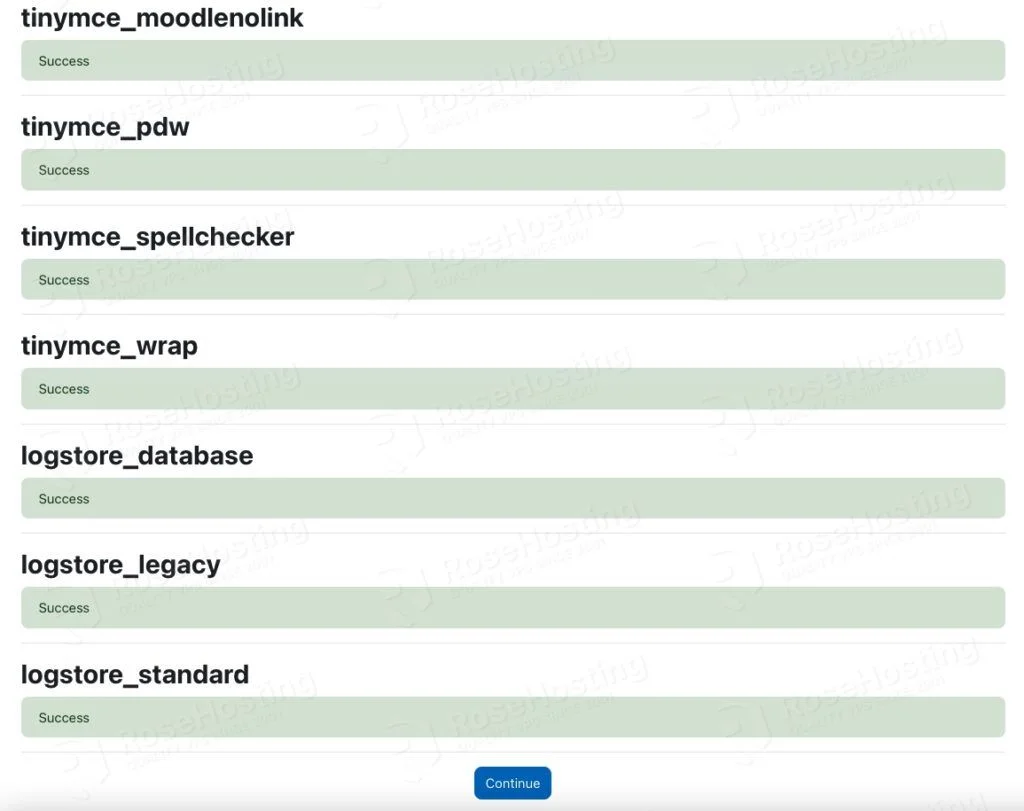
In this step, make sure all status are green then click Continue.
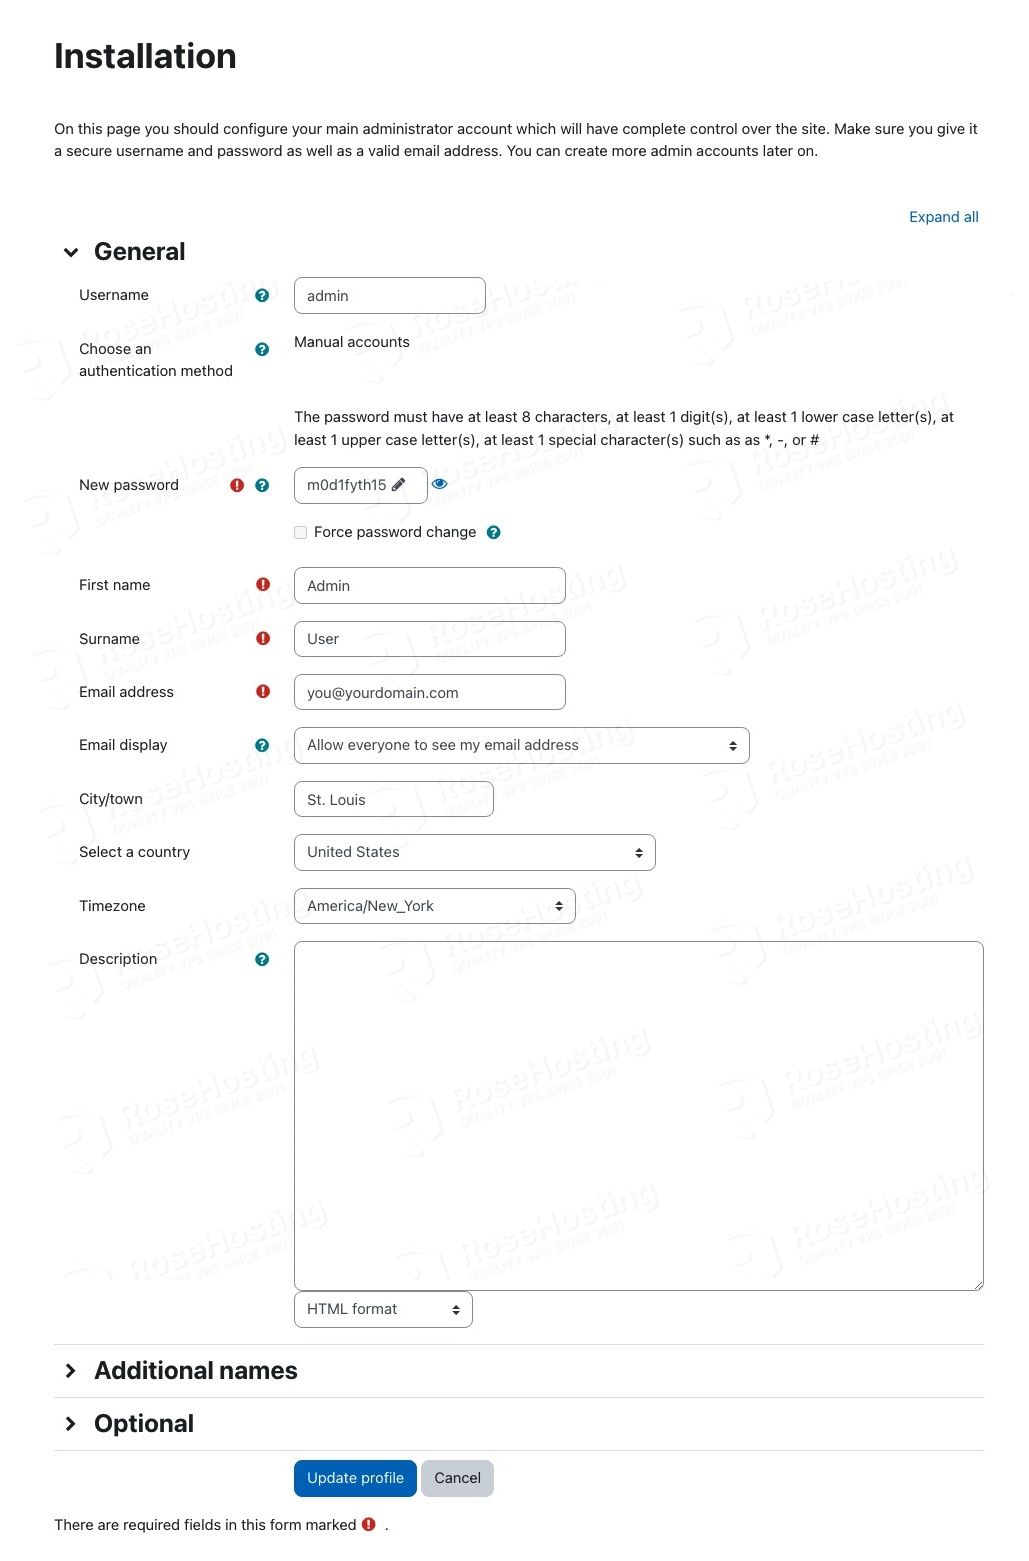
Fill in the required information and make sure to create a strong password for your Moodle administrator user. If everything is okay, complete it by clicking on the ‘Update Profile’ button.
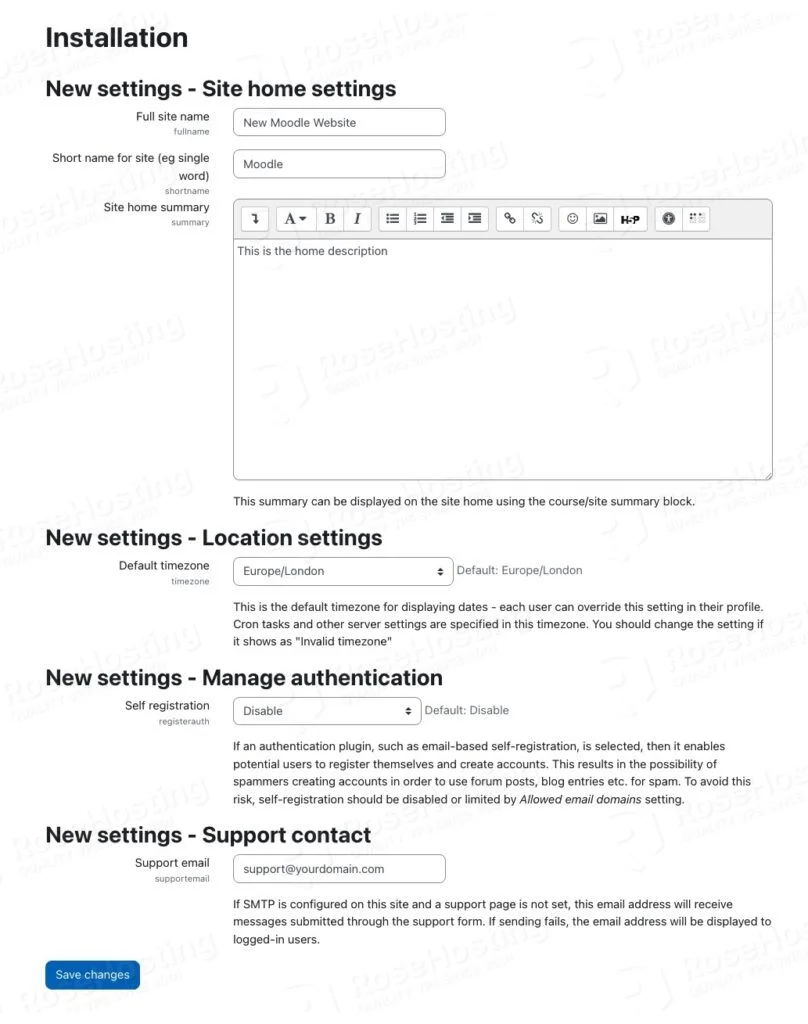
Fill the boxes to describe your new Moodle website.
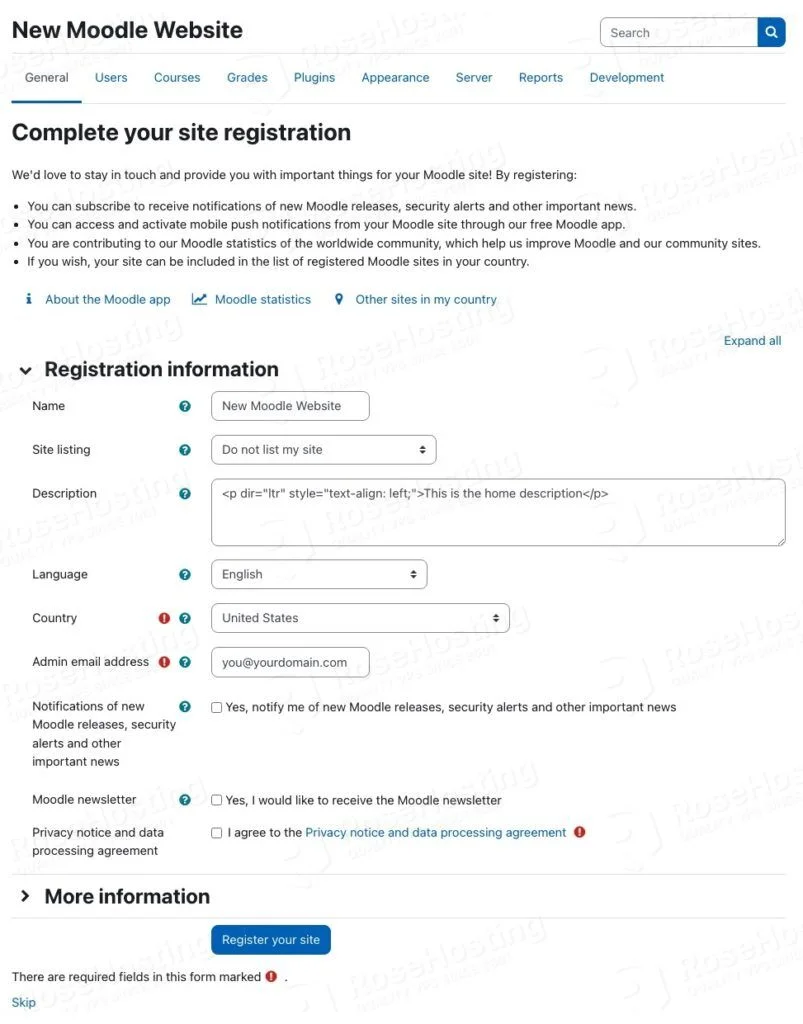
In this step, you can register your website or skip it.
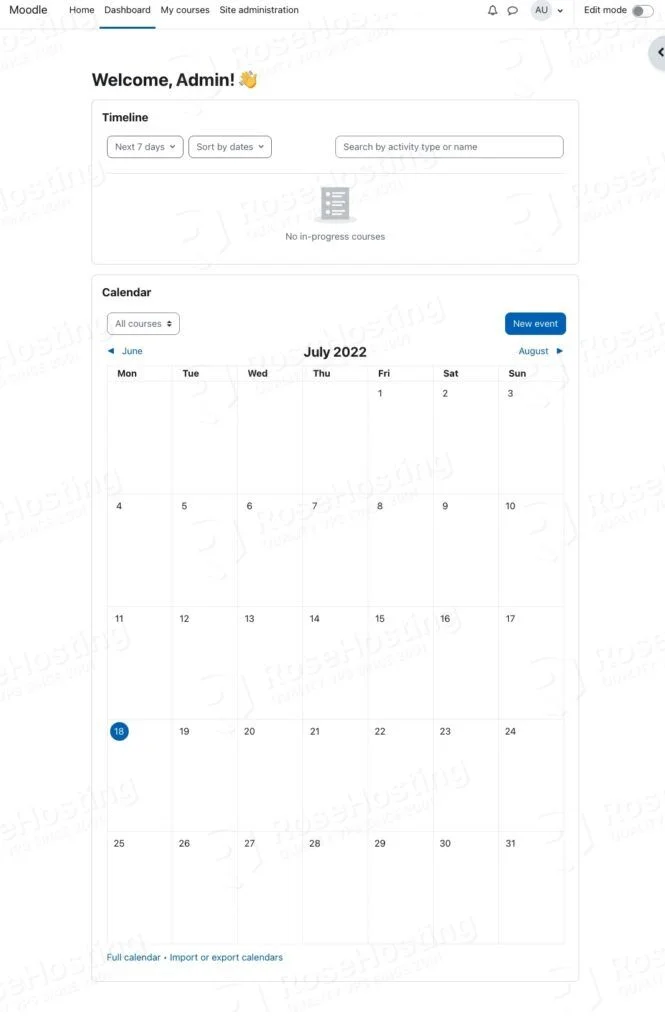
That’s it. Moodle has been successfully installed on your moodle.yourdomain.com
Step 6. Install Cron
We need to configure the Moodle cronjobs, so they can run regularly in the background. Without setting it up, your Moodle website might not run properly.
# crontab -u www-data -e
The command above will bring you to a file editor. After entering the editor, you can insert this line.
* * * * * /usr/bin/php /var/www/html/moodle/admin/cli/cron.php >/dev/null
Do not forget to save the changes, then exit from the editor.
That’s it. The cron will run every minute.
Congratulations! You have successfully installed Moodle on Debian 11.
Of course, if you are one of our Debian Hosting customers, you don’t have to install Moodle on Debian 11 yourself – simply ask our admins, sit back, and relax. Our admins will install Moodle on Debian 11 for you immediately without any additional fee, along with many useful optimizations that we can do for you. Managing a Moodle website is not just about the installation. We can help you optimize your Moodle installation if you have a VPS with us.