
Nginx is one of the most popular open source web server software. It is widely used for load balancing, reverse proxying, media streaming and much more. Nginx is the only all-in-one high-performance HTTP server, designed to serve a high volume of concurrent connections, as an alternative to Apache web server. Today Nginx is installed on more than 450 million servers worldwide and is used by one of the highest traffic websites on the web like Dropbox, Zynga games, Netflix. In this tutorial, we will show you how to Install Nginx on Ubuntu 16.04.
 There is no question that Nginx is the best-in-class web server and application delivery solution. Installing Nginx on Ubuntu 16.04 is an easy task, just carefully follow the steps below and you should have Nginx installed on your Ubuntu server in less than 10 min. This guide should work on other Ubuntu-based Linux VPS systems as well but was tested and written for Ubuntu 16.04 VPS. Let’s get started.
Table of Contents
Step 1: Install Nginx on Your Ubuntu Server
Nginx is available in the Ubuntu package repositories simple. First, update the apt cache with the following command:
sudo apt update
and install Nginx by issuing:
sudo apt install nginx
Once the installation is completed Nginx will be automatically started.
You can make sure that Nginx service is running with the following command:
sudo systemctl status nginx
The output should look like below:
● nginx.service - A high performance web server and a reverse proxy server
   Loaded: loaded (/lib/systemd/system/nginx.service; enabled; vendor preset: enabled)
   Active: active (running) since Sat 2018-03-31 01:50:44 CDT; 8s ago
 Main PID: 716 (nginx)
   CGroup: /system.slice/nginx.service
           ├─716 nginx: master process /usr/sbin/nginx -g daemon on; master_process on
           ├─717 nginx: worker process
           ├─718 nginx: worker process
           ├─719 nginx: worker process
           └─720 nginx: worker process
Step 2: Open Firewall Ports
If you are using ufw you need to open HTTP port 80 and/or HTTPS port 433. Ufw comes with profiles based on the default ports of most common daemons and programs.
To open both Nginx ports run the following command:
sudo ufw allow 'Nginx Full'
To verify the change run:
sudo ufw status
The output should look like below:
Status: active

To                         Action      From
--                         ------      ----
Nginx Full                 ALLOW       Anywhere
Nginx Full (v6)            ALLOW       Anywhere (v6)
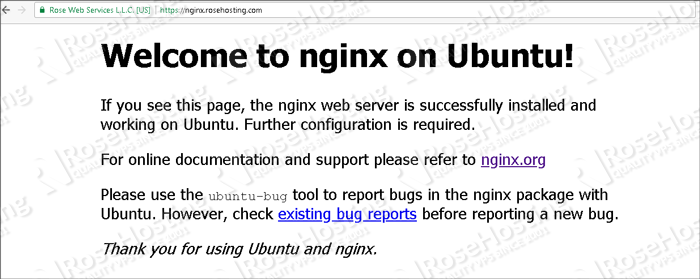
You can now open your browser, enter your server IP address into your browser address bar and you should see the default Nginx page.
Step 3: Managing Nginx Service
You can manage the Nginx service same as any other systemd unit.
Start the nginx service with the following command:
sudo systemctl start nginx
Stop the service with:
sudo systemctl stop nginx
Restart the service with:
sudo systemctl restart nginx
Check the status of the service with:
sudo systemctl status nginx
Enable the service on system boot with:
sudo systemctl enable nginx
Disable the service on system boot with:
sudo systemctl disable nginx
Step 4: Create a New Server Block
The default Nginx installation will have one server block enabled with a document root set to /var/www/html.
In this guide, we will create a new server block for the domain example.com and set the document root to /var/www/example.com.
First, create the domain document root with the following command:
sudo mkdir -p /var/www/example.com
and then create an index.html file with the following content:
sudo vim /var/www/example.com/index.html
<!DOCTYPE html>
<html lang="en">
<head>
    <meta charset="UTF-8">
    <title>example.com</title>
</head>
<body>
    <h1>example.com server block</h1>
</body>
</html>
Next, create a new server block with the following content:
sudo vim /etc/nginx/sites-available/example.com.conf
server {
       listen 80;
       listen [::]:80;

       server_name example.com www.example.com;

       root /var/www/example.com;
       index index.html;

       location / {
               try_files $uri $uri/ =404;
       }
}
Activate the server block by creating a symbolic link :
sudo ln -s /etc/nginx/sites-available/example.com.conf /etc/nginx/sites-enabled/example.com.conf
Step 5: Restart Nginx
Test the Nginx configuration and restart nginx:
sudo nginx -t
sudo systemctl restart nginx
Now if you enter example.com into your browser address bar you should see example.com server block.
 Of course, you don’t have to install Nginx on Ubuntu 16.04, if you use one of our Optimized Nginx Web Hosting Solutions, in which case you can simply ask our expert Linux admins to install and configure Nginx on Ubuntu 16.04 for you. They are available 24×7 and will take care of your request immediately.
PS. If you liked this post on how to install Nginx on Ubuntu 16.04, please share it with your friends on the social networks using the buttons on the left or simply leave a reply below. Thanks.