
Odoo is a popular open-source enterprise resource planning (ERP) software that provides a suite of business applications for companies of all sizes.
Odoo offers a wide range of features including accounting, project management, human resources, customer relationship management, inventory management, and e-commerce, among others.
It is available in both a free, open-source Community edition, as well as a more feature-rich Enterprise edition with additional support and features. It has a large and active community of developers and users contributing to its ongoing development and improvement.

In this tutorial, we are going to show you how to install Odoo 16 Community edition on AlmaLinux 9.
Table of Contents
Prerequisites
- A server with AlmaLinux 9
- User privileges: root or non-root user with sudo privileges
Step 1. Update the System
After a fresh installation of AlmaLinux, we need to update the packages to the latest versions available:
# dnf update && sudo dnf upgrade
Step 2. Install Required Dependencies
Before you begin the Odoo installation, you need to install some Odoo dependencies onto your system. You can install all of them using the following command:
# dnf install python3 python3-devel git gcc redhat-rpm-config libxslt-devel bzip2-devel openldap-devel libjpeg-devel freetype-devel curl unzip
Step 3. Install PostgreSQL
Odoo uses PostgreSQL to store its data. First, we need to add the official PostgreSQL Repository for the AlmaLinux system.
# dnf install https://download.postgresql.org/pub/repos/yum/reporpms/EL-9-x86_64/pgdg-redhat-repo-latest.noarch.rpm
Update the list of available packages using the following command.
# dnf update
Now, you can install the PostgreSQL server with the following command:
# dnf install postgresql14 postgresql14-server
Once the installation is complete, initialize the PostgreSQL database:
# /usr/pgsql-14/bin/postgresql-14-setup initdb
Initializing database ... OK
Start and enable the PostgreSQL service.
# systemctl enable postgresql-14 && systemctl start postgresql-14
Create a new PostgreSQL user for Odoo with the following command:
# su - postgres -c "createuser -s odoo16"
Step 4. Install Wkhtmltopdf
A wkhtmltopdf package is an open-source tool that Odoo uses to make HTML in PDF formats to print PDF reports.
# dnf install https://github.com/wkhtmltopdf/packaging/releases/download/0.12.6.1-2/wkhtmltox-0.12.6.1-2.almalinux9.x86_64.rpm
Verify that wkhtmltopdf is installed on your server:
# wkhtmltopdf --version
wkhtmltopdf 0.12.6.1 (with patched qt)
Step 5. Install and configure Odoo 16
We need to create a new system user for our Odoo 16 instance. We will create a username odoo16 and define /opt/odoo16 as its home directory:
# useradd -m -d /opt/odoo16 -U -r -s /bin/bash odoo16
Now, switch to the odoo16 the user we have created in the previous step:
# su - odoo16
Clone the Odoo 16 source code from the Odoo GitHub repository:
$ git clone https://www.github.com/odoo/odoo --depth 1 --branch 16.0 /opt/odoo16/odoo
Create a new Python virtual environment:
$ python3 -m venv odoo16-venv
Activate the virtual environment with the following command:
$ source odoo16-venv/bin/activate
All Odoo dependencies are listed in the requirements.txt file, located in the /opt/odoo16/odoo directory.
Install the required dependencies with the following command:
(odoo16-venv) $ export PATH=/usr/pgsql-14/bin:$PATH
(odoo16-venv) $ pip3 install -r odoo/requirements.txt
Once the installation is complete, deactivate the “odoo16-venv” virtual environment with the following command:
(odoo14-venv) $ deactivate
The following command is optional and can be used if you want to use custom modules for the Odoo instance. Execute the provided command for creating a directory for custom addons:
# mkdir /opt/odoo16/custom-addons
Next, log out as an Odoo 16 user:
exit
For debugging purposes, create a log directory for Odoo 16 and set proper ownership:
# mkdir /var/log/odoo16
# chown -R odoo16: /var/log/odoo16/
We have to create a configuration file for the Odoo 16 instance as well:
# nano /etc/odoo16.conf
In the file that we just opened, add the following lines:
[options]
admin_passwd = master_password
db_host = False
db_port = False
db_user = odoo16
db_password = False
xmlrpc_port = 8069
logfile = /var/log/odoo16/odoo.log
addons_path = /opt/odoo16/odoo/addons,/opt/odoo16/custom-addons
Note: Make sure you set a strong and difficult to guess master_password.
Step 6. Create a Systemd Service File for Odoo 16
Create a systemd unit file that we can use to run our Odoo 16 instance as a service.
# nano /etc/systemd/system/odoo16.service
Add the following lines:
[Unit]
Description=Odoo16
Requires=postgresql-14.service
After=network.target postgresql-14.service

[Service]
Type=simple
SyslogIdentifier=odoo16
PermissionsStartOnly=true
User=odoo16
Group=odoo16
ExecStart=/opt/odoo16/odoo16-venv/bin/python3 /opt/odoo16/odoo/odoo-bin -c /etc/odoo16.conf
StandardOutput=journal+console

[Install]
WantedBy=multi-user.target
Run the following command for systemd to read the newly created service configuration:
# systemctl daemon-reload
Start and enable the Odoo 16 instance to start automatically on a server boot:
# systemctl start odoo16 && systemctl enable odoo16
To check and verify the status of our Odoo 16 service, run the following command:
# systemctl status odoo16
You should receive the following output:
● odoo16.service - Odoo16
     Loaded: loaded (/etc/systemd/system/odoo16.service; enabled; vendor preset: disabled)
     Active: active (running)
   Main PID: 4874 (python3)
      Tasks: 4 (limit: 10907)
     Memory: 112.6M
        CPU: 2.367s
     CGroup: /system.slice/odoo16.service
             └─4874 /opt/odoo16/odoo16-venv/bin/python3 /opt/odoo16/odoo/odoo-bin -c /etc/odoo16.conf
Step 7. Configure Firewall
You need to allow port 8069 through the firewall. You can allow it with the following command:
# firewall-cmd --permanent --zone=public --add-port=8069/tcp
Next, reload the firewall to apply the changes:
# firewall-cmd --reload
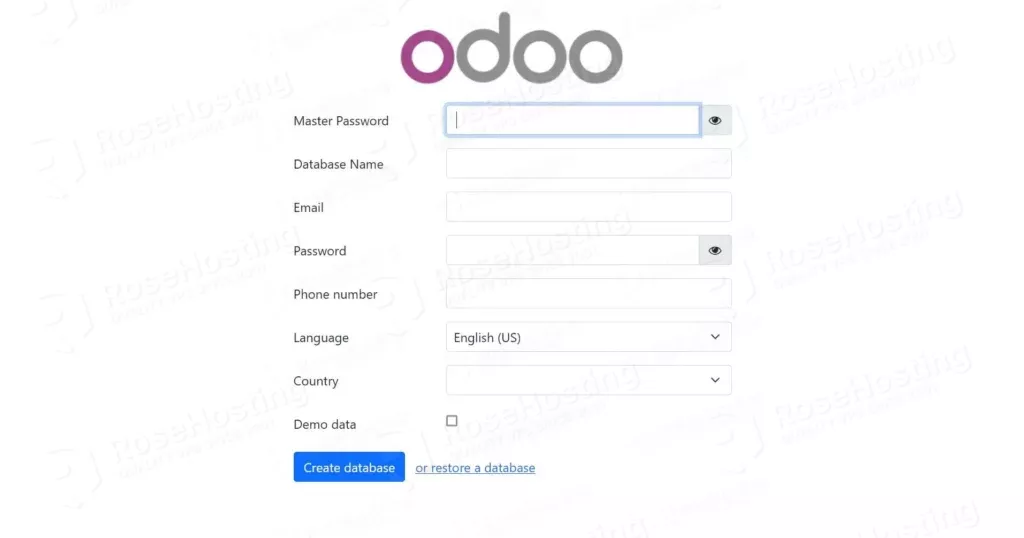
Step 8. Access the Odoo 16 Instance
You should now be able to access the Odoo 16 instance at http://your-IP-address:8069.
That’s it. You successfully installed and configured Odoo 16 on AlmaLinux 9 VPS. If you find this setup difficult, you can always contact our technical support, and they will do the rest. We are available 24/7, and we are ready to help you. You just need to sign up for one of our NVMe VPS plans and submit a support ticket.
If you liked this post about installing Odoo 16 on AlmaLinux 9, please share it with your friends on social networks or simply leave a reply below.