 In this tutorial, we will show you how to install Openbravo ERP on an Ubuntu VPS . Openbravo ERP is an open source ERP (Enterprise Resource Planning) web-based business solution for small and medium sized companies released under the Openbravo Public License.
Please note, Openbravo is a resource hungry software, so in order to install Openbravo it is necessary to have at least 1.5 GB of RAM free on your server.
At the time of writing this tutorial, the latest stable version of Openbravo is 3.0PR14Q3.4 and it requires:

- Tomcat 6 (Tomcat 7 is not supported)
- Ant >= 1.7.1
- OpenJDK >= 1.6.0
- PostgreSQL >= 8.4 installed on your virtual server.
Update the server’s OS packages using the following commands:
apt-get update
apt-get upgrade
Install PostgreSQL:
sudo apt-get install postgresql-9.3 postgresql-client-9.3 postgresql-contrib-9.3 uuid
Then, run the the following commands:
sudo -i -u postgres
update pg_database set datallowconn = TRUE where datname = 'template0';
\c template0
update pg_database set datistemplate = FALSE where datname = 'template1';
drop database template1;
create database template1 with template = template0 encoding = 'UTF8';
update pg_database set datistemplate = TRUE where datname = 'template1';
\c template1
update pg_database set datallowconn = FALSE where datname = 'template0';
ALTER ROLE postgres WITH PASSWORD 'your-password';
CREATE ROLE tad LOGIN PASSWORD 'your-tad-user-password';
CREATE DATABASE openbravo WITH ENCODING='UTF8' OWNER=tad;
template1=# \q
exit
Restart the PostgreSQL service for the changes to take effect:
/etc/init.d/postgresql restart
Install Ant, OpenJDK and Tomcat 6:
sudo apt-get install ant openjdk-7-jdk tomcat6 tomcat6-admin tomcat6-user tomcat6-common
Run the following commands:
echo 'export JAVA_HOME=/usr/lib/jvm/java-7-openjdk-amd64' > /etc/profile.d/java.sh
echo 'export CATALINA_HOME=/usr/share/tomcat6' >> /etc/profile.d/java.sh
echo 'export CATALINA_BASE=/var/lib/tomcat6' >> /etc/profile.d/java.sh
echo 'export CATALINA_OPTS="-server -Djava.awt.headless=true -Xms512M -Xmx2048M -XX:MaxPermSize=512M"' >> /etc/profile.d/java.sh
chmod +x /etc/profile.d/java.sh
source /etc/profile.d/java.sh
cp $JAVA_HOME/lib/tools.jar /usr/share/tomcat6/lib/
Edit your Tomcat startup script and add the lines below immediately after ‘JVM_TMP=/tmp/tomcat6-$NAME-tmp’ line:
vi /etc/init.d/tomcat6
add the following lines:
JAVA_HOME=/usr/lib/jvm/java-7-openjdk-amd64
CATALINA_HOME=/usr/share/tomcat6
CATALINA_BASE=/var/lib/tomcat6
CATALINA_OPTS="-server -Djava.awt.headless=true -Xms512M -Xmx2048M -XX:MaxPermSize=512M"
Edit /etc/tomcat6/tomcat-users.xml file:
vi /etc/tomcat6/tomcat-users.xml
add the following lines:
<tomcat-users>
<role rolename="manager"/>
<role rolename="admin"/>
<user username="admin" password="your-tomcat-admin-password" roles="admin,manager"/>
</tomcat-users>
Download the latest version of Openbravo ERP available at http://sourceforge.net/projects/openbravo/files/ to the server, extract it and run ‘ant setup’:
cd /opt/
wget http://sourceforge.net/projects/openbravo/files/02-openbravo-sources/3.0PR14Q3.4/openbravo-3.0PR14Q3.4.tar.bz2/download -O openbravo3.tar.bz2
tar -xjvf openbravo3.tar.bz2
cd /opt/Openbravo-3.0PR14Q3.4/
ant setup
cd config/
chmod 755 setup-properties-linux-x64.bin
Then, run the following command:
./setup-properties-linux-x64.bin
Follow the easy on-screen instructions and make sure you change these settings:
Admin Role Password [syspass]: <your-password>

DB Role Password [tad]: <your-tad-user-password>

Tomcat Manager URL:  http://<your_ip>:8080/manager

Tomcat manager password [admin]: <your-tomcat-admin-password>
Run ‘ant install.source’ as unprivileged user, for example create a new user named ‘openbravo’:
adduser openbravo
chown openbravo:openbravo -R /opt/openbravo/
chown openbravo:openbravo -R /opt/Openbravo-3.0PR14Q3.4/
cd /opt/Openbravo-3.0PR14Q3.4/
su openbravo
ant install.source
ant smartbuild
exit
If you receive the following errors:
BUILD FAILED
/opt/Openbravo-3.0PR14Q3.4/build.xml:487: The following error occurred while executing this line:
/opt/Openbravo-3.0PR14Q3.4/src/build.xml:843: The following error occurred while executing this line:
/opt/Openbravo-3.0PR14Q3.4/src/build.xml:849: Directory /var/lib/tomcat6/webapps/openbravo/WEB-INF/lib creation was not successful for an unknown reason
run the following commands to fix the problem:
su root
mkdir -p /var/lib/tomcat6/webapps/openbravo/
chown openbravo:openbravo /var/lib/tomcat6/webapps/openbravo/
su openbravo
ant smartbuild
exit
Make sure tomcat6 user has read/write permissions to the ‘/var/lib/tomcat6/webapps/openbravo/’ directory:
chown tomcat6:tomcat6 -R /var/lib/tomcat6/webapps/openbravo/
Restart the Tomcat service:
/etc/init.d/tomcat6 restart
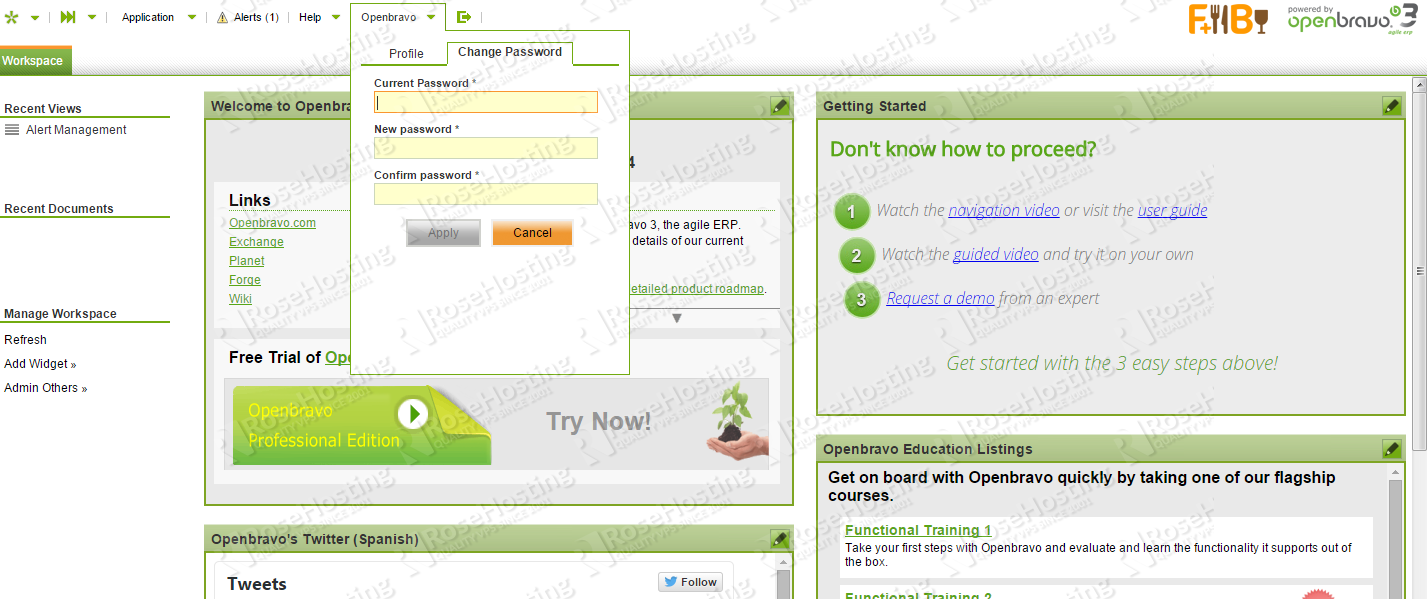
Open http://your_ip:8080/openbravo in your favorite web browser and log in into Openbravo using ‘Openbravo’ as username and ‘openbravo’ as password. The system is case-sensitive so you need to type both username and password correctly to access Openbravo. Do not forget to change your Openbravo user password:
If you like to redirect to port 80 instead of 8080 and open Openbravo ERP using http://your-domain.com/openbravo , you need to edit the Apache configuration and set a reverse proxy. For example, edit the virtual host for your-domain.com in Apache and add these lines:
ProxyRequests Off

     <Proxy *>
         Order deny,allow
         Allow from all
     </Proxy>
         ProxyPass / http://your-domain.com:8080/
         ProxyPassReverse / http://your-domain.com:8080/
     <Location />
         Order allow,deny
          Allow from all
     </Location>
Restart your Apache web server for the changes to take effect and open Openbravo using http://your-domain.com/openbravo
That’s it. Openbravo has successfully been installed on your Ubuntu VPS.
Of course you don’t have to do any of this if you use one of our Linux VPS Hosting services, in which case you can simply ask our expert Linux admins to Openbravo ERP for you. They are available 24×7 and will take care of your request immediately.
PS. If you liked this post please share it with your friends on the social networks using the buttons on the left or simply leave a reply below. Thanks.
Hi! A very nice article.
How-to guides are always interesting and help developers to easily understand and integrate software.
I would like just to point out that Openbravo will run in Tomcat 7 in 2015 along with Java 7 and Postgres 9.3 in a future appliance.
Anyway, congrats again and thanks for thinking of Openbravo to do so.
Regards.
I have followed this steps for openbravo installation in Ubuntu Desktop. After completed all the steps openbravo is not running in localhosyt:8080/openbravo. I cannot see openbravo folder in /var/lib/tomcat6/webapps/. Instead of that ${env.CATALINA_HOME} folder is created and inside that I can see webapps/openbravo. Build is done in project directory it self. Could you reply the solution to resolve this?
Please run the following commands on your server and provide us with the output:
echo $CATALINA_HOME
echo $CATALINA_BASE
Hi! Very nice guide.
I have a question, i have followed all steps for Ubuntu 14.04, and when i try to start openbravo on my browse it doesn´t, i found on tomcat logs and the problem is the lack of memory “Error deploying web application directory openbravo
java.lang.OutOfMemoryError: Java heap space” Could you reply a solution, i added echo ‘export JAVA_HOME=/usr/lib/jvm/java-7-openjdk-amd64’
‘export CATALINA_HOME=/usr/share/tomcat6’
‘export CATALINA_BASE=/var/lib/tomcat6’
‘export CATALINA_OPTS=”-server -Djava.awt.headless=true -Xms512M -Xmx2048M -XX:MaxPermSize=512M” to my bashrc, because on java.sh the variables doesn´t appear, do you have any suggestion?
To avoid out of memory complaints you should add the following values to the Tomcat startup script:
vi /etc/init.d/tomcat6
JAVA_HOME=/usr/lib/jvm/java-7-openjdk-amd64
CATALINA_HOME=/usr/share/tomcat6
CATALINA_BASE=/var/lib/tomcat6
CATALINA_OPTS=”-server -Djava.awt.headless=true -Xms512M -Xmx2048M -XX:MaxPermSize=512M”
Great tutorial and well structured but I’ve been trying to install this on Ubuntu14.04 and I can’t get it to work after installation is complete. Has anyone tested and verified it’s working? I am not a programmer or developer so hopefully this is not missing any steps that I’d have to figure out.
One of the reasons why I asked this is that when I use the cli code to install Postgres it doesn’t install 8.4 but in the beginning of the document, it says it’s for 8.4. It keeps installing 9.3 and after some research I found it 8.4 is obsolete.
It does not work for me either!
Ubuntu 14.04 with tomcat7 and Openbravo-3.0PR15Q1.
There is always some Java heap space problem.
But “echo $CATALINA_OPTS” gives me the right values -server -Djava.awt.headless=true -Xms512M -Xmx2048M -XX:MaxPermSize=512M
To avoid out of memory complaints you should add the following values to the Tomcat startup script:
JAVA_HOME=/usr/lib/jvm/java-7-openjdk-amd64
CATALINA_HOME=/usr/share/tomcat7
CATALINA_BASE=/var/lib/tomcat7
CATALINA_OPTS=”-server -Djava.awt.headless=true -Xms512M -Xmx2048M -XX:MaxPermSize=512M”
Excellent guide, when browsing openbravo to the next path:
Application / Sales managment / transaction / sales order / form personalization; I’ve seen this alert:
Form Personalization is a Premium Feature only available for Professional and Basic Edition subscribers.
Learn more about the benefits of Openbravo’s Professional and Basic Editions.
¿Is Openbravo ERP really open source?
When I try to update the postgres server with the following:
update pg_database set datallowconn = TRUE where datname = ‘template0’;
\c template0
Returns the error:
No command ‘update’ found, did you mean:
Command ‘xupdate’ from package ‘libxml-xupdate-libxml-perl’ (universe)
Command ‘lupdate’ from package ‘qtchooser’ (main)
Command ‘pupdate’ from package ‘pbuilder-scripts’ (universe)
Command ‘uupdate’ from package ‘devscripts’ (main)
update: command not found
-bash: /c: No such file or directory
Please try using the interactive terminal for working with Postgres. Enter the following command after switching to the ‘postgres’ user:
psql
Thanks.
when I try to access by browser tells me “The requested resource is not available”
Did you edit the Apache virtual host and replace ‘your-domain.com’ with your actual domain as instructed?