
With the rise in popularity of AI agents, you’ve probably heard of OpenClaw. The open-source personal AI assistant that can handle your everyday tasks or run autonomously when triggered. It can send emails, manage your calendar, and much more, all from everyday chat apps such as Telegram and WhatsApp. In this tutorial, you will learn how to install OpenClaw on AlmaLinux 10 to get started with your workflow. Let’s begin.
Table of Contents
Prerequisites
- An AlmaLinux 10 VPS with at least 4GB of RAM
- SSH root access, or a user with sudo privileges
Create user
You can create a user, for example, you can name it “claw”.
# adduser clawYou will need to enable lingering for the user you plan to use for the OpenClaw installation.
# loginctl enable-linger clawThis will keep the systemd services running for the claw user, even after you log out with the user.
Install OpenClaw
You can install the required packages before running the OpenClaw installation script.
# dnf install tar curl dnf-plugins-core gitOpenClaw also requires NodeJS 22 or NodeJS 24, which will be installed during the OpenClaw installation. You can check our installation guide for more details.
Now, you can run the OpenClaw installation script:
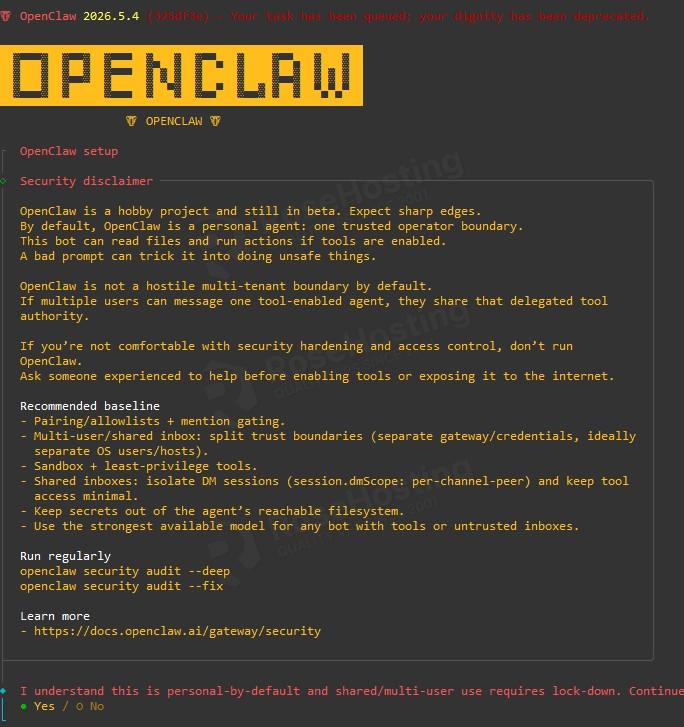
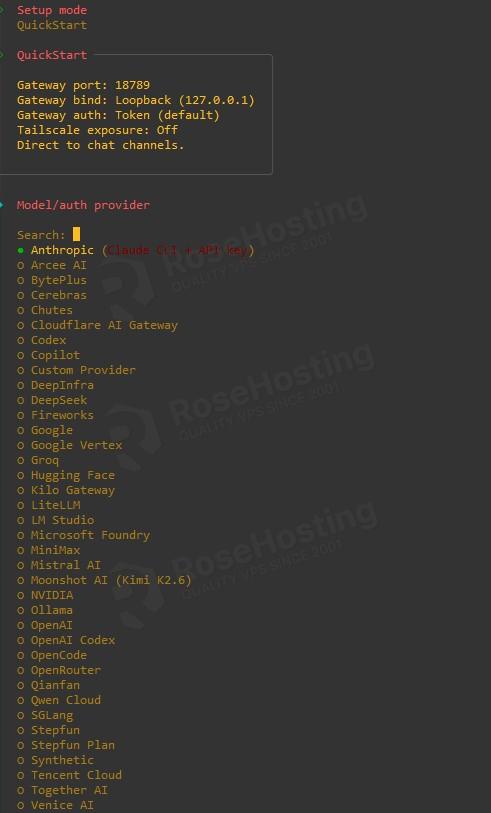
# curl -fsSL https://openclaw.ai/install.sh | bashThis will start the onboarding process, which will ask you several questions about which Model/auth provider to use, which workspace, agent, and more.
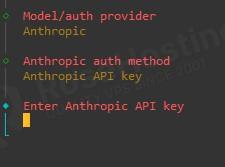
You can select “Yes” and continue, and for the next step, select the Model/auth you want to use, the AI service you are using, and want to add in OpenClaw. For this example, we will use Antropic and click continue.
Then you will be asked about the auth method; choose the one you want to use and continue the process.
Next, you will be asked which communication channel you want to use, and you can select it.

And follow the steps to set it up. If you still haven’t decided which channel you want to use, or if you’d like to set it up later, you can select the “Skip for now” option.
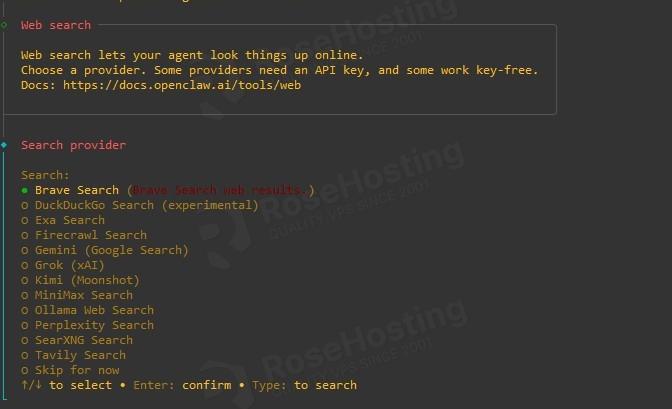
Once this is complete, you may also be asked about the search provider; you can select one now or choose “Skip for now.”
The next steps will ask you for the “skills” you want to install, which you can choose from, or “Skip for now,” and after that, you will be prompted about “Hooks,” from which you can choose now or skip for later.
Gateway failed issues
If, for some reason, during the installation, you get gateway service install failed.

You can run the command to configure the workspace and gateway:
# opencalw configureThis will take you through the steps needed to configure OpenClaw and the gateway.
If you are still facing the issue, you can use the openclaw doctor fix command, which will attempt to fix the issues, and sometimes you may also need to copy the service file to systemd if the service is still not starting:
# cp /home/claw/.config/systemd/user/openclaw-gateway.service /etc/systemd/system/openclaw-gateway.service
# systemctl daemon-reload
# systemctl start openclaw-gateway
# systemctl status openclaw-gateway
Then you can reload the added service daemon and start the openclaw-gateway service. Once you confirm it’s running, you will be able to access OpenClaw now.
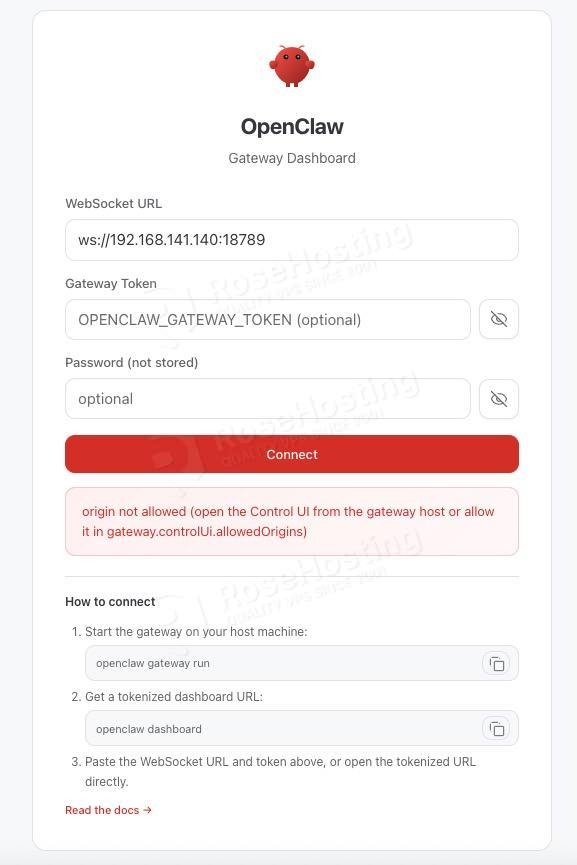
If you haven’t saved the OpenClaw gateway token, you can easily find it in the file~/.openclaw/openclaw.json and copy it from there, and click “Connect”
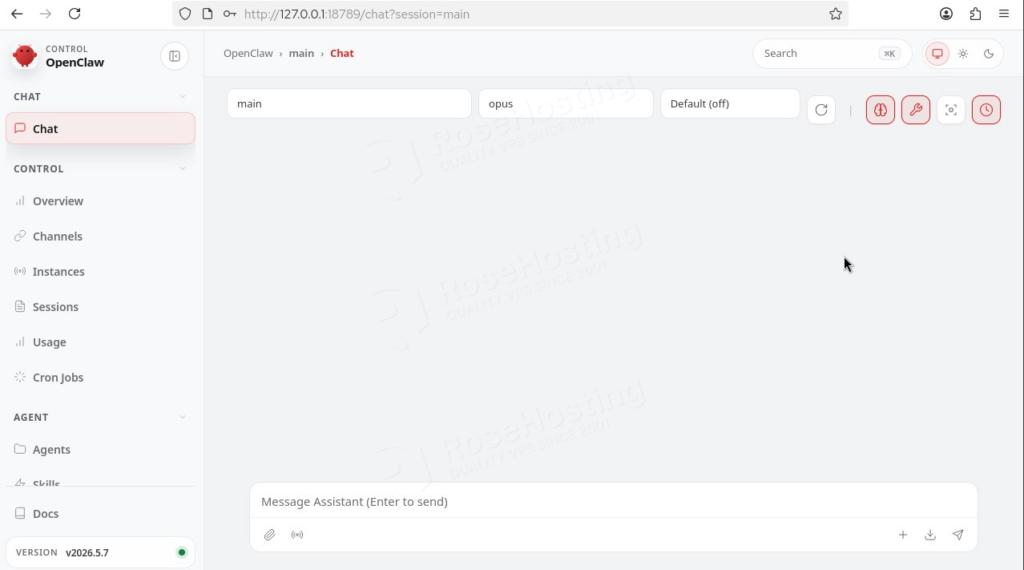
You are now logged in to OpenClaw, and you can start configuring your agents and tasks.
Using these steps, you can install the required packages and begin installing OpenClaw. You may need to plan in advance, which models you want to use, or which communication channels to configure for your workflow. OpenClaw is customizable, and you can configure it to your needs.
If you are one of our web hosting customers using our managed OpenClaw Hosting, you don’t need to install OpenClaw on AlmaLinux 10 yourself; our Linux administrators will set it up and configure it on the AlmaLinux 10 server for you. They are available 24×7 and will address your request immediately.